I started my journey in iOS accessibility about 9 years ago, when I was working at the BBC. I even dared to give a talk about it in App Dev Con in 2018. Years later, I’m pretty sure that I was just able to overcome my terror of public speaking thanks to the Dunning-Kruger effect. I was at that point where you’ve just started learning about something, become passionate about it, and vastly overestimate how much you actually know. It only takes digging a little deeper to realise how vast any topic is, and that one will probably never master it, but can just hope to be in a continuous learning process. And accessibility is no different. Not to discourage anyone! The truth is that a few basic tools in your toolbox can bring you a very long way towards offering a very good experience. As someone said, we are actually not in need of experts, but in need of basic knowledge.
 About the same time, the Apple Watch had been around for a few years, and I thought it would be cool to do something with it. I thought there were not that many good games for it, so I decided to start one. It would also be the perfect opportunity to start learning about an aspect of accessibility I hadn’t explored before: video games accessibility.
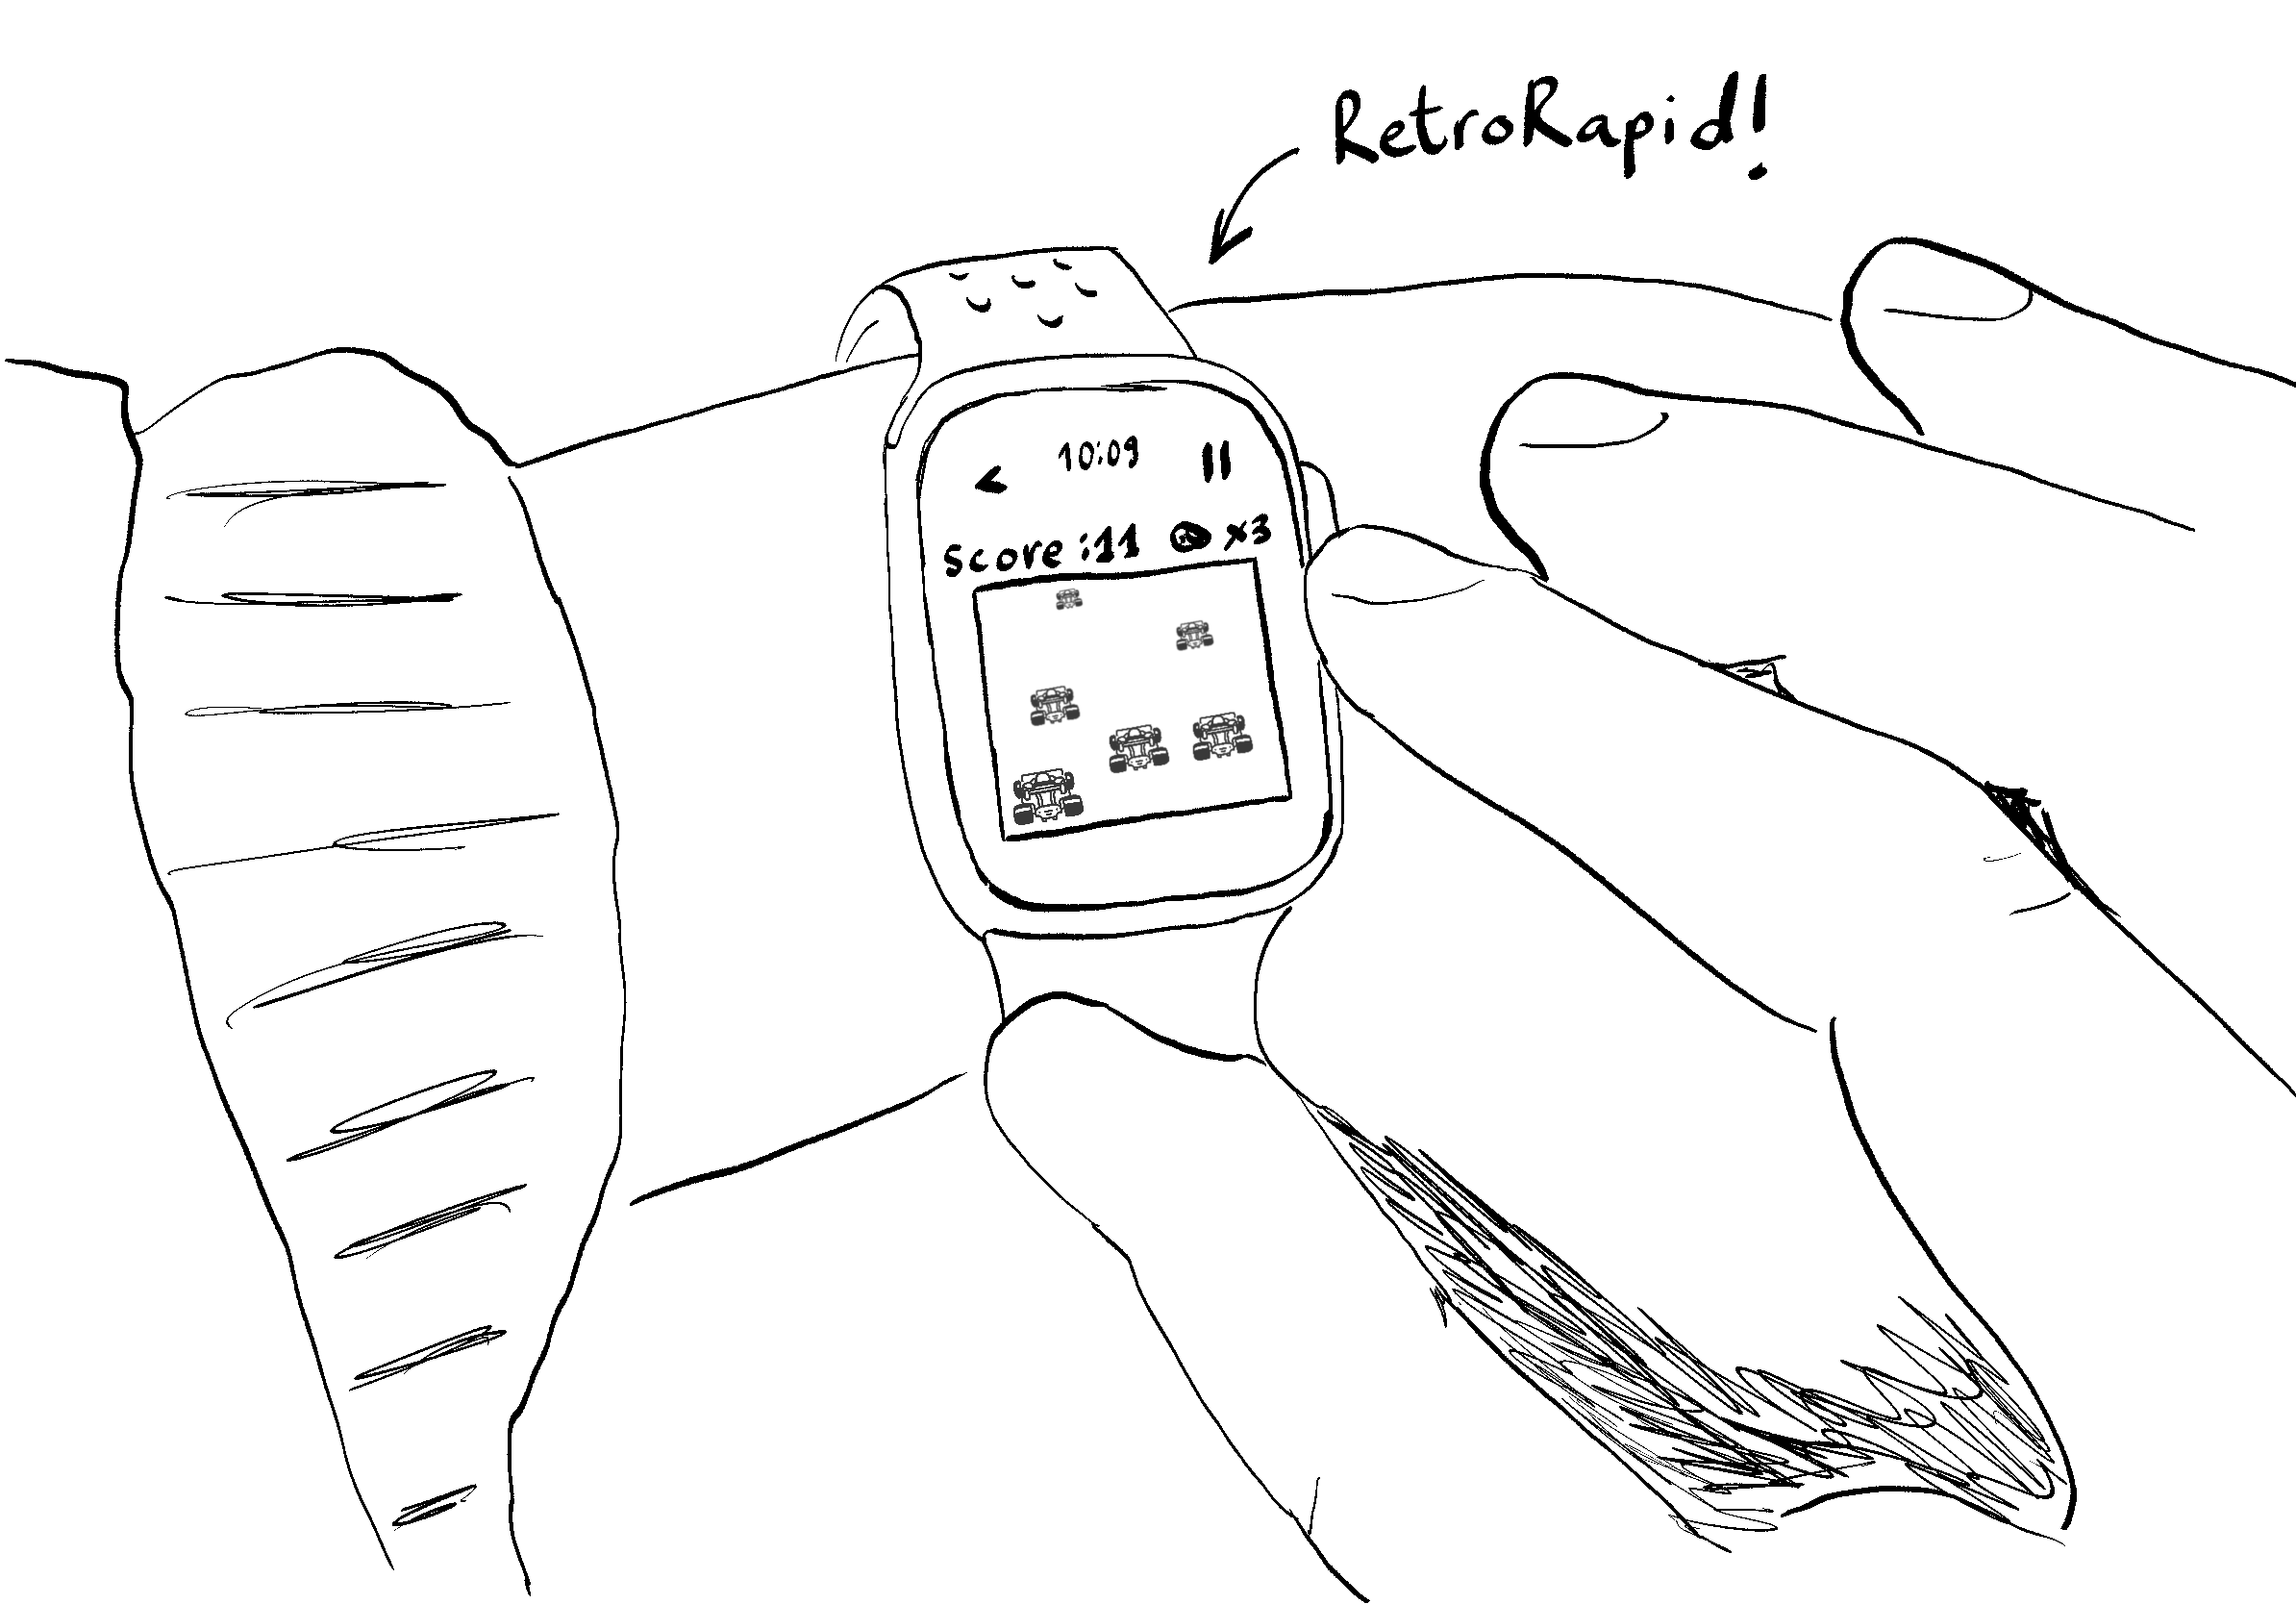
And so, RetroRapid! was born. A game inspired by a cheap old handheld LCD video game I had when I was a kid. There are three lanes, cars come your way, and you have to move left or right to overtake them without crashing. Simple enough to be playable on the Apple Watch, and to be able to explore ideas, as a newbie in the field, to make it accessible. It is a long story, but it turns out that I just released that game. It had been in a drawer for that many years (about 8?!) and unexpectedly, I released it last week.
I’m very much in the process of exploring ways to make the game more accessible, but I thought it would be cool to share some of my first approaches. I should actually do more research about the topic and learn from actual experts. So far, my approach has been the same thought process I would have followed for any app. Plus having observed the truly inspirational journey of a really awesome indie game: Art of Fauna.
Controls
The first question I asked myself was: how many different ways can I give users to control this game?
One of my principles when approaching accessibility is that the user experience should be abstracted to provide multiple input and output mechanisms. Here, we’ll focus on the input mechanisms. When thinking about accessibility for iOS apps, one of the first things that might come to mind is VoiceOver. That’s a great example of this. VoiceOver allows for an alternative input mechanism: a series of special gestures to explore and interact with apps. And output: the device speaking to you, instead of relying on the visuals on the screen.
For a game, providing a multitude of control mechanisms feels essential.
As mentioned, this was always going to be a Watch first game. So the first thing I wanted to try is if it was possible to control the game with the Digital Crown. I also wanted to support tap and swipe controls (more on this later), but the Digital Crown felt like a must because it lets you play without covering the screen, and the posture of the hand resting in it feels more natural, rather than interacting with touch controls on such a small screen.
.digitalCrownRotation(
    $crownValue,
    from: -100,
    through: 100,
    by: 0.1,
    sensitivity: .low,
    isContinuous: true,
    isHapticFeedbackEnabled: true
)
But just because it is Watch first, it doesn’t mean this game wouldn’t be playable on the iPhone. I want it to be truly multi-platform. And the iPhone has many advantages when it comes to alternative input methods. One of them is that it is possible to support a one-hand input mechanism. And so, I thought it would be cool to control the game with swipe gestures. Swipe left moves the car to the left, and swipe right moves the car to the right. Simple! But it works!
Of course, I should also support taps. And I thought, why restrict the tap gesture to a small area? Let’s make half the screen a giant left button, and the other one a giant right button. I’d still add graphics to provide the affordance, and this would make it super fun and easy to play holding the device in landscape mode (more on this later).
The last control that I implemented is the keyboard. Bringing the game to iPadOS, and with more and more of these devices being attached to covers with keyboards, it just made sense that you could simply use the left/right arrow keys to move the car too.
override var keyCommands: [UIKeyCommand]? {
    [
        UIKeyCommand(input: UIKeyCommand.inputLeftArrow, modifierFlags: [], action: #selector(handleLeft)),
        UIKeyCommand(input: UIKeyCommand.inputRightArrow, modifierFlags: [], action: #selector(handleRight))
    ]
}
And I’m not done! Video game controllers will be next. And I have to give it a shot to make it accessible with Switch Control and Voice Control too.
And what about VoiceOver? Yes! That was the first thing that I thought about when starting the game. Just as it happens with any app. Let’s talk modes.
Modes
After giving some thought to controls, it was time to think about how to make the game perceivable.
When creating apps, we should not rely on just one mode, like color, for example. Instead, we should use a combination of modes (shape, text, sound, haptics…) so everyone can perceive that information. So what about games, that have a very strong visual component? Just as the visuals, audio is a very important aspect of games too! I figured, can we make the game playable by using audio cues? I gave each lane a note: C for the left lane, E for the middle, and G for the right. The idea was that even with your eyes closed, you could build a mental map of the road. And implemented three alternative audio cue modes: lane pulse, plays a note for each safe lane to move to (equal time silence for an unsafe lane); arpeggio, plays a sequence of notes for safe lanes; and chord plays all the notes for safe lanes at once. Then, I had to provide audio cues for lane changes too. I decided to offer three styles too: lane confirmation, plays the note of the lane you moved to; success, plays a characteristic sound letting you know if you moved to a safe or unsafe lane; and a combination of both.
And what about the input mechanism for VoiceOver? The classic selection and double-tap for action wouldn’t cut it on a game where you need to act fast. So I decided to allow direct touch, so the gestures are the same as if VoiceOver was not enabled.
.accessibilityDirectTouch(true, options: [.silentOnTouch])
The amount of options comes from a place of not knowing what would be more intuitive, but also from a place of giving choice. Another principle of mine when approaching accessibility is that customization is at its core, and it is about meeting users where they are. It doesn’t seem like giving choice would harm anyone.
We build things for users, and whenever we can, we should get them involved in the process. So I posted in AppleVis’ forum to request feedback. The community was extremely helpful and supportive! The consensus was that the approach could work, but that a tutorial was needed to make it clearer from the start. I took that on board and implemented one covering the game, controls, and audio cues. The results have been encouraging. Some users are already scoring a fair amount of overtakes, which suggests this approach might actually be viable.
Settings
As mentioned, customization is at the very core of accessibility. Not all options work for all users, and what might be useful for someone might make the experience very hard for others.
When I was a kid, the sound of the game was essential. The repetitive bip sound was super useful to get into the rhythm of the game and know exactly when to move the car and avoid crashing. But what if someone can’t perceive audio (or might find it annoying or unbearable)? It felt like a job for haptic feedback (back to the Modes idea!). If you think about it, most users might actually use haptics over sounds these days. But what if haptics are very distracting for someone? Simple, let’s add a toggle to disable them if they want to.
public func triggerCrashHaptic() {
    notificationGenerator.notificationOccurred(.error)
}

public func triggerGridUpdateHaptic() {
    lightImpactGenerator.impactOccurred()
}

public func triggerMoveHaptic() {
    mediumImpactGenerator.impactOccurred()
}
And I also wanted to provide a volume slider for the sound effects, and a font selector because the retro font I chose seems like it might be difficult to read for many users.
Some other settings are more specific. Like VoiceOver announcements that let you know when the speed is about to increase (it happens every 100 points). But I see how the announcement might take you off the game once they know the deal.
private func announceSpeedIncreaseIfNeeded(oldValue: Bool, newValue: Bool) {
    guard oldValue == false, newValue else { return }
    guard inGameAnnouncementsEnabled else { return }
    UIAccessibility.post(
        notification: .announcement,
        argument: GameLocalizedStrings.string("speed_increase_announcement")
    )
}
And some settings don’t have toggles. I wanted to support Dark Mode, Dynamic Type, and very important: portrait and landscape orientations!
Levels (& language)
Finally, I first developed the game at a speed that I felt it would be fun for me. But what is fun for me might be incredibly tricky for some people. So I added three speeds so more people can enjoy the game.
My first instinct was to call those levels easy/medium/hard, but I immediately thought that that naming could be very unfair. Easy might still be very difficult for some users, so it feels like an inappropriate name. Language is important! I might not have found the perfect names (naming things turns out to be a very complicated thing). But for now, I settled with Cruise/Fast/Rapid.
Again, it’s a small thing, but language shapes how people feel before they even start playing.
Wrapping up
And that’s it! I have more plans for the future. But that’s what I’ve done so far, and I hope you found it interesting.
These are just some of the thoughts and approaches I’ve followed. Take them with a pinch of salt. I’m not an expert at all, but thought it would be interesting simply as an example of my thought process when I approach the accessibility of any app in general. I promise I’ll learn from others’ experiences, and will come back with an update in the future.
My biggest surprise has been that my general understanding of accessibility seems to have brought me quite far. I genuinely think the most important thing is learning to ask yourself the right questions. The code, as these snippets show, tends to follow naturally from there. I hope this post shows a bit of that. And unsurprisingly, making the game more accessible makes it better for everyone. Some people have praised the haptics implementation, for example. My intention was to provide an alternative for those who can’t experience audio, but it turns out others appreciated it too.
If you have any feedback, comments, questions, etc., please hit me in the socials anytime. Thanks for reading!
Where to find the game?
For now, if you’d like to play the game, you can find it in the App Store for iOS, iPadOS, and watchOS. macOS and tvOS should come soon, and I would love to port it to visionOS too, even if it will be unlikely I’ll ever get to test it on a real device.
You can play 5 times a day for free, and unlimited play costs £2.99. But there is a special launch offer, and you can get it for £0.99 with the code ARCTICCONF till 28th Feb 2026. And if you enjoy it, an App Store review genuinely makes a difference in helping others discover it. It’s one of the best ways to support an indie developer.