Tips and tricks to build accessible iOS apps
#365DaysIOSAccessibility
A year-long journey exploring iOS accessibility, one day at a time. Each post shares practical insights, tips, and techniques to make your iOS apps more accessible.
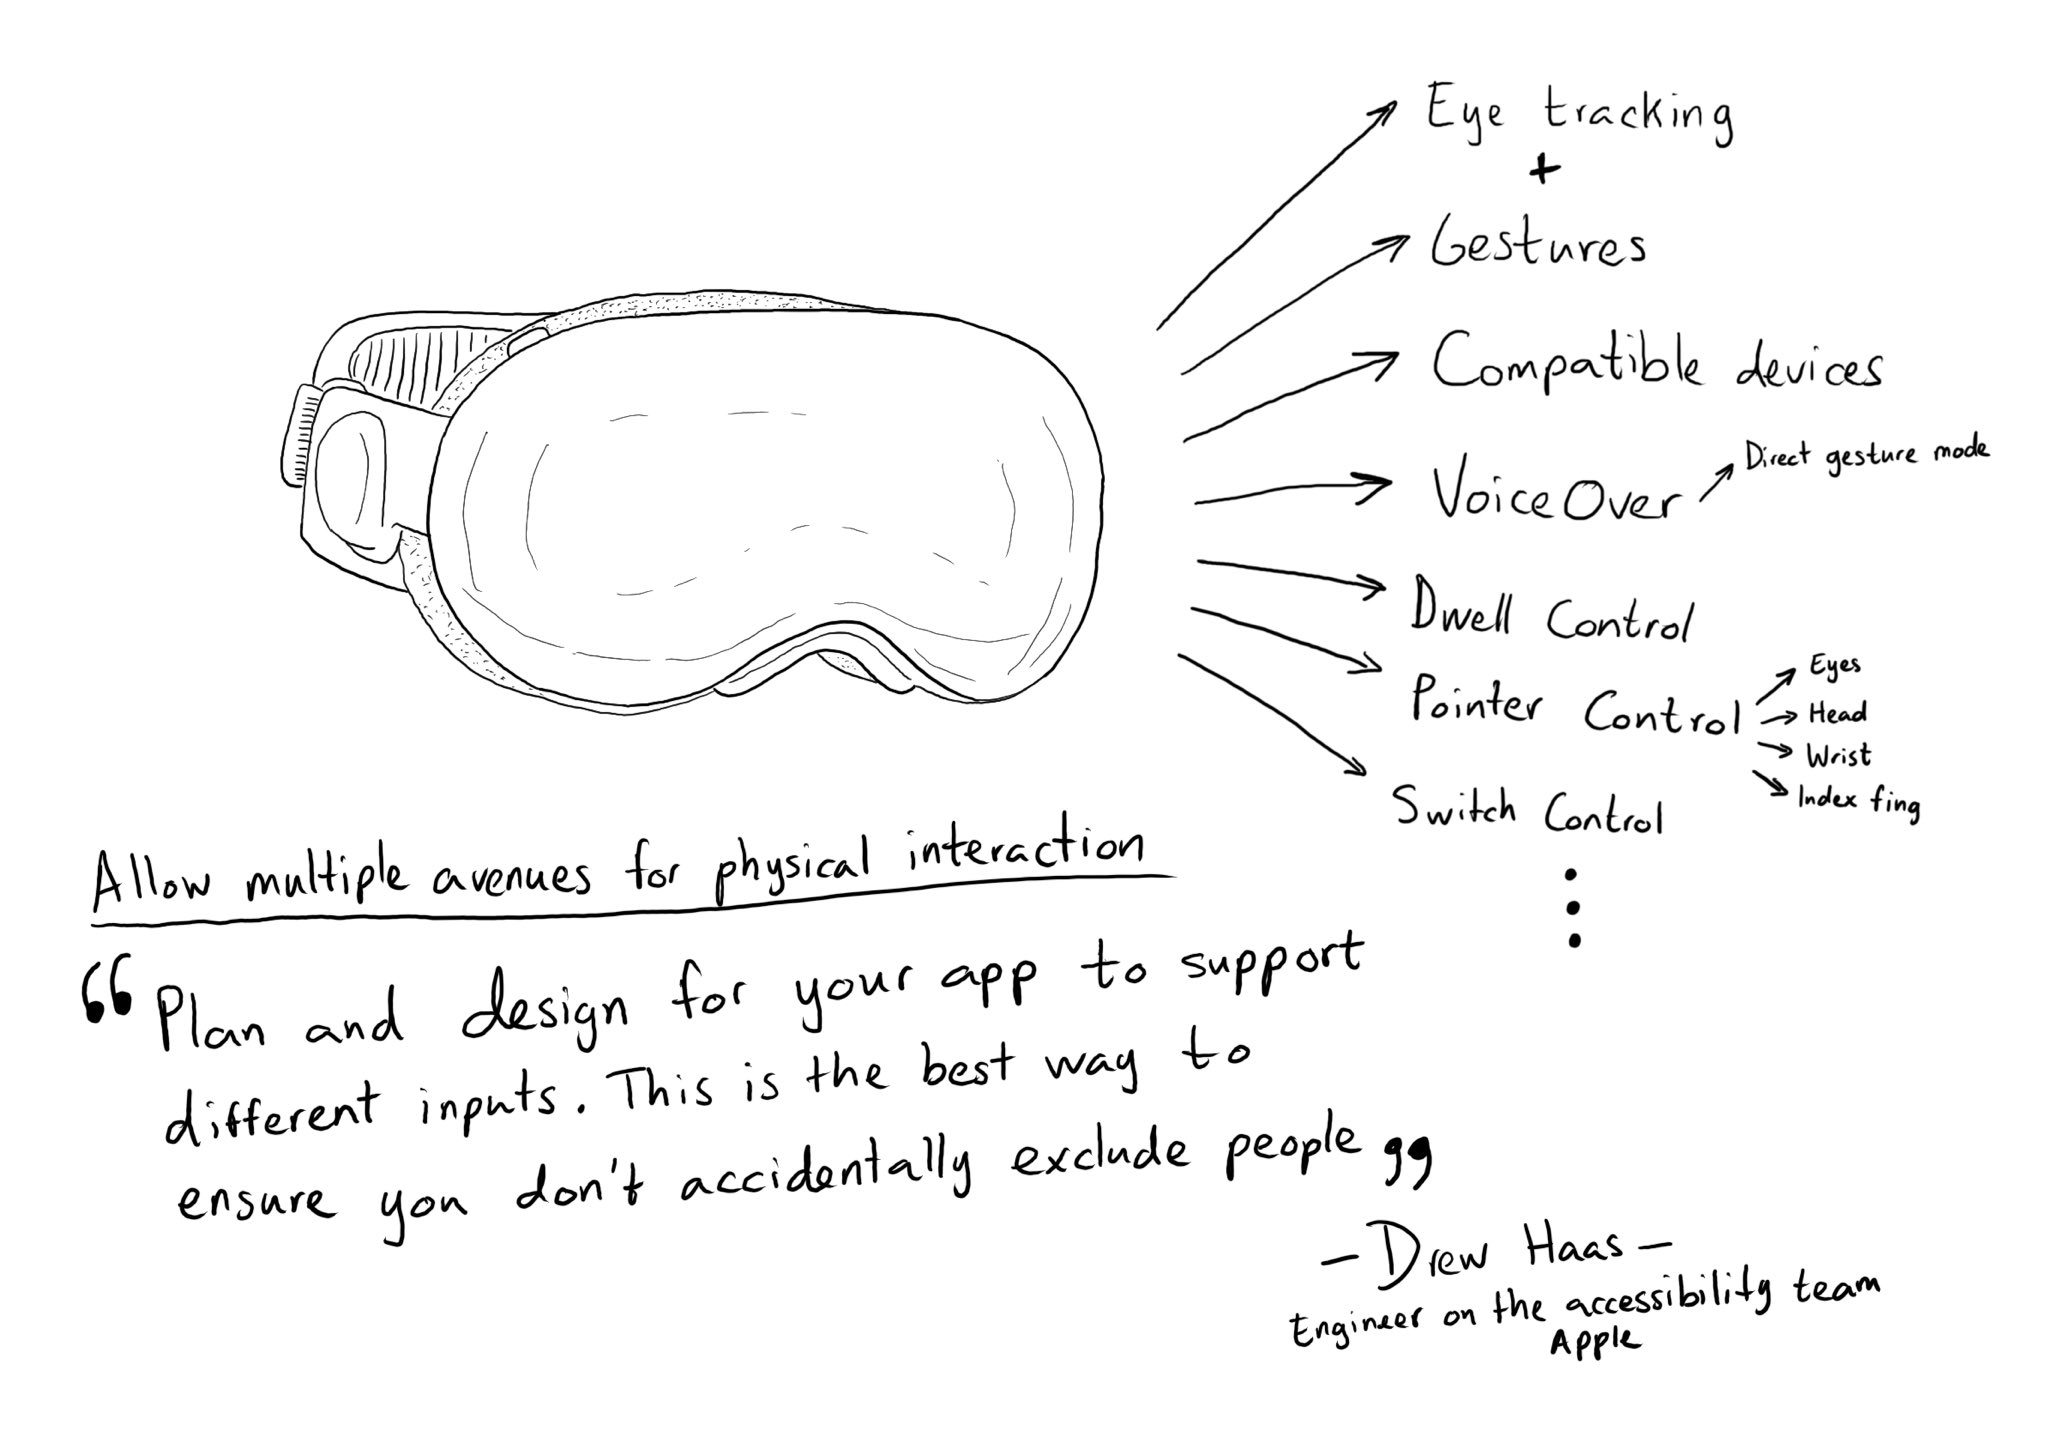
Abstracting your interface in a way that can offer multiple input and output mechanisms is key when developing software with an accessibility mindset. Apple has brought this to the next level in visionOS. Create accessible spatial experiences
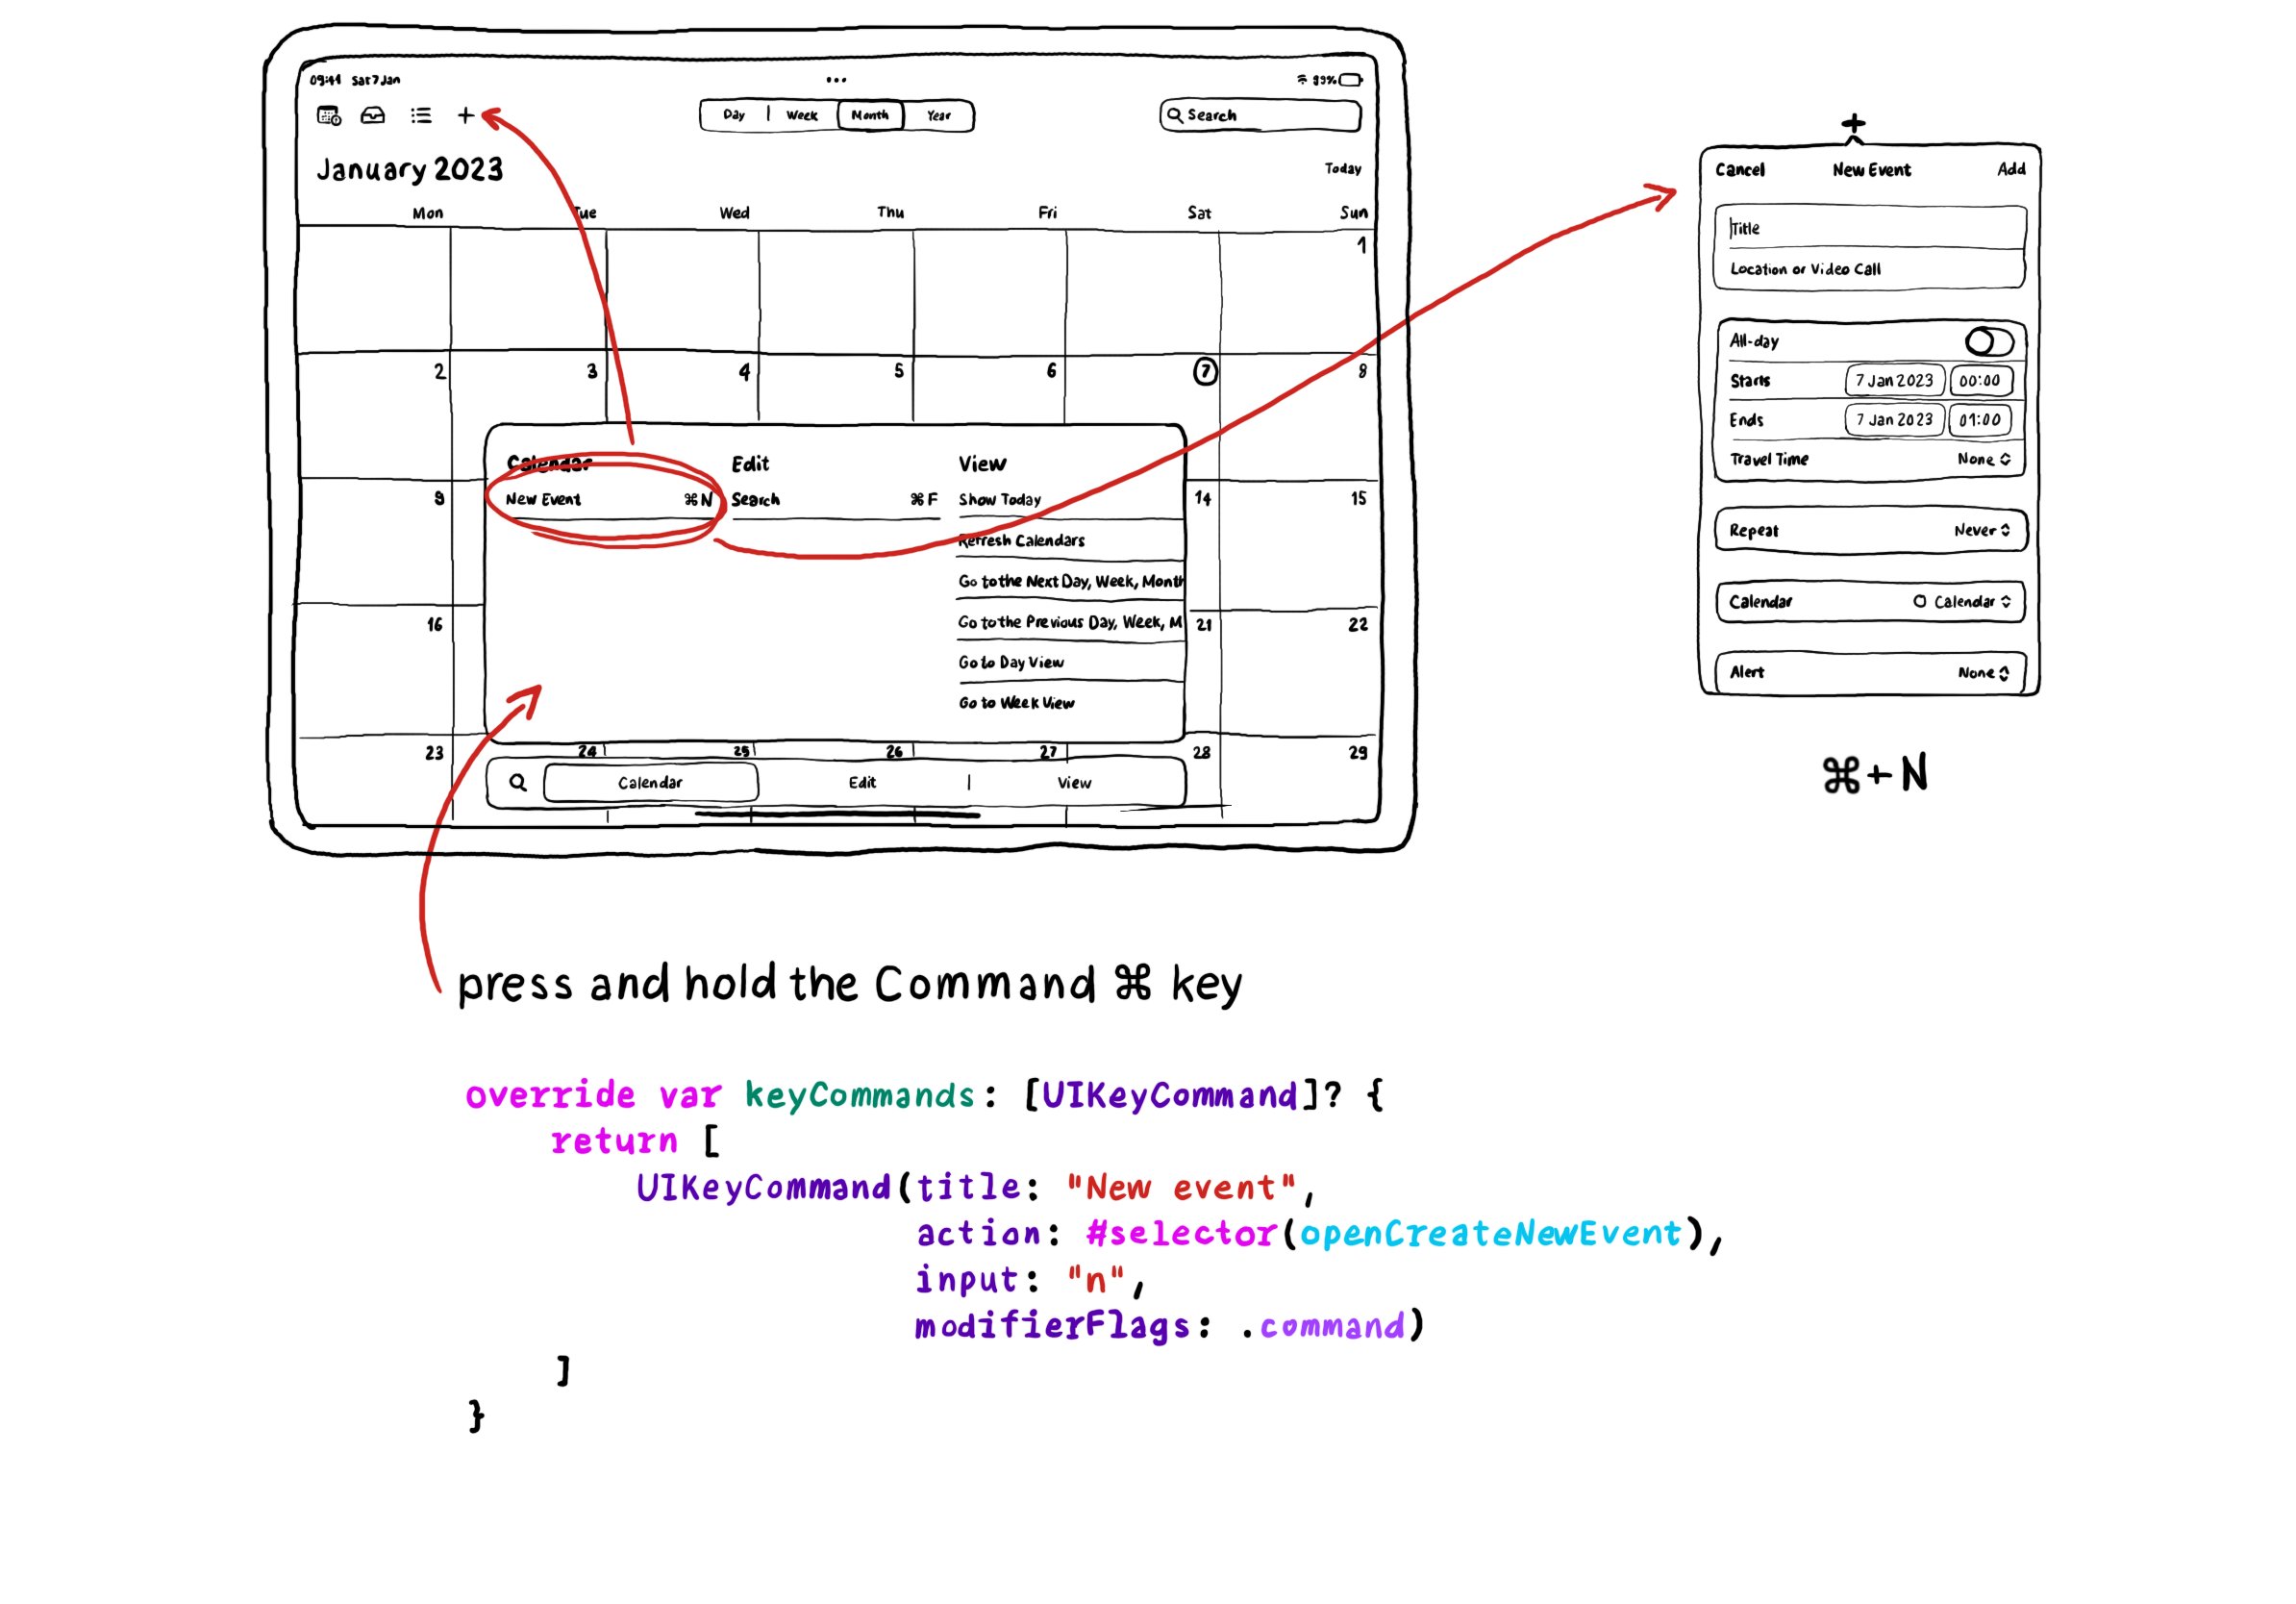
In UIKit you can create keyboard shortcuts by overriding the keyCommands for your view controller, which is an array of UIKeyCommand. A bit of a different approach to how you'd do it with SwiftUI.
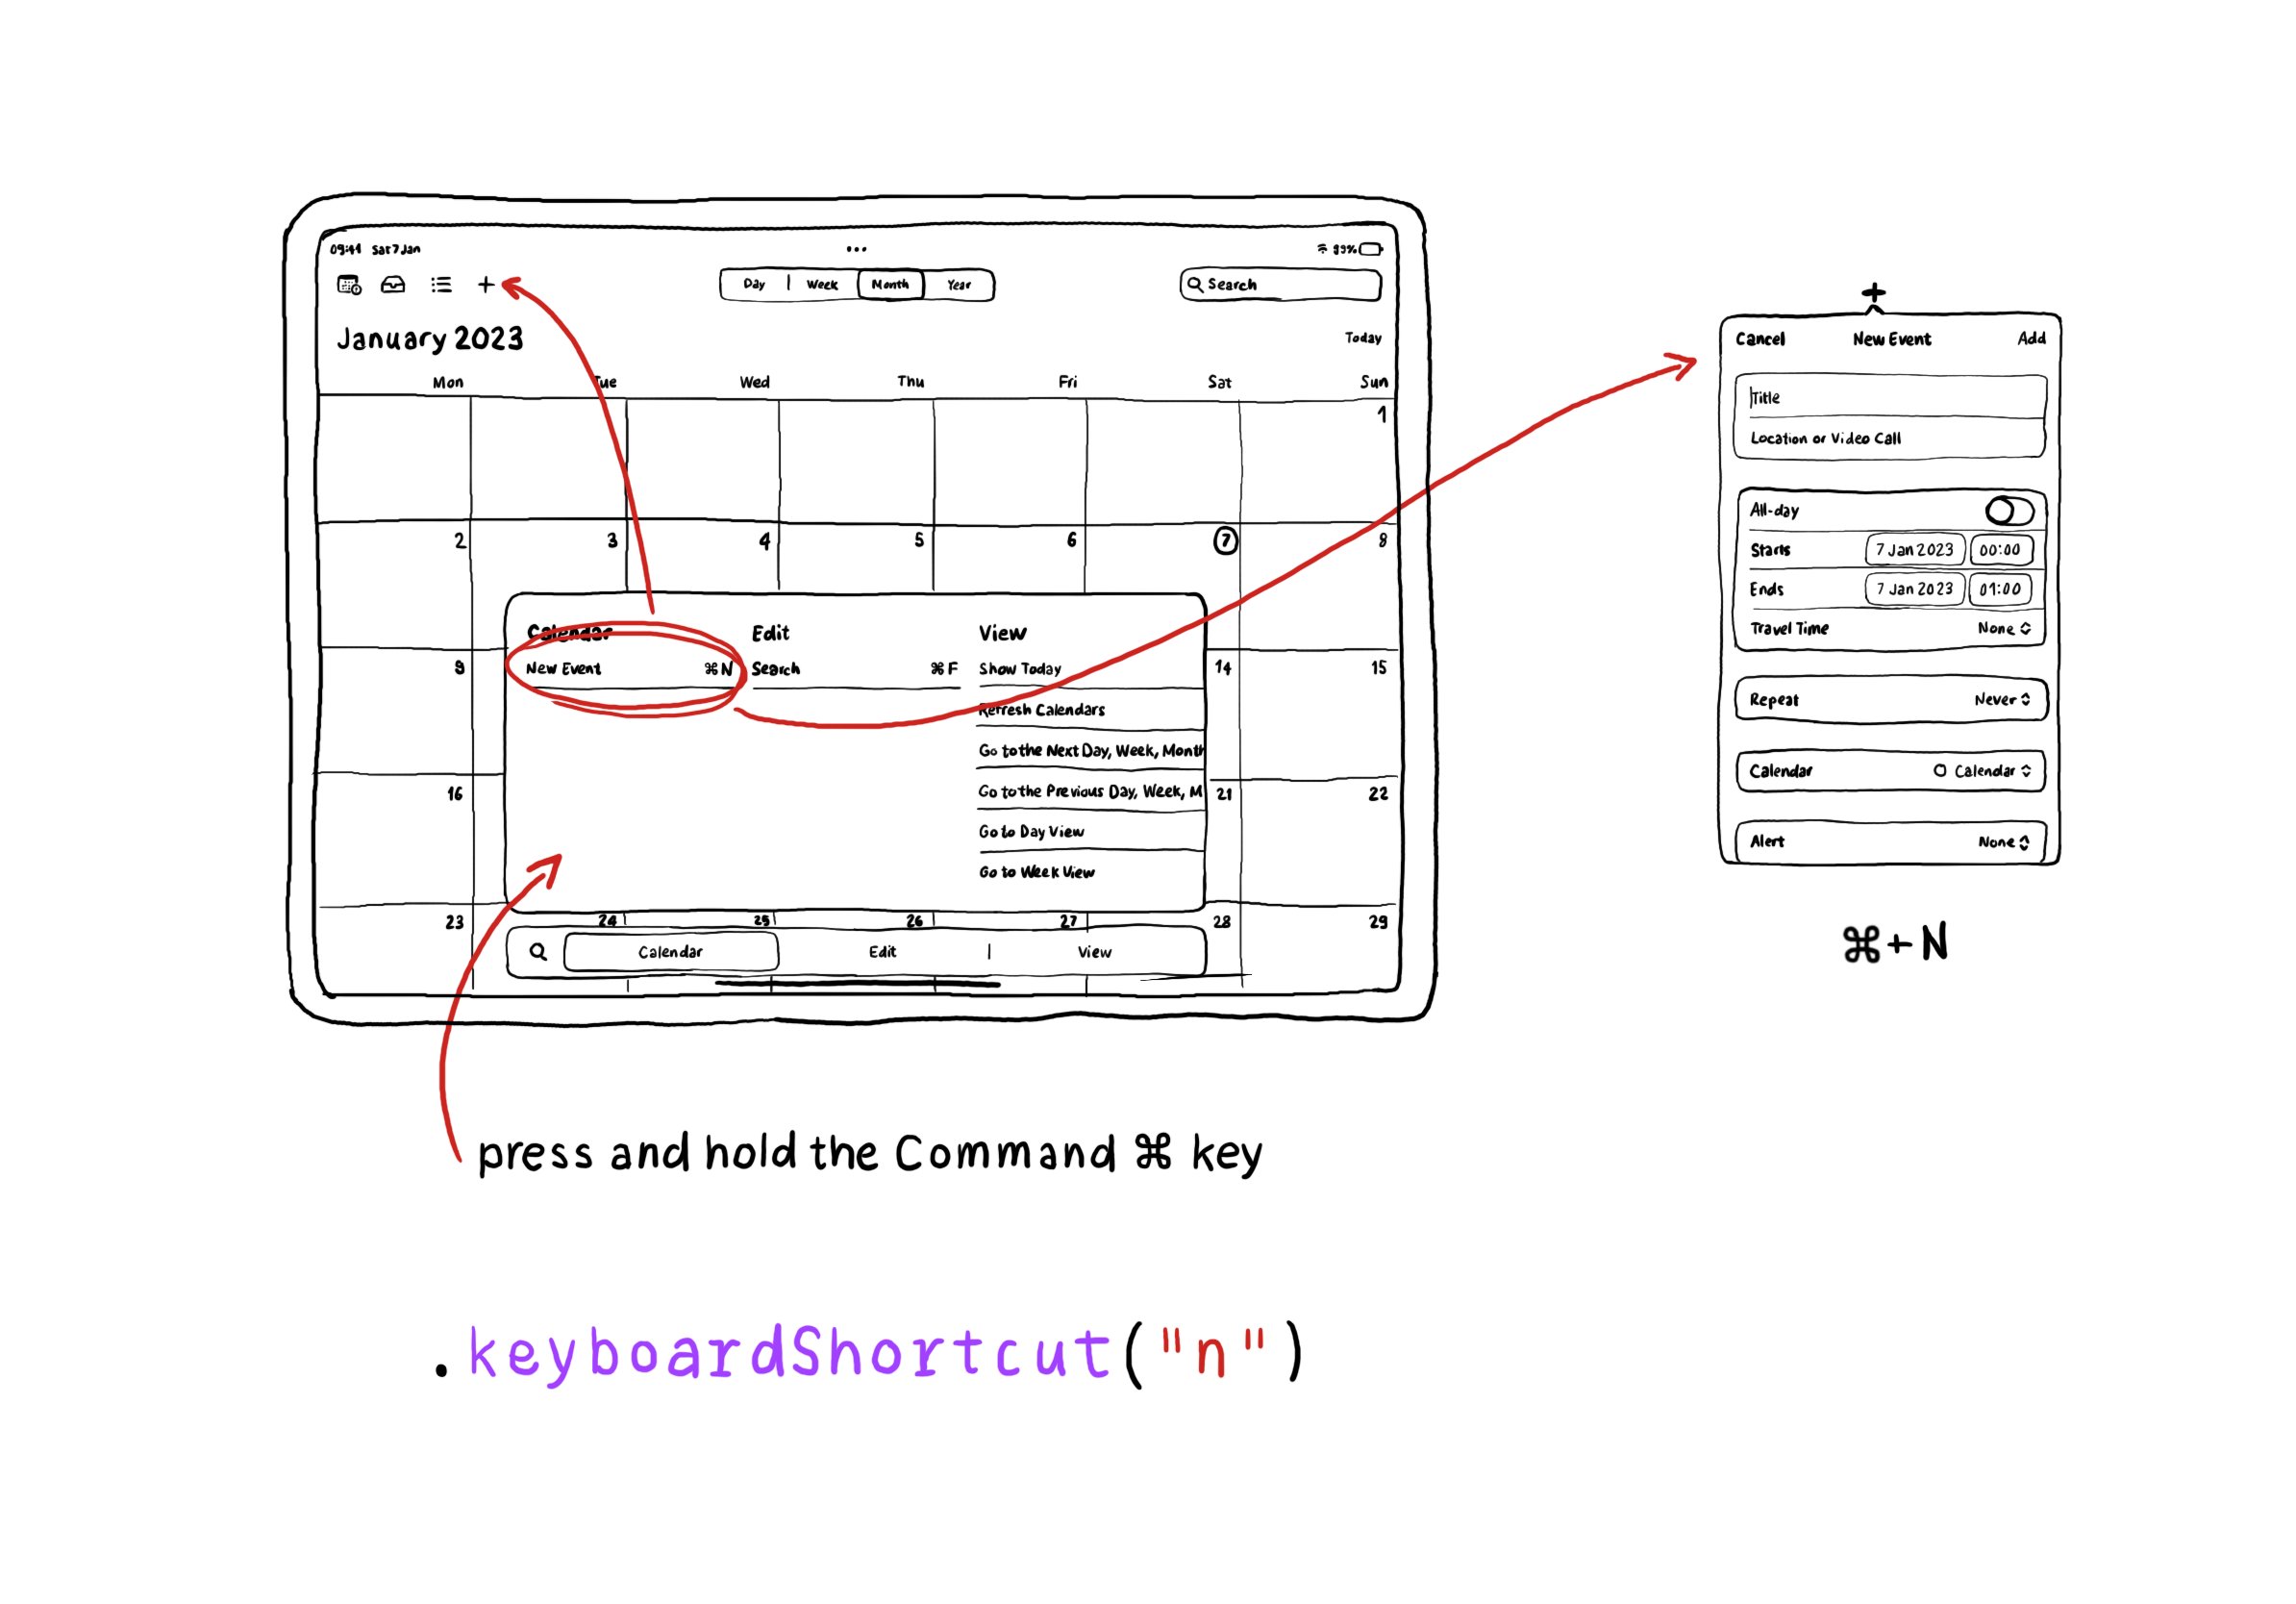
Adding keyboard shortcuts in your SwiftUI apps is extremely easy. Just use the .keyboardShortcut(_:) modifier. When pressing and holding the command key, the shortcut will appear in the shortcuts list.
Sydney Cocoaheads organized a pretty spectacular accessibility event for #GAAD22 with an amazing lineup of speakers. Please check it out for a great crash course on accessibility with some of the best! https://m.youtube.com/watch?v=SKuWLHNHF28&t=2184s
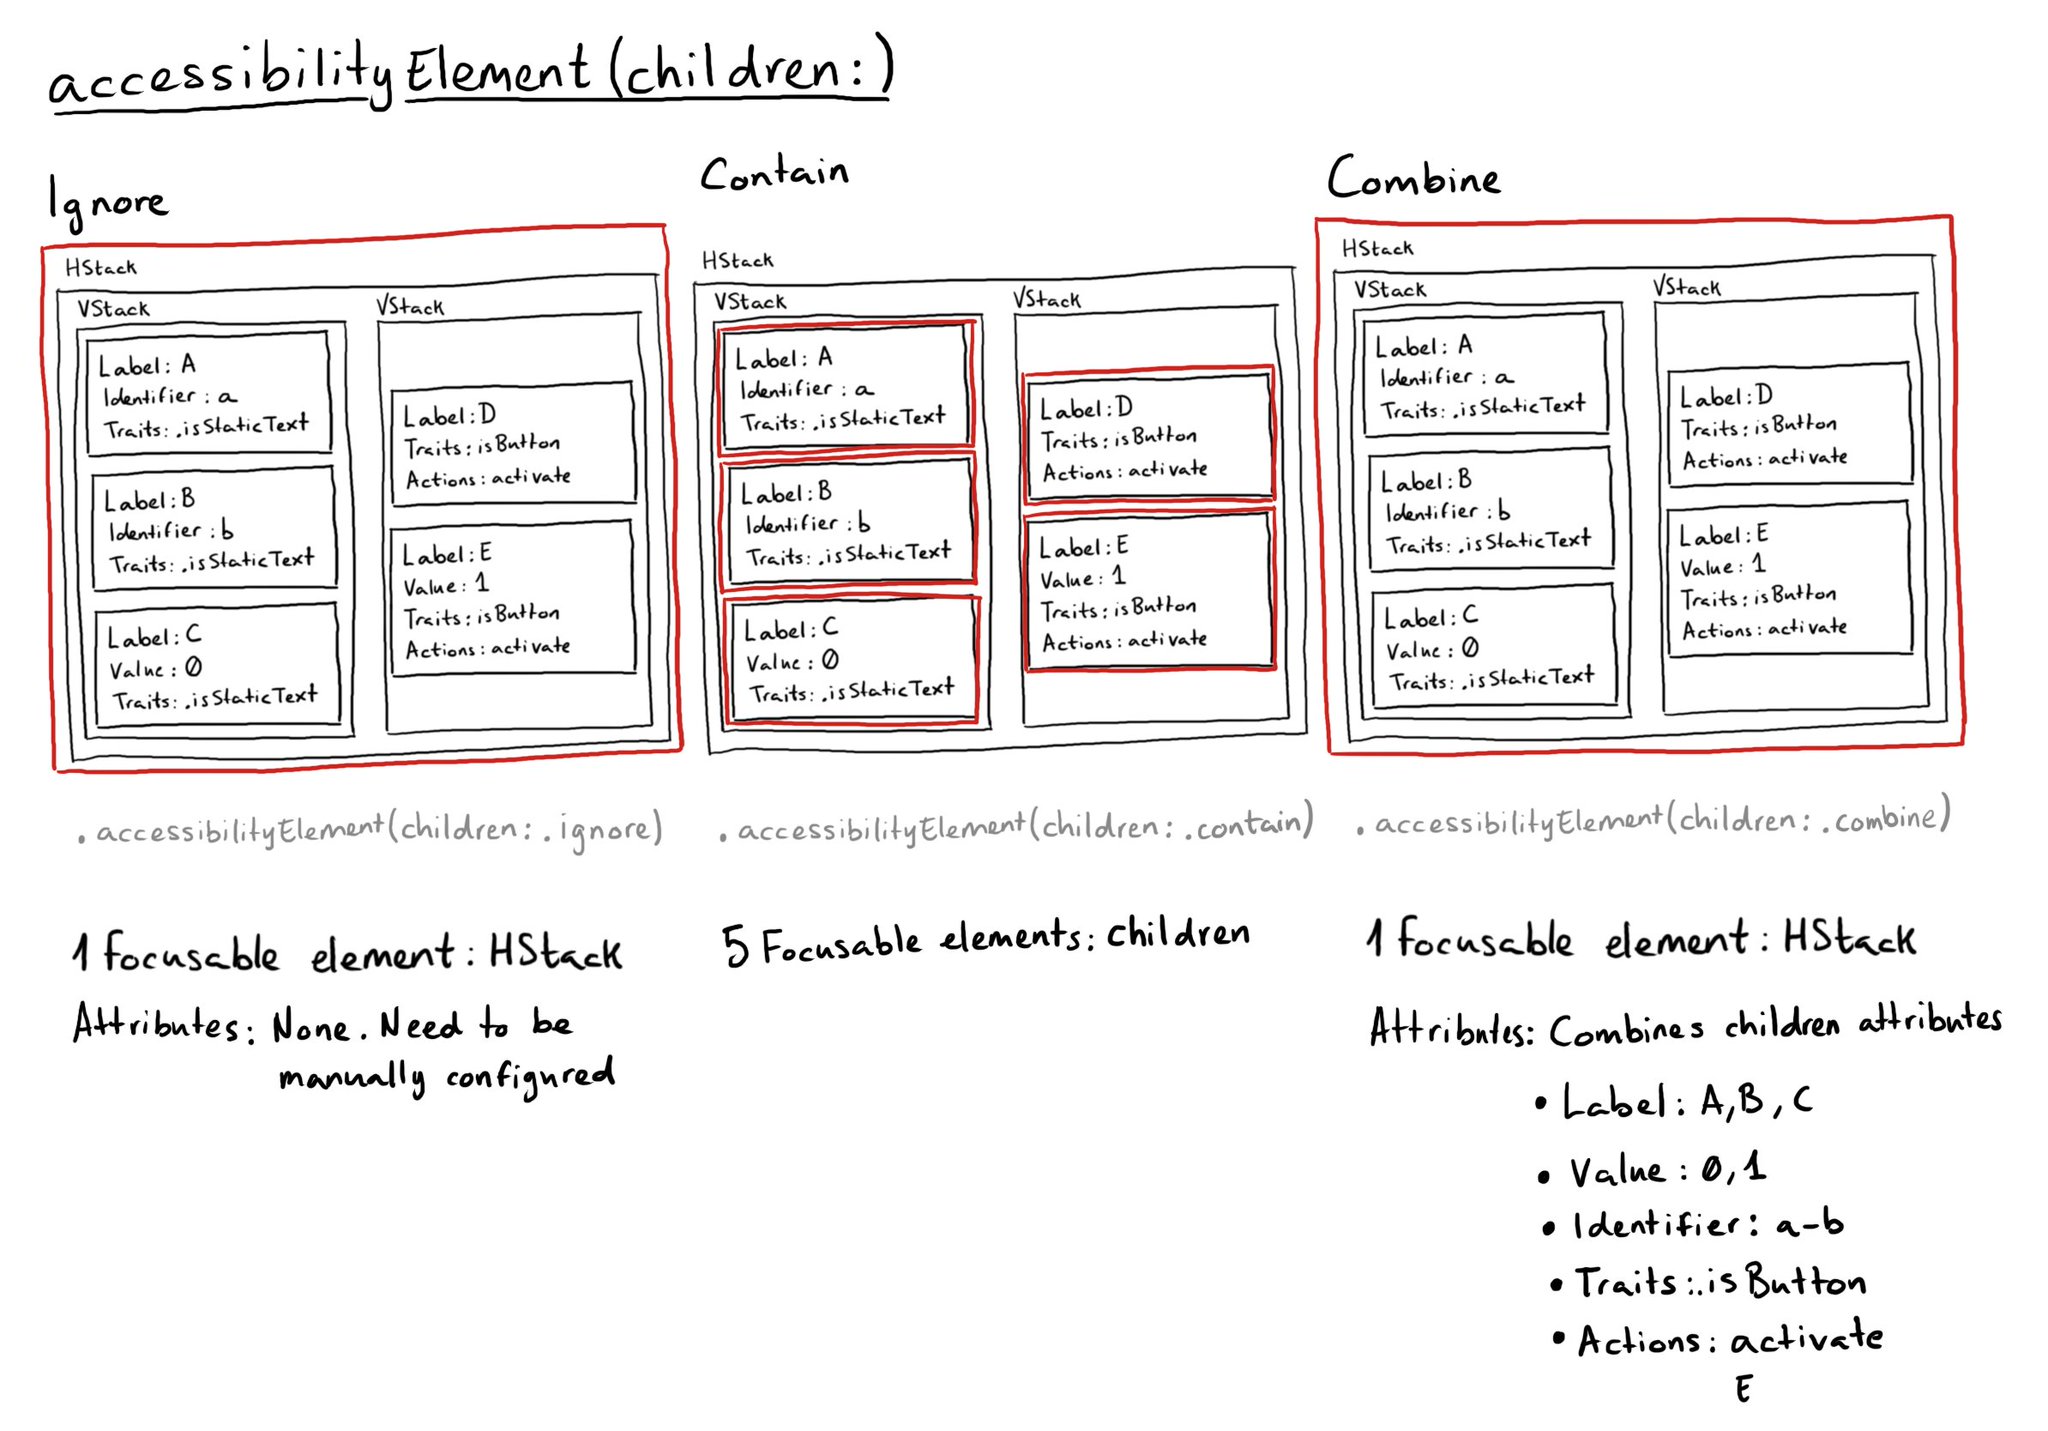
In SwiftUI there is a very useful modifier accessibilityElement(children:), that will do very different things depending on the AccessibilityChildBehavior passed as a parameter. There are three options: ignore (default), contain, and combine.
@azzoor has this great video with some advice on how to set up your device for testing accessibility and a ton of tips will get you testing effectively in no time. https://m.youtube.com/watch?v=Ca1H6wF348g&feature=youtu.be
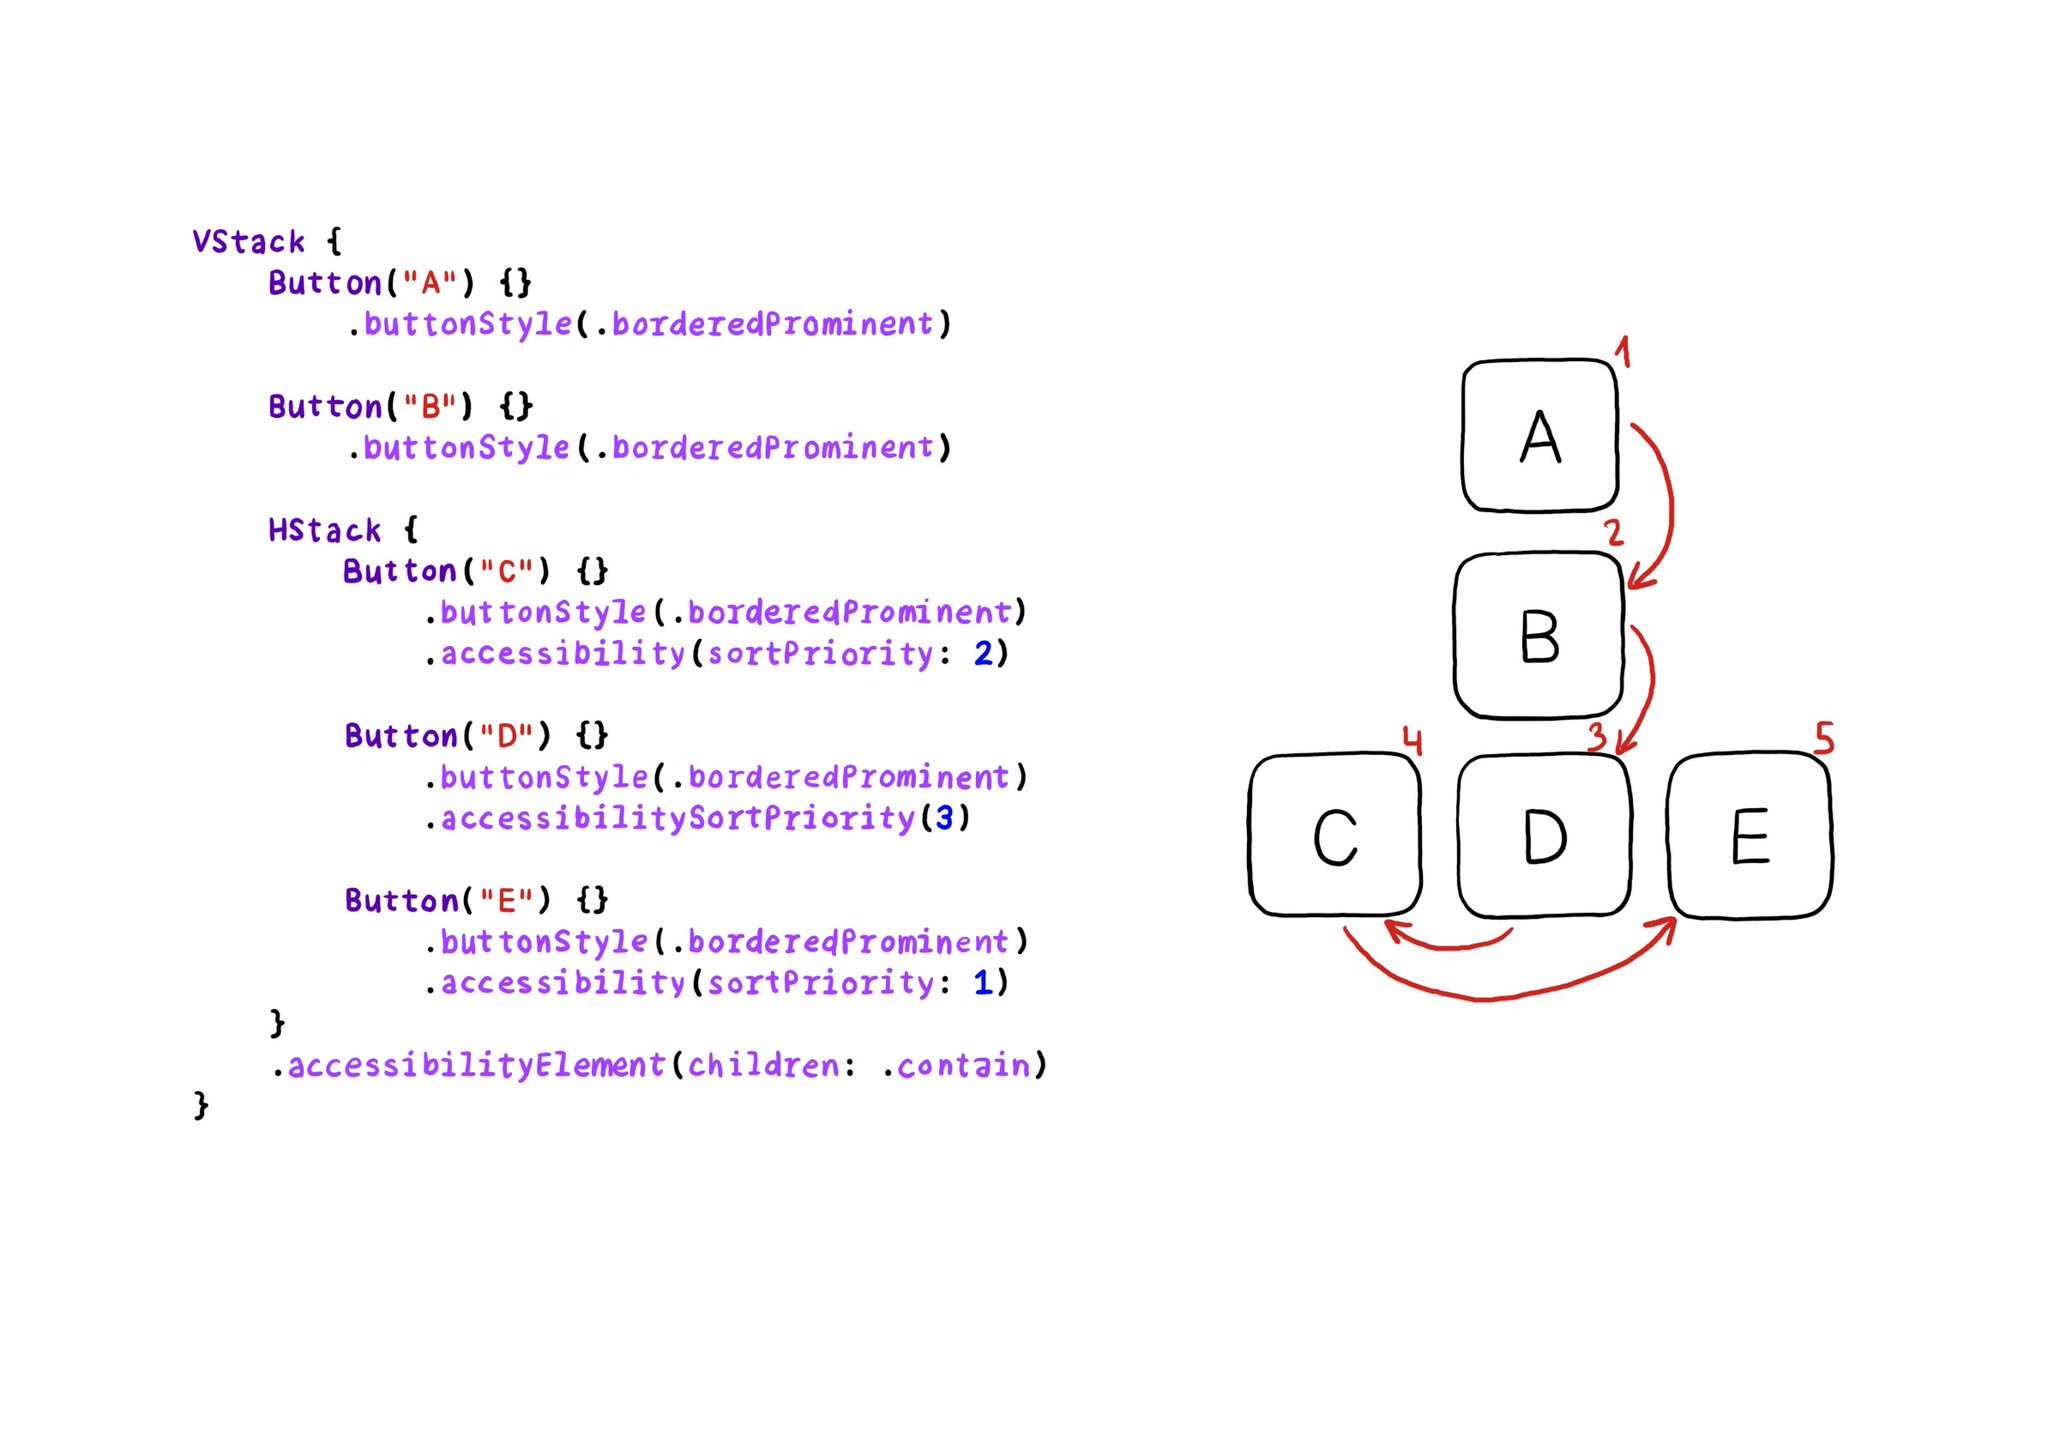
VoiceOver will traverse elements from left-right, and from top-bottom. If for any reason you need to change that order, in SwiftUI you can change the accessibility sort priority. A higher priority number in the container means it will go first.
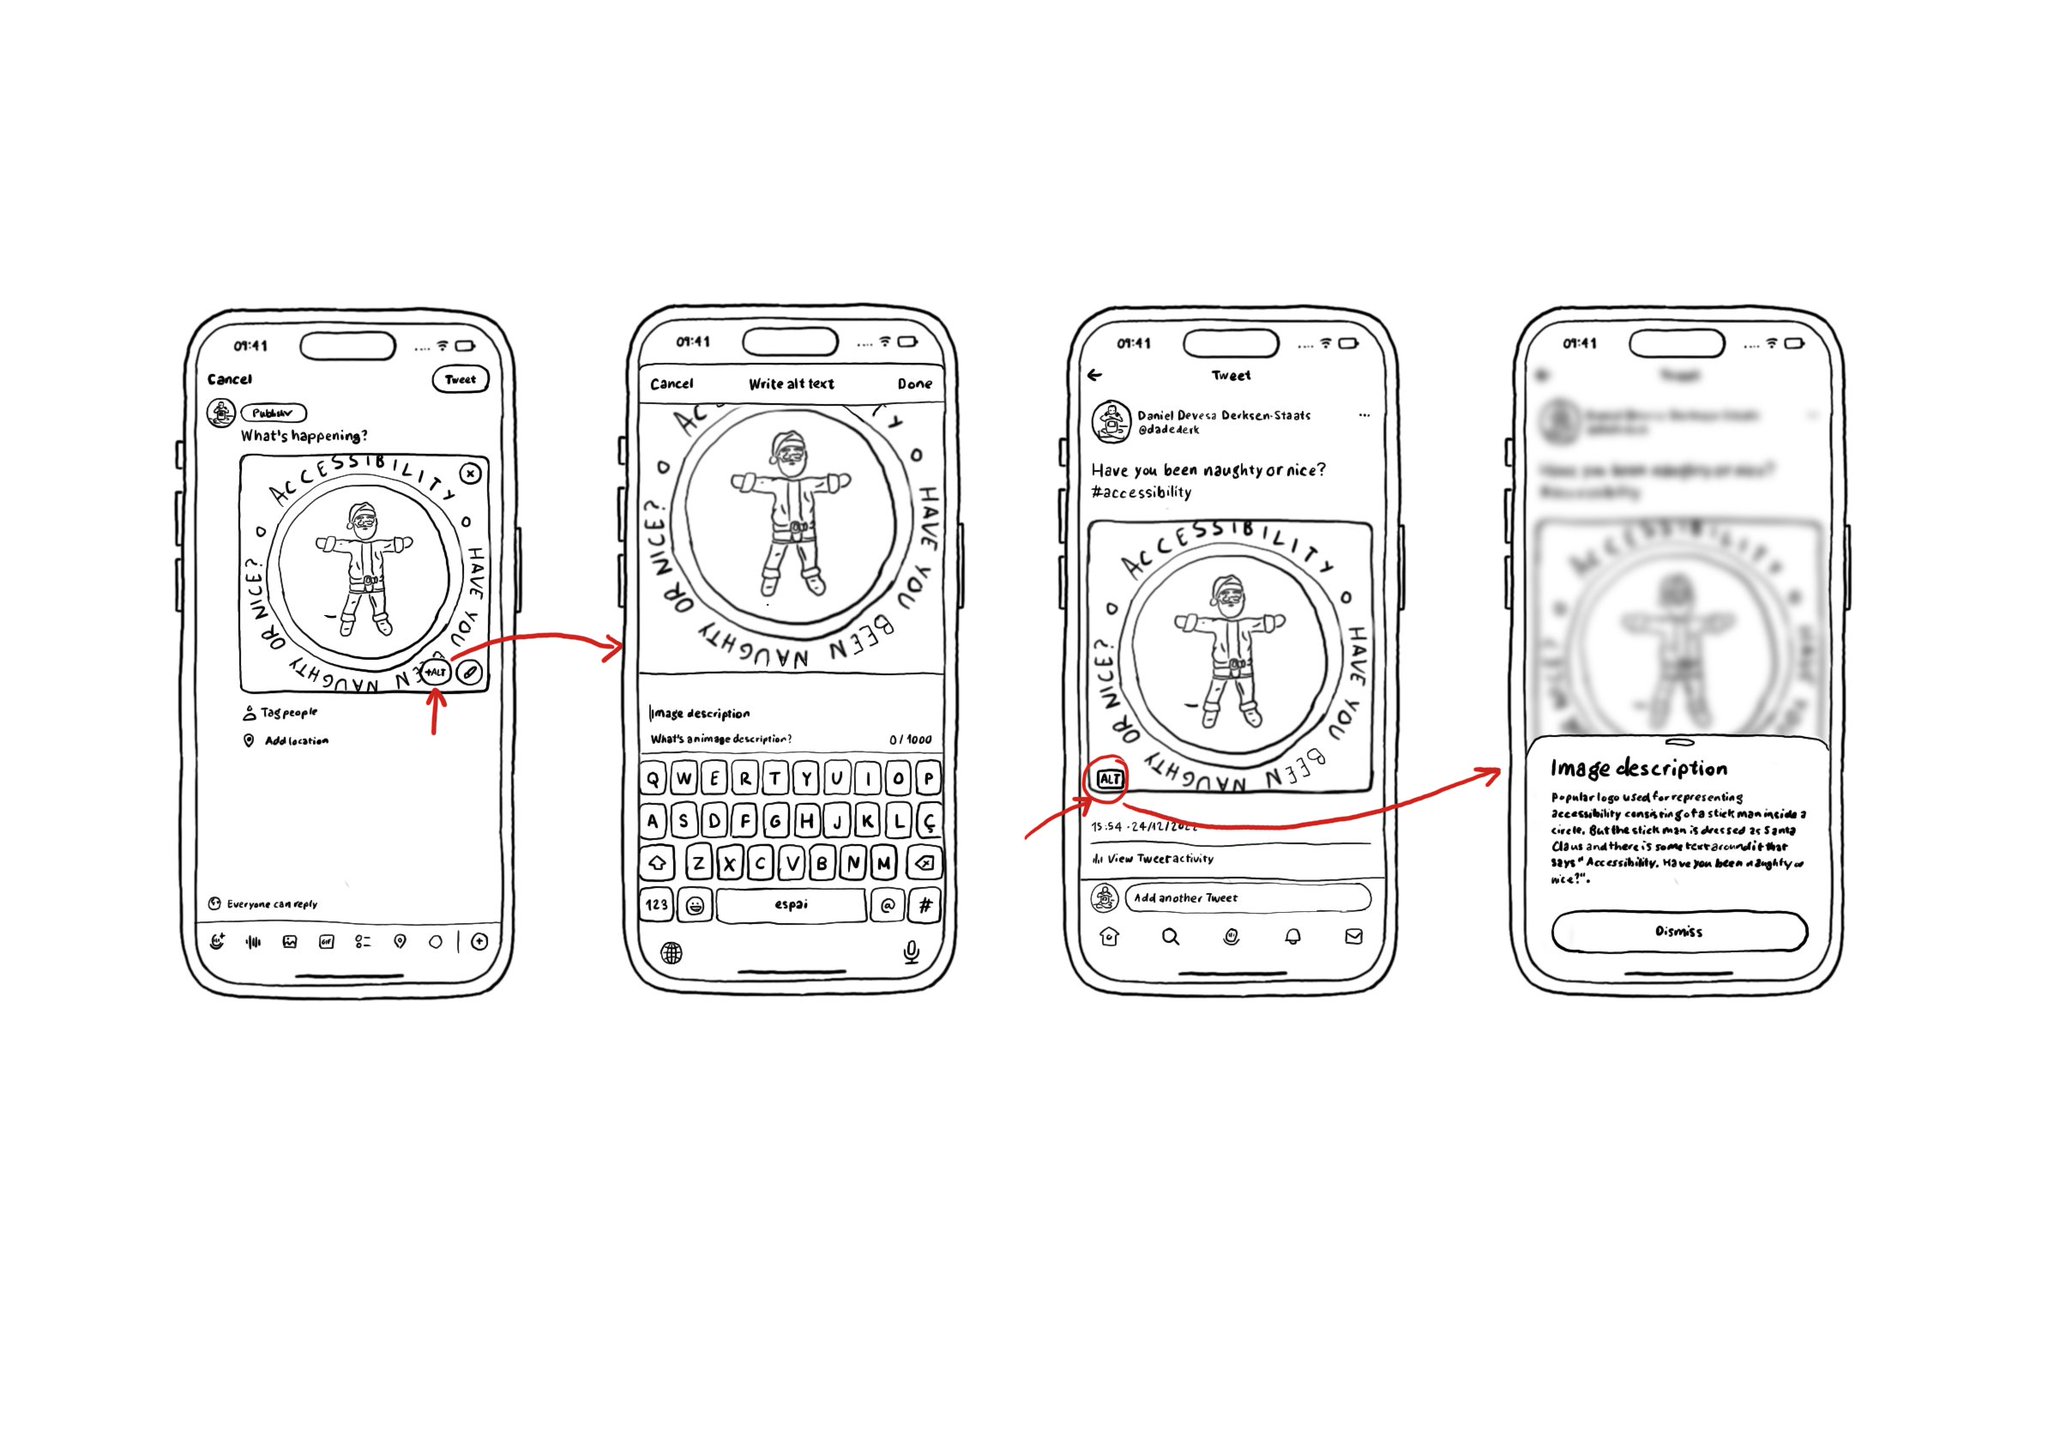
If your app lets the user share images, consider implementing the possibility for them to add an alt text for the image, so it can be used as an accessibility label when consumed by other users. Twitter or Slack have nice flows for doing this.
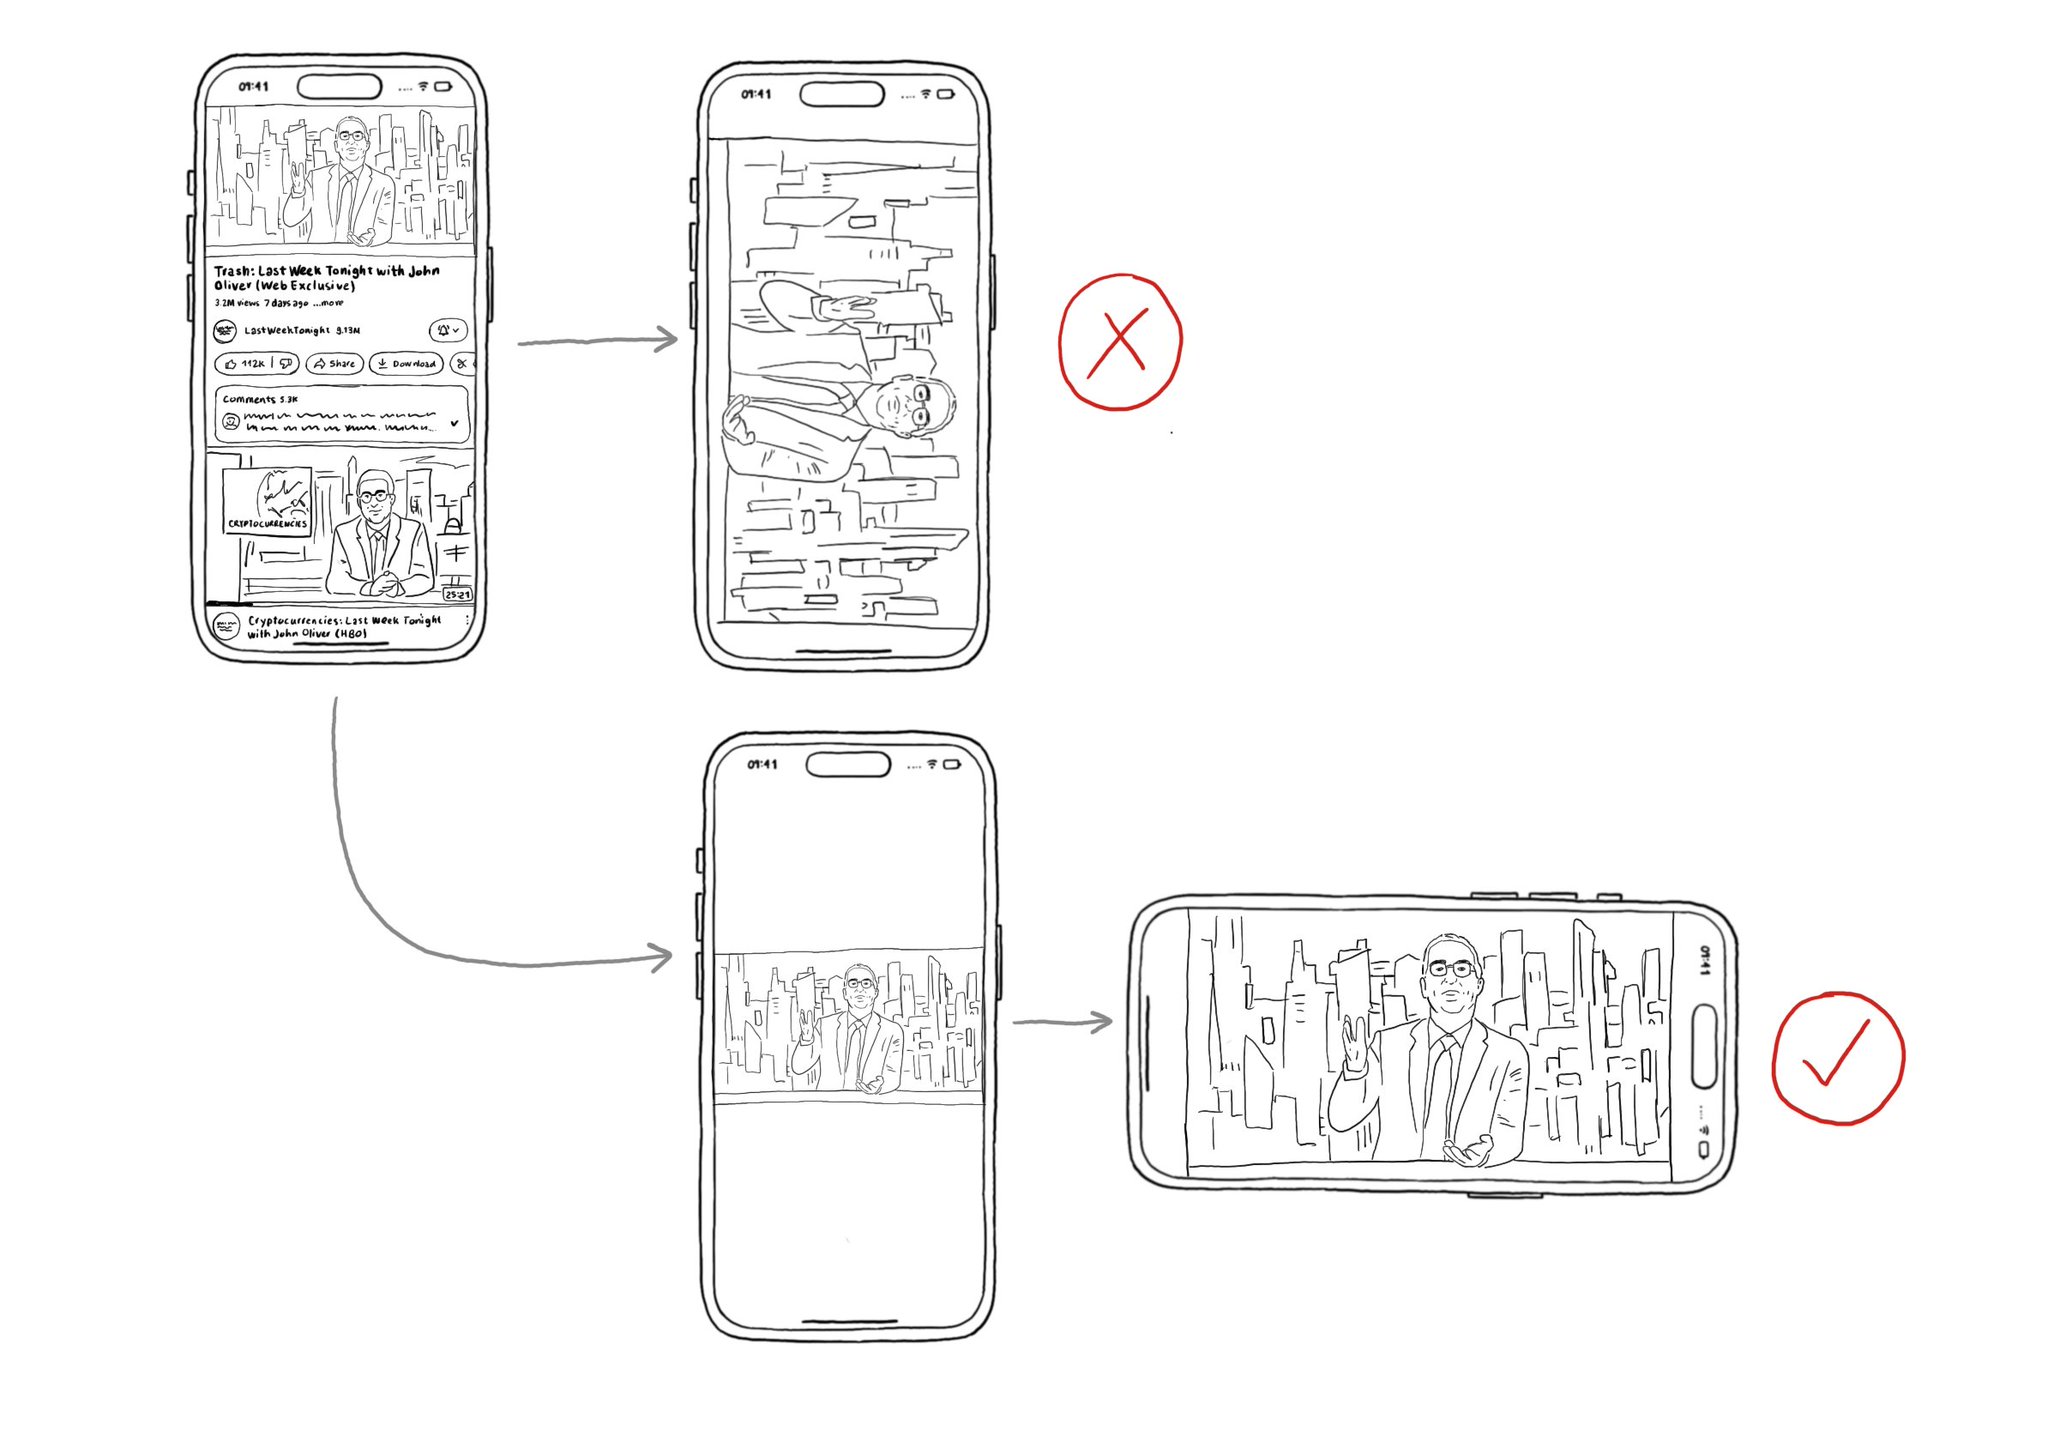
Support both orientations, if possible. I know not even iOS itself does it, but it hasn't always been like that. You'll create a more robust UI that will be easier to port to iPadOS. And especially, don't force your users to rotate their devices.
"We have one job, and that's to make our apps work. And if you are not implementing accessibility features, you are forgetting about making it work for a lot of people" @NovallSwift Couldn't have said it better! https://x.com/novallswift/status/1328387659744505856
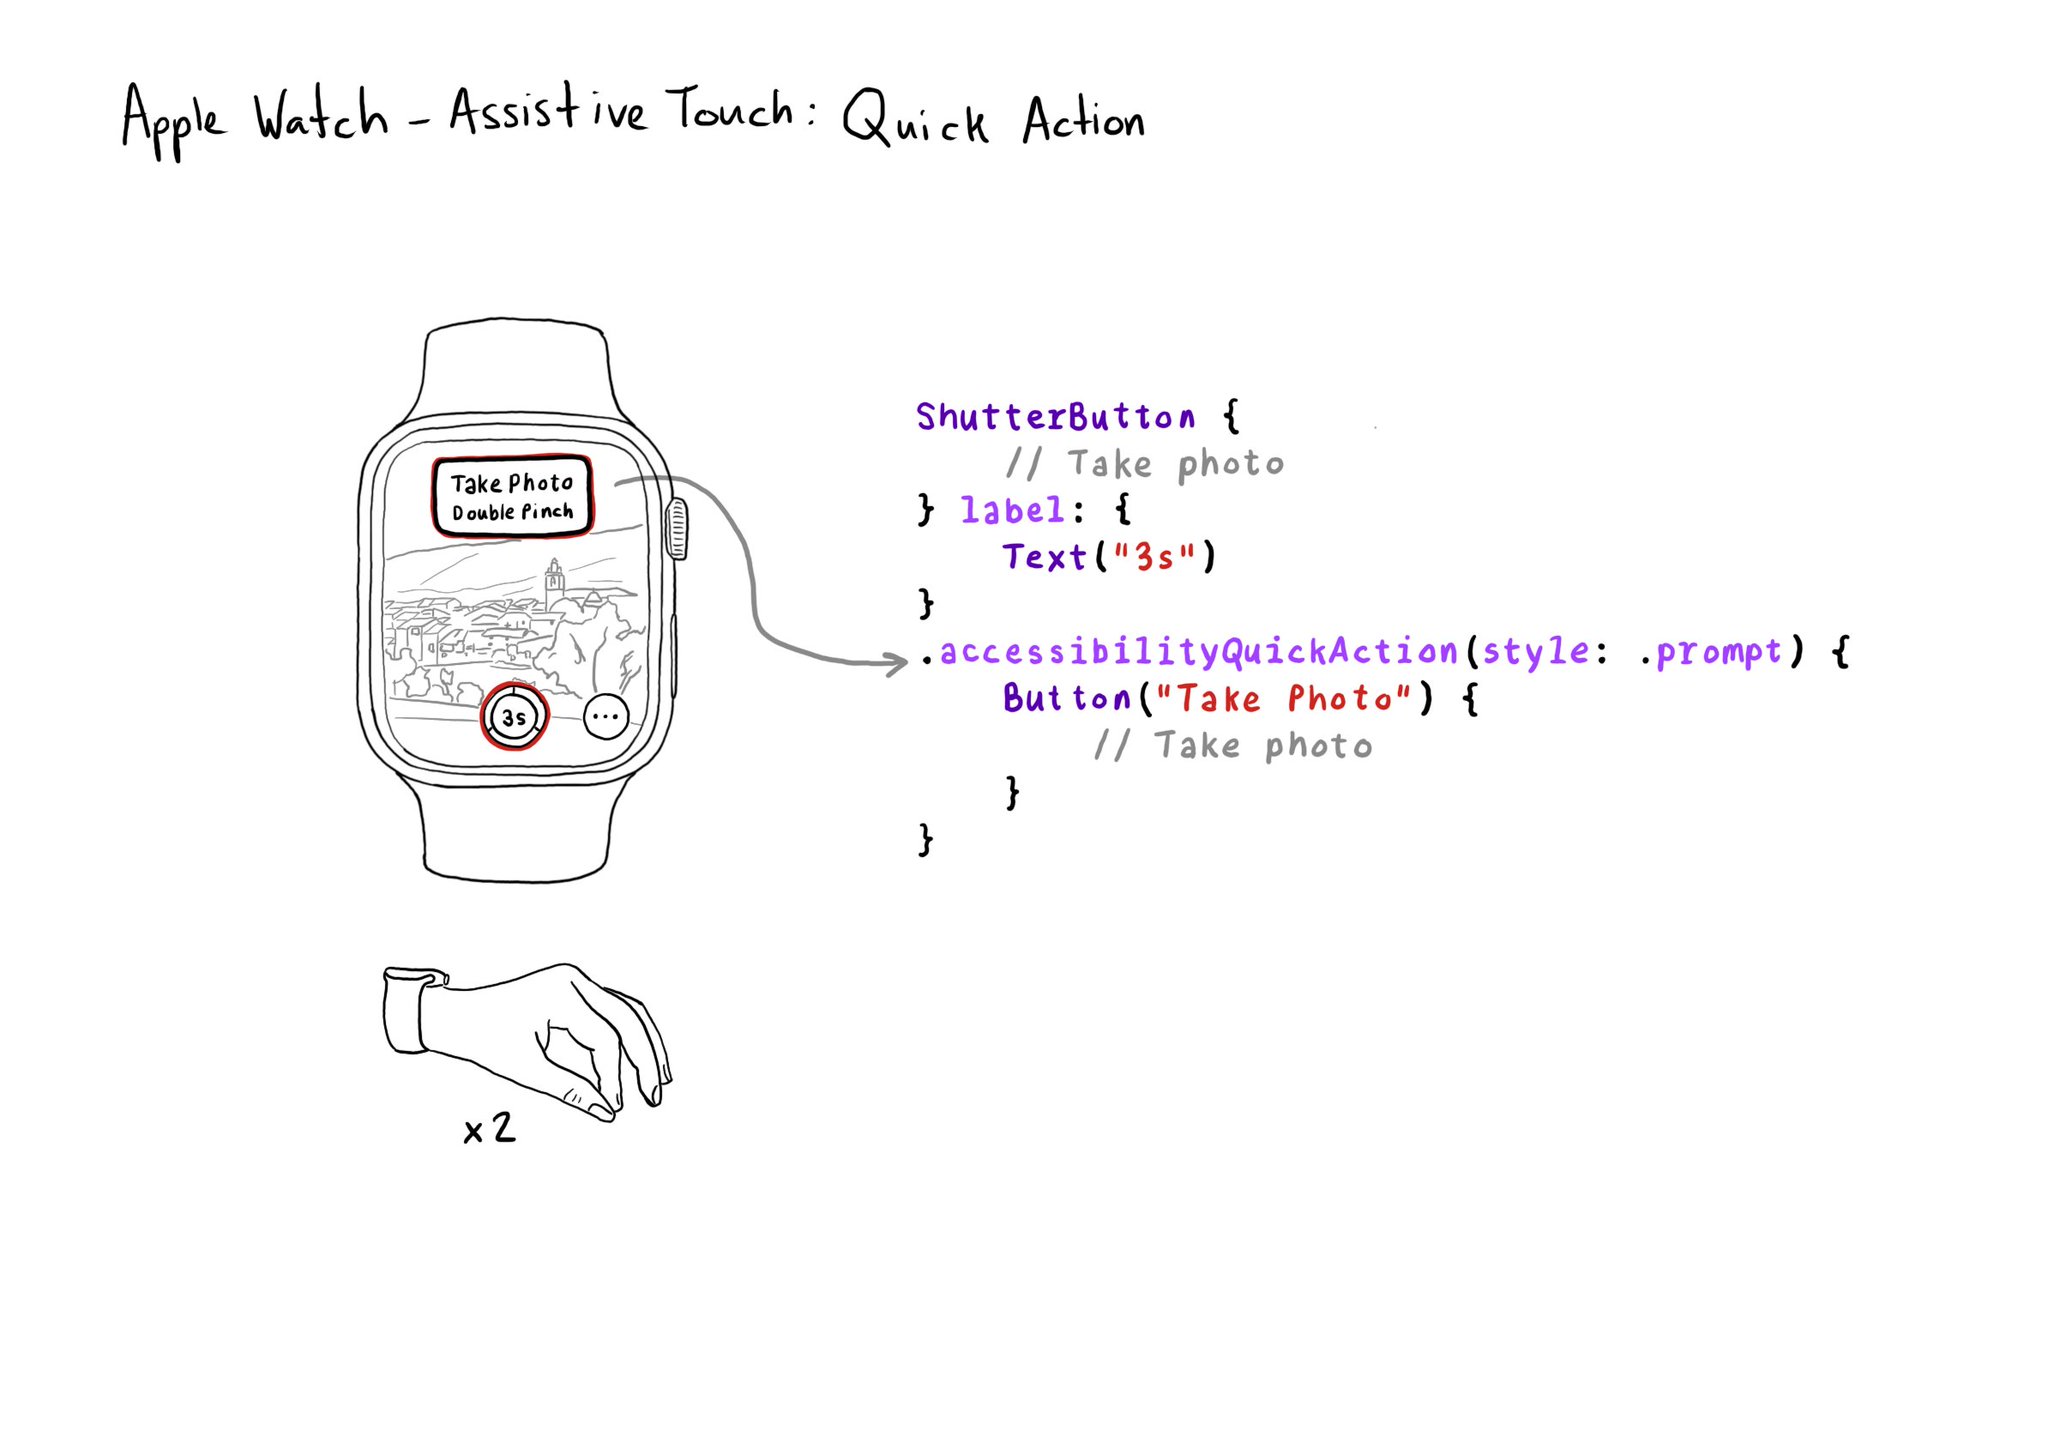
If your watch app has good VoiceOver support, chances are you'll also have good Assistive Touch support. But an improvement you can make is to implement a quick action (triggered with a double pinch) when there is a main action you can perform.

Assistive Touch for the Apple Watch works like magic. It lets you use your watch with gestures with the hand of the same arm you are wearing your watch on. No need to use your nose! If you don't have it on, is because you don't know about it.
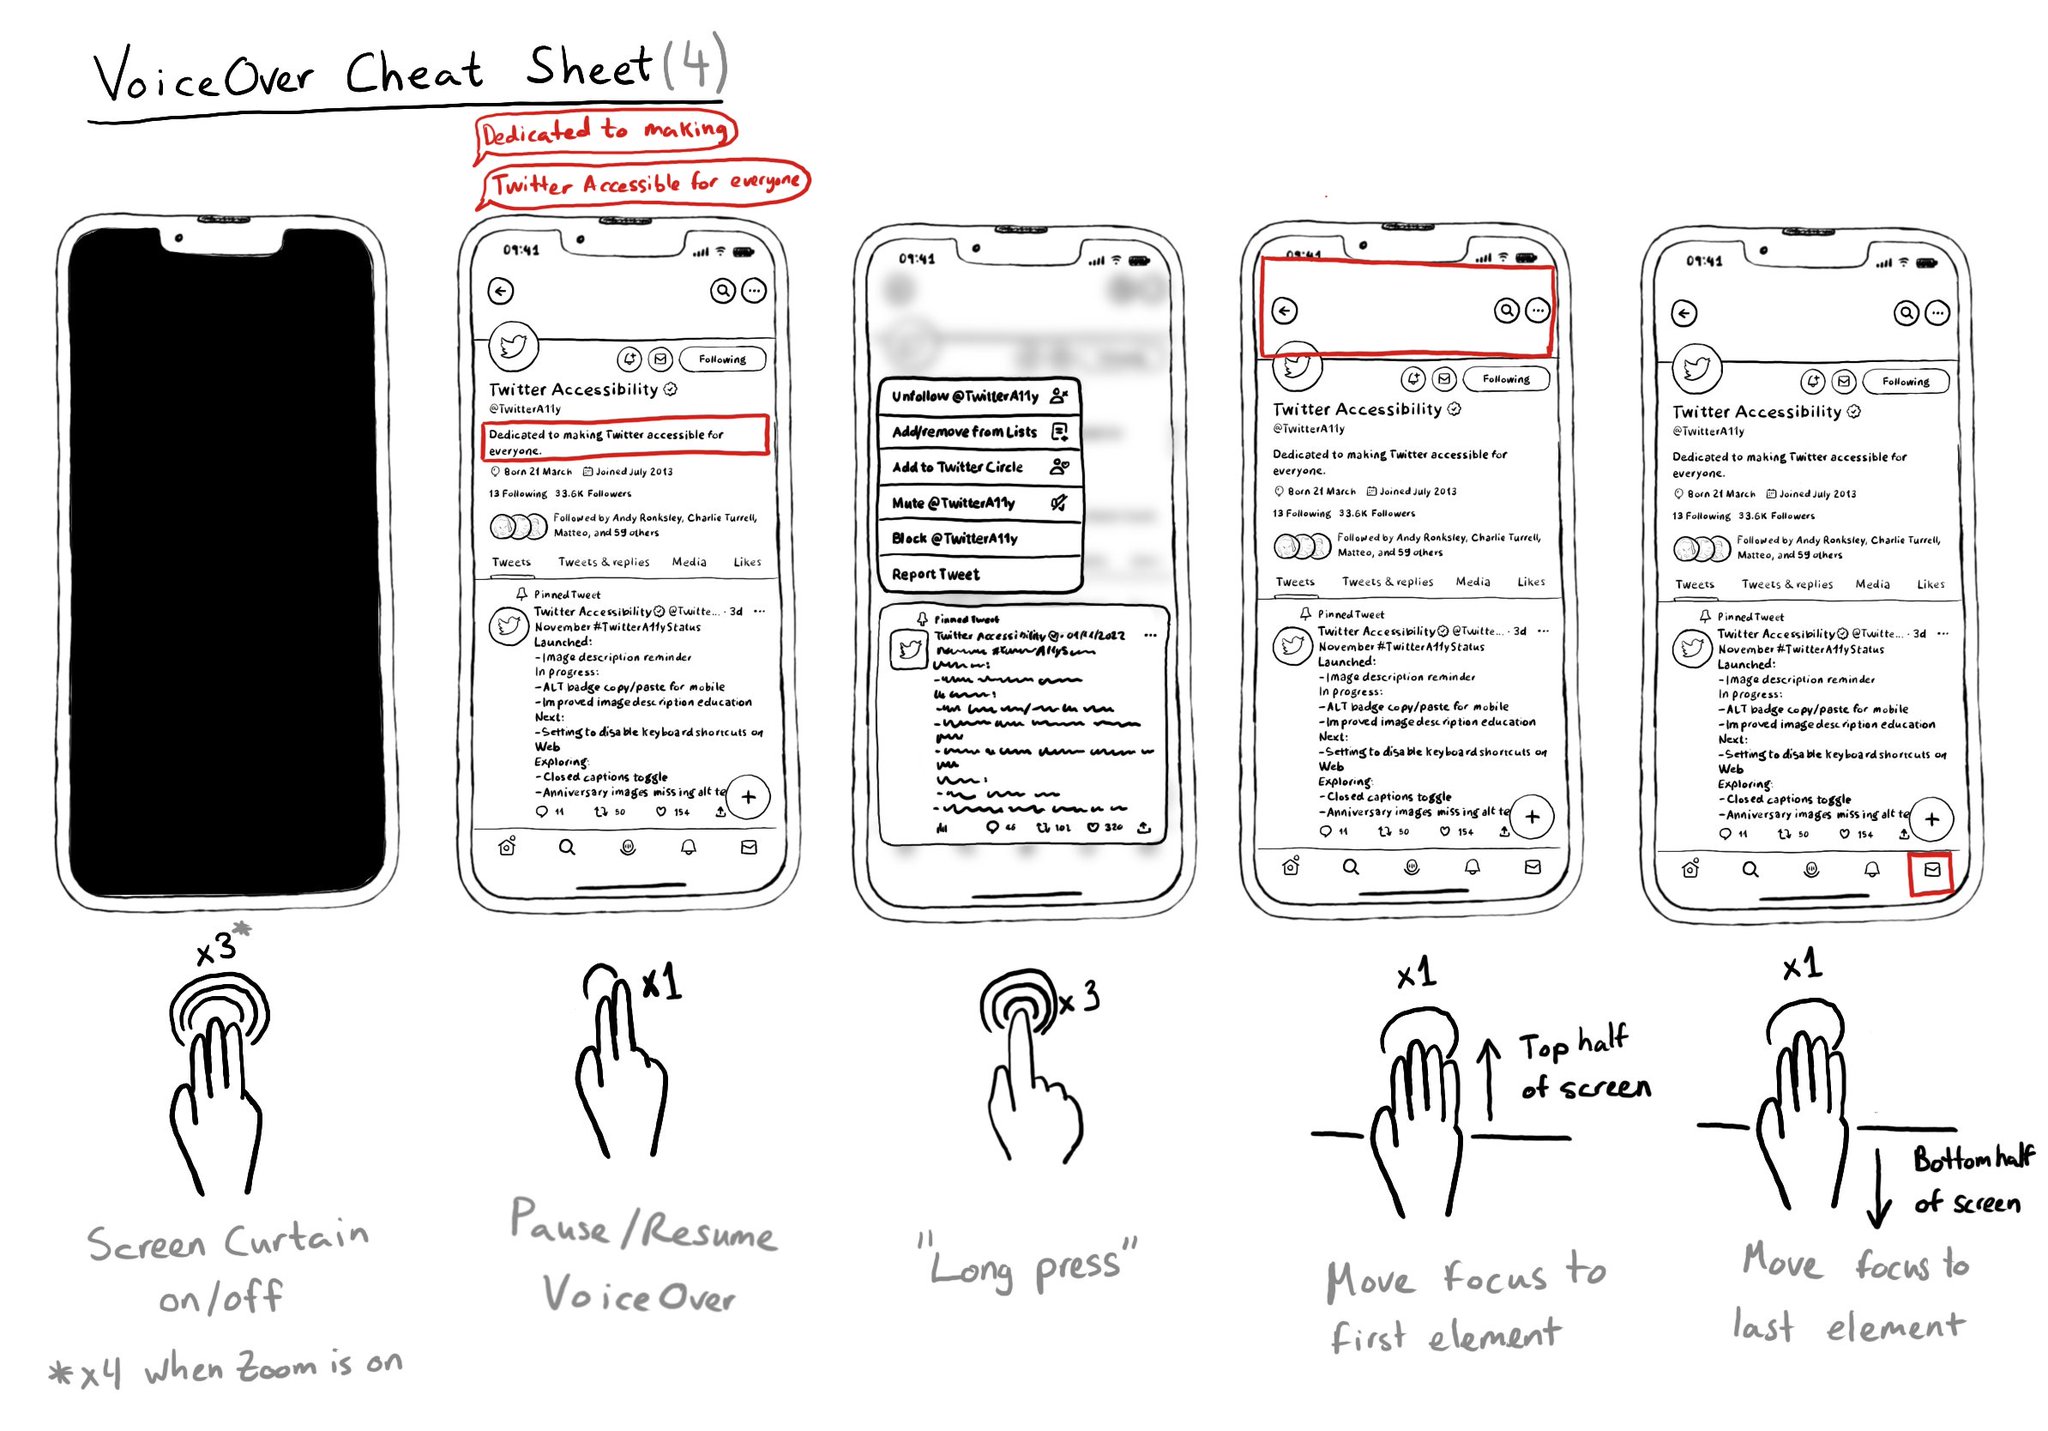
It is useful to know these VoiceOver gestures to activate/deactivate Screen Curtain, pause/resume VoiceOver, easily simulate a long press for opening context menus, or quickly move the cursor to the screen's first or last elements.
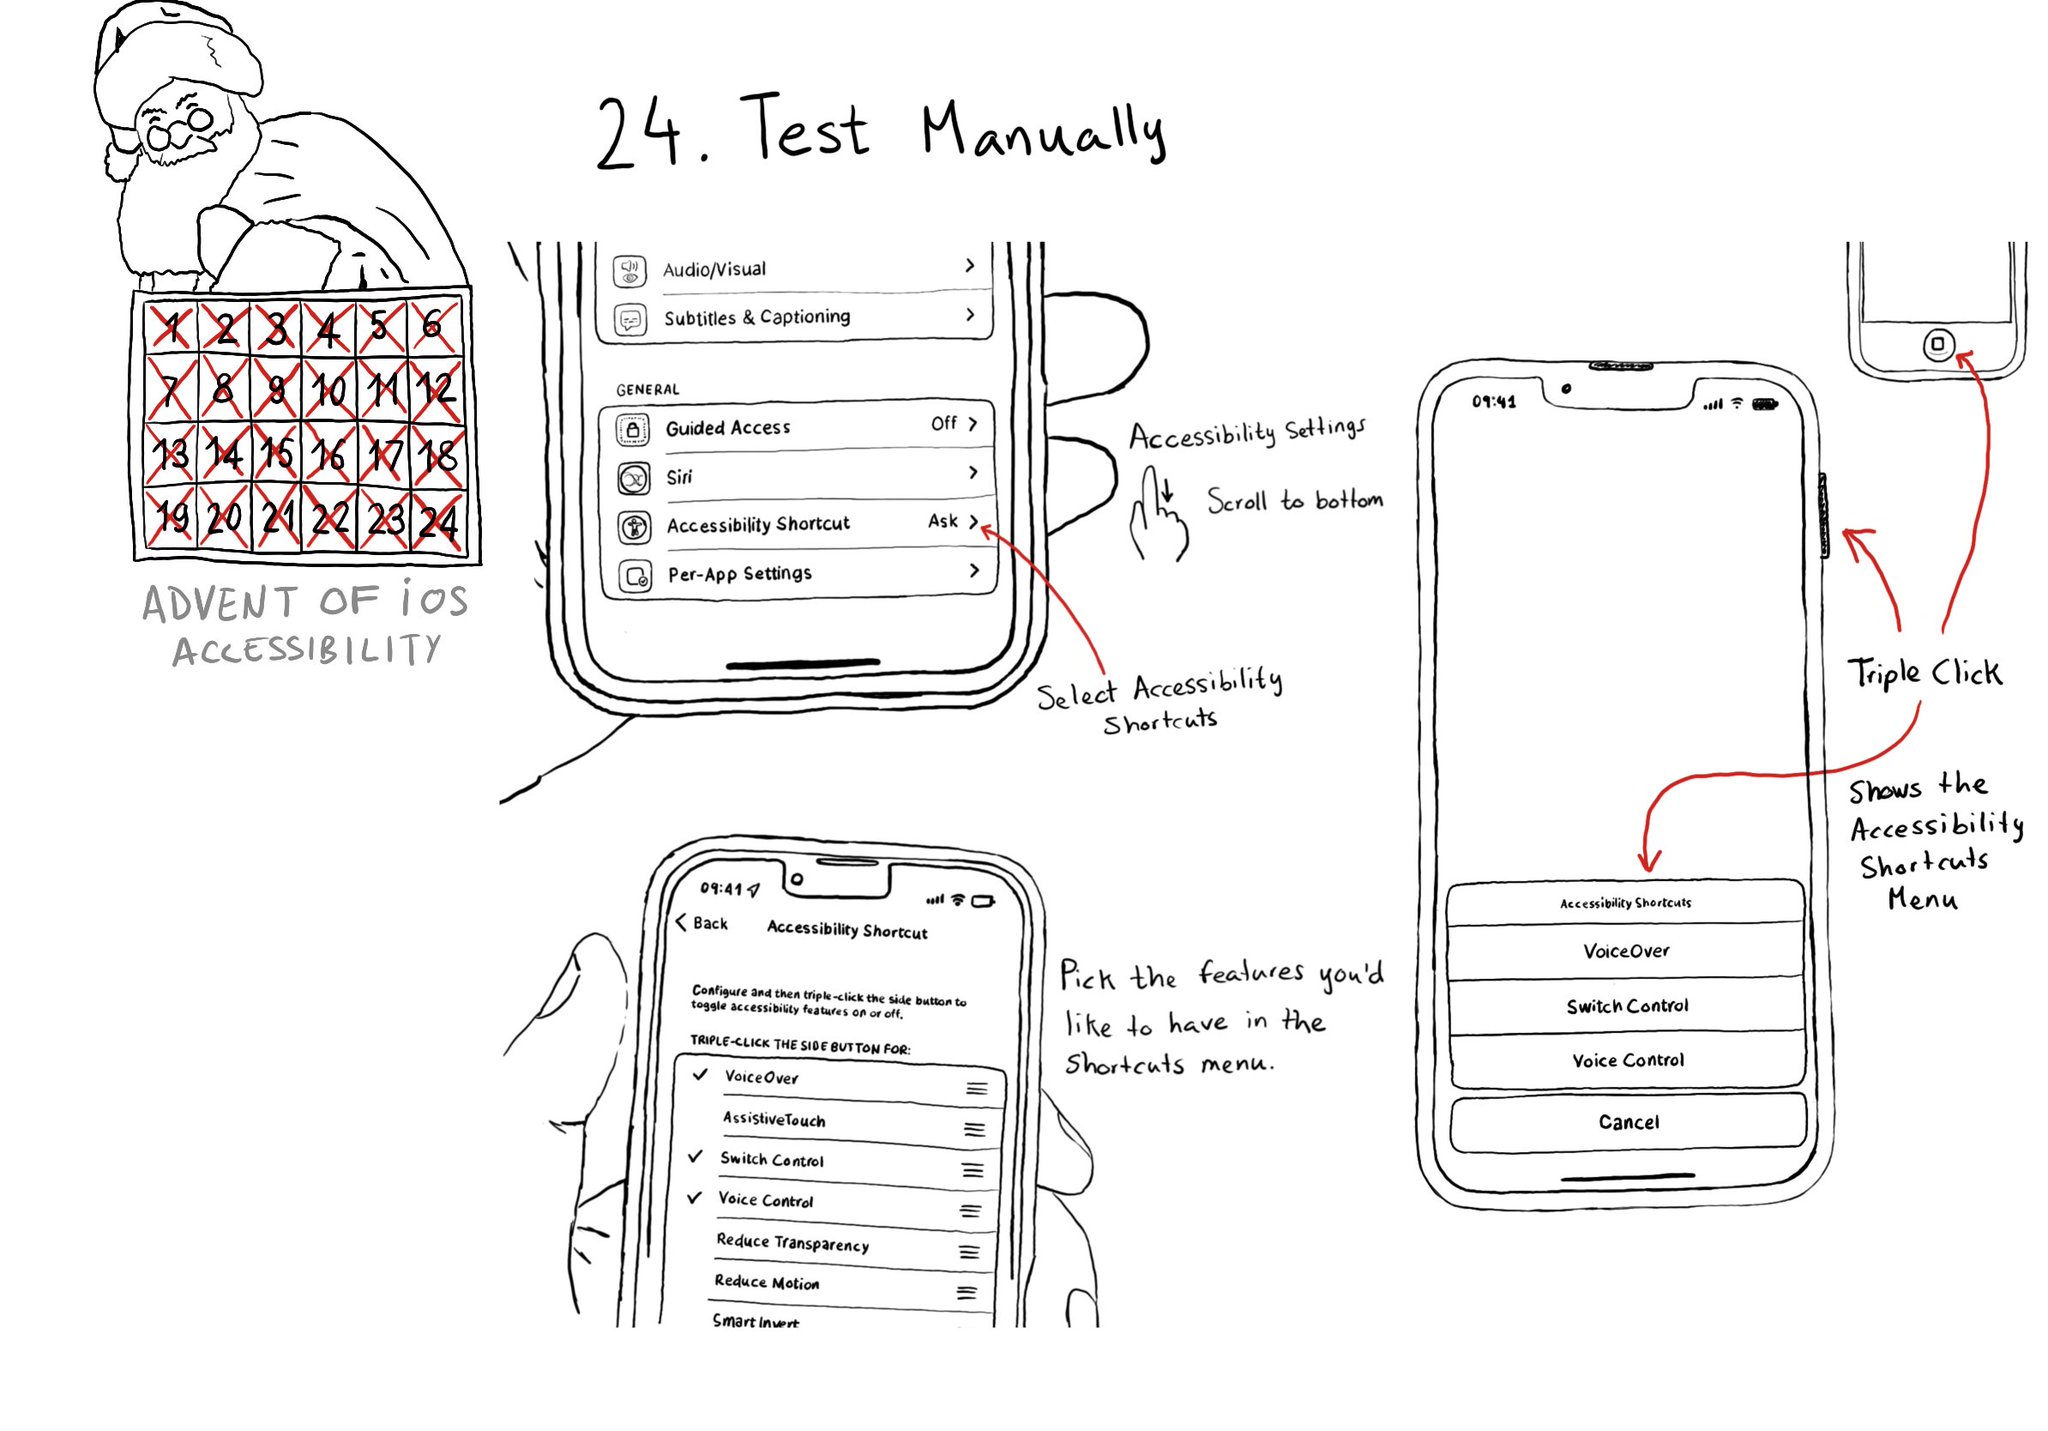
Test manually. Familiarise yourself with different assistive technologies. I find it useful to start with VoiceOver but check out Voice Control, Full Keyboard Access, and others... Remove friction, configuring shortcuts can help. Merry Christmas!
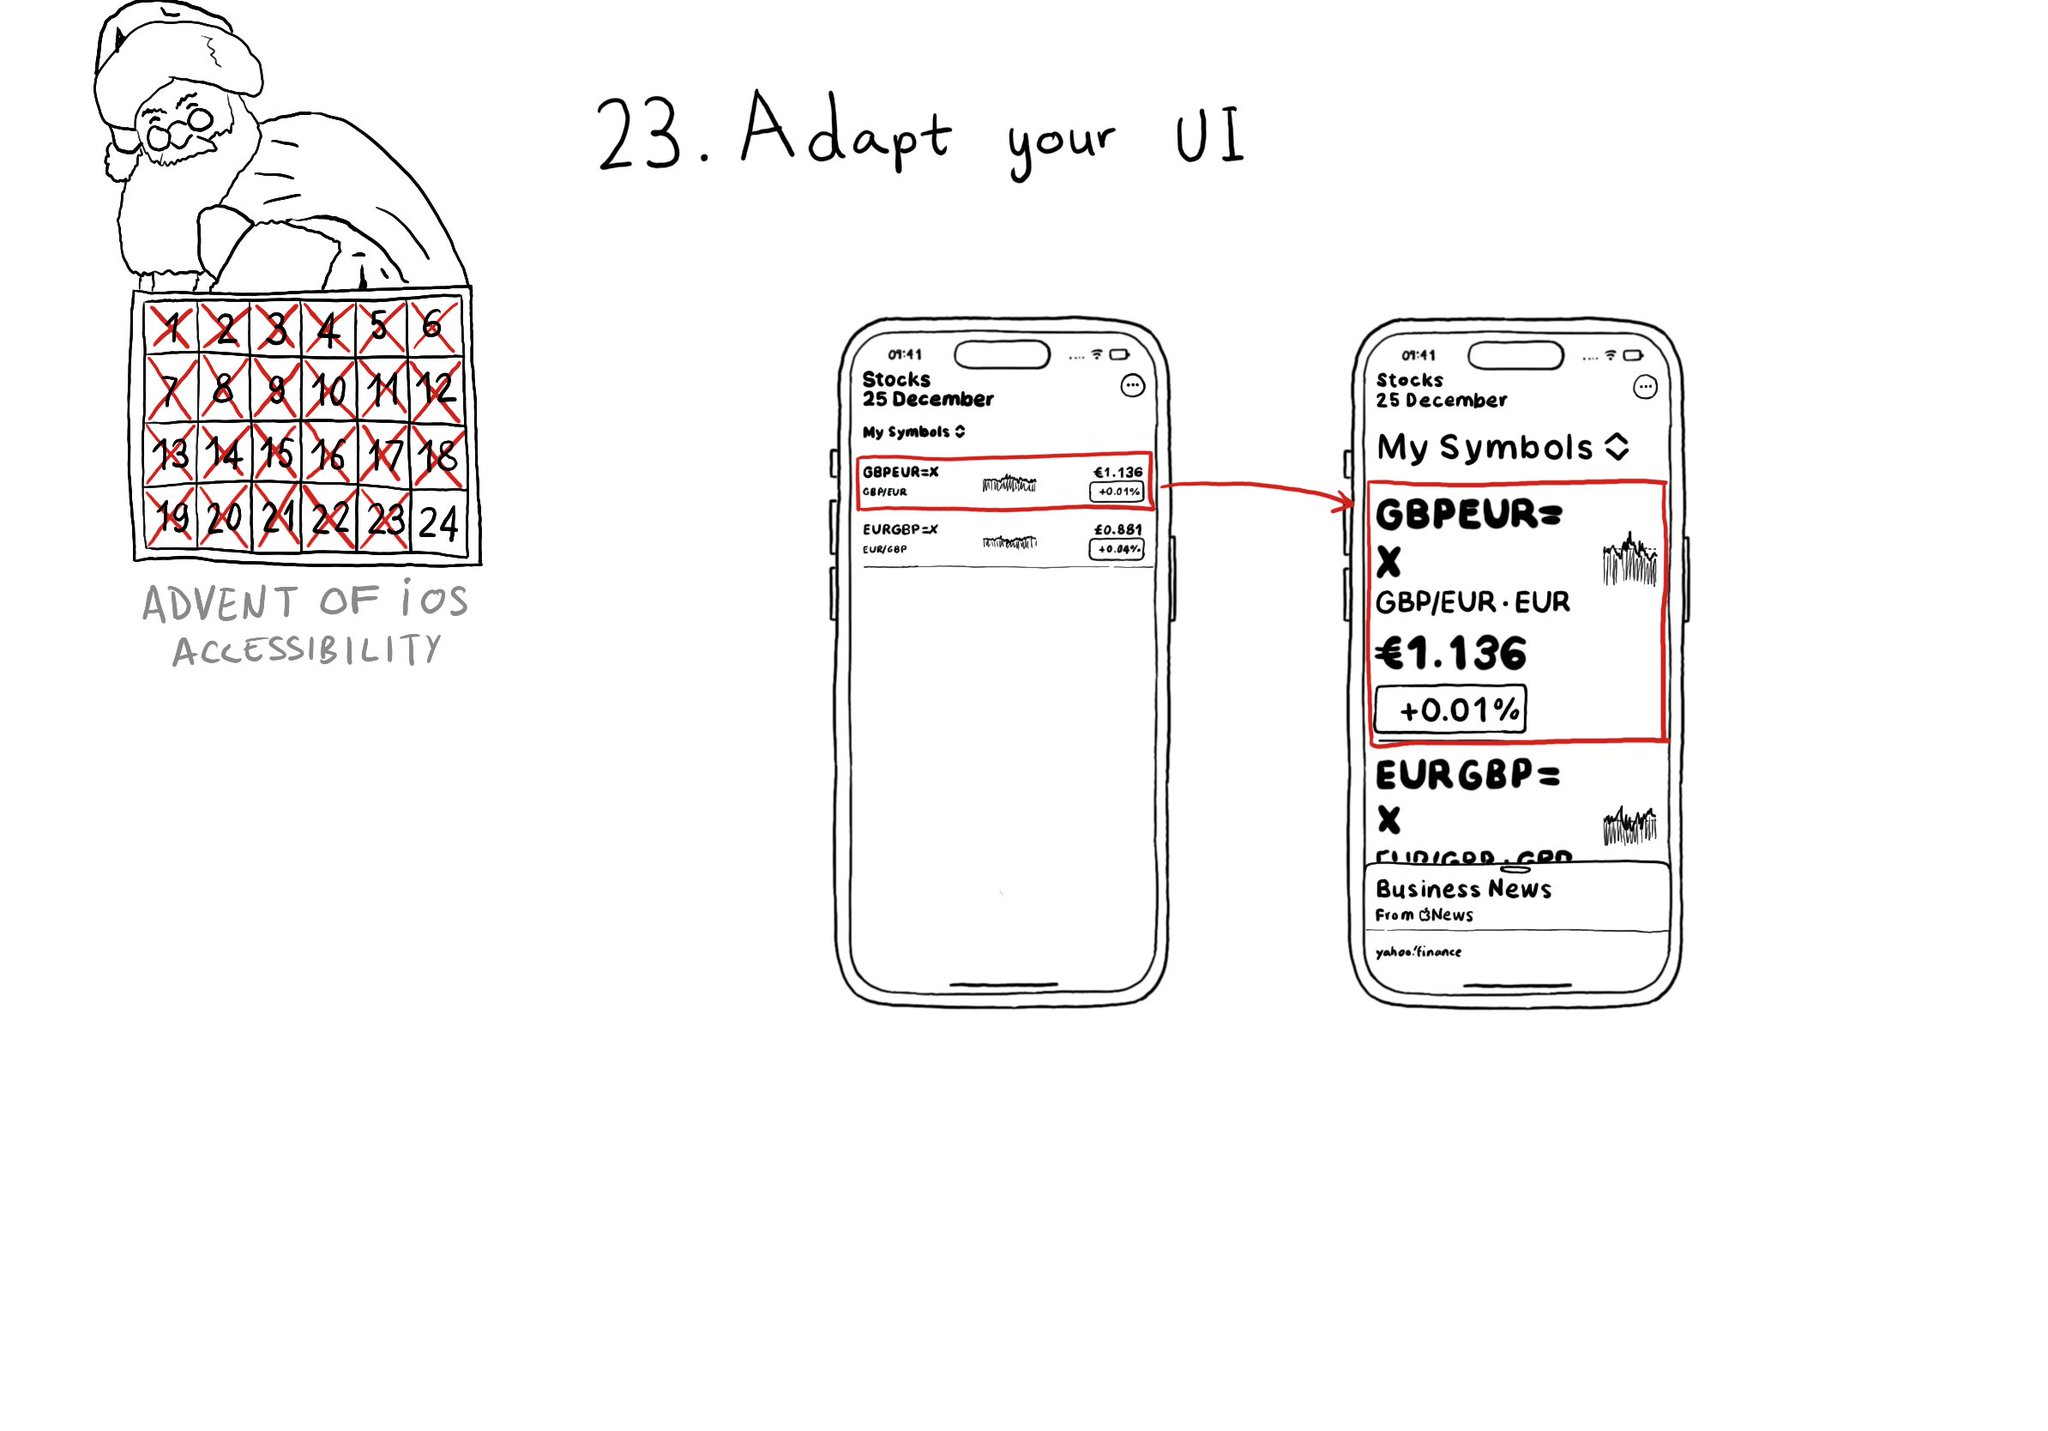
Sometimes your UI will just not scale for large text sizes. Simple changes, for large sizes, like disposing elements vertically instead of horizontally, reducing the number of columns, and allowing more lines of text, can do the trick most times.
Showing 1-15 of 230 posts