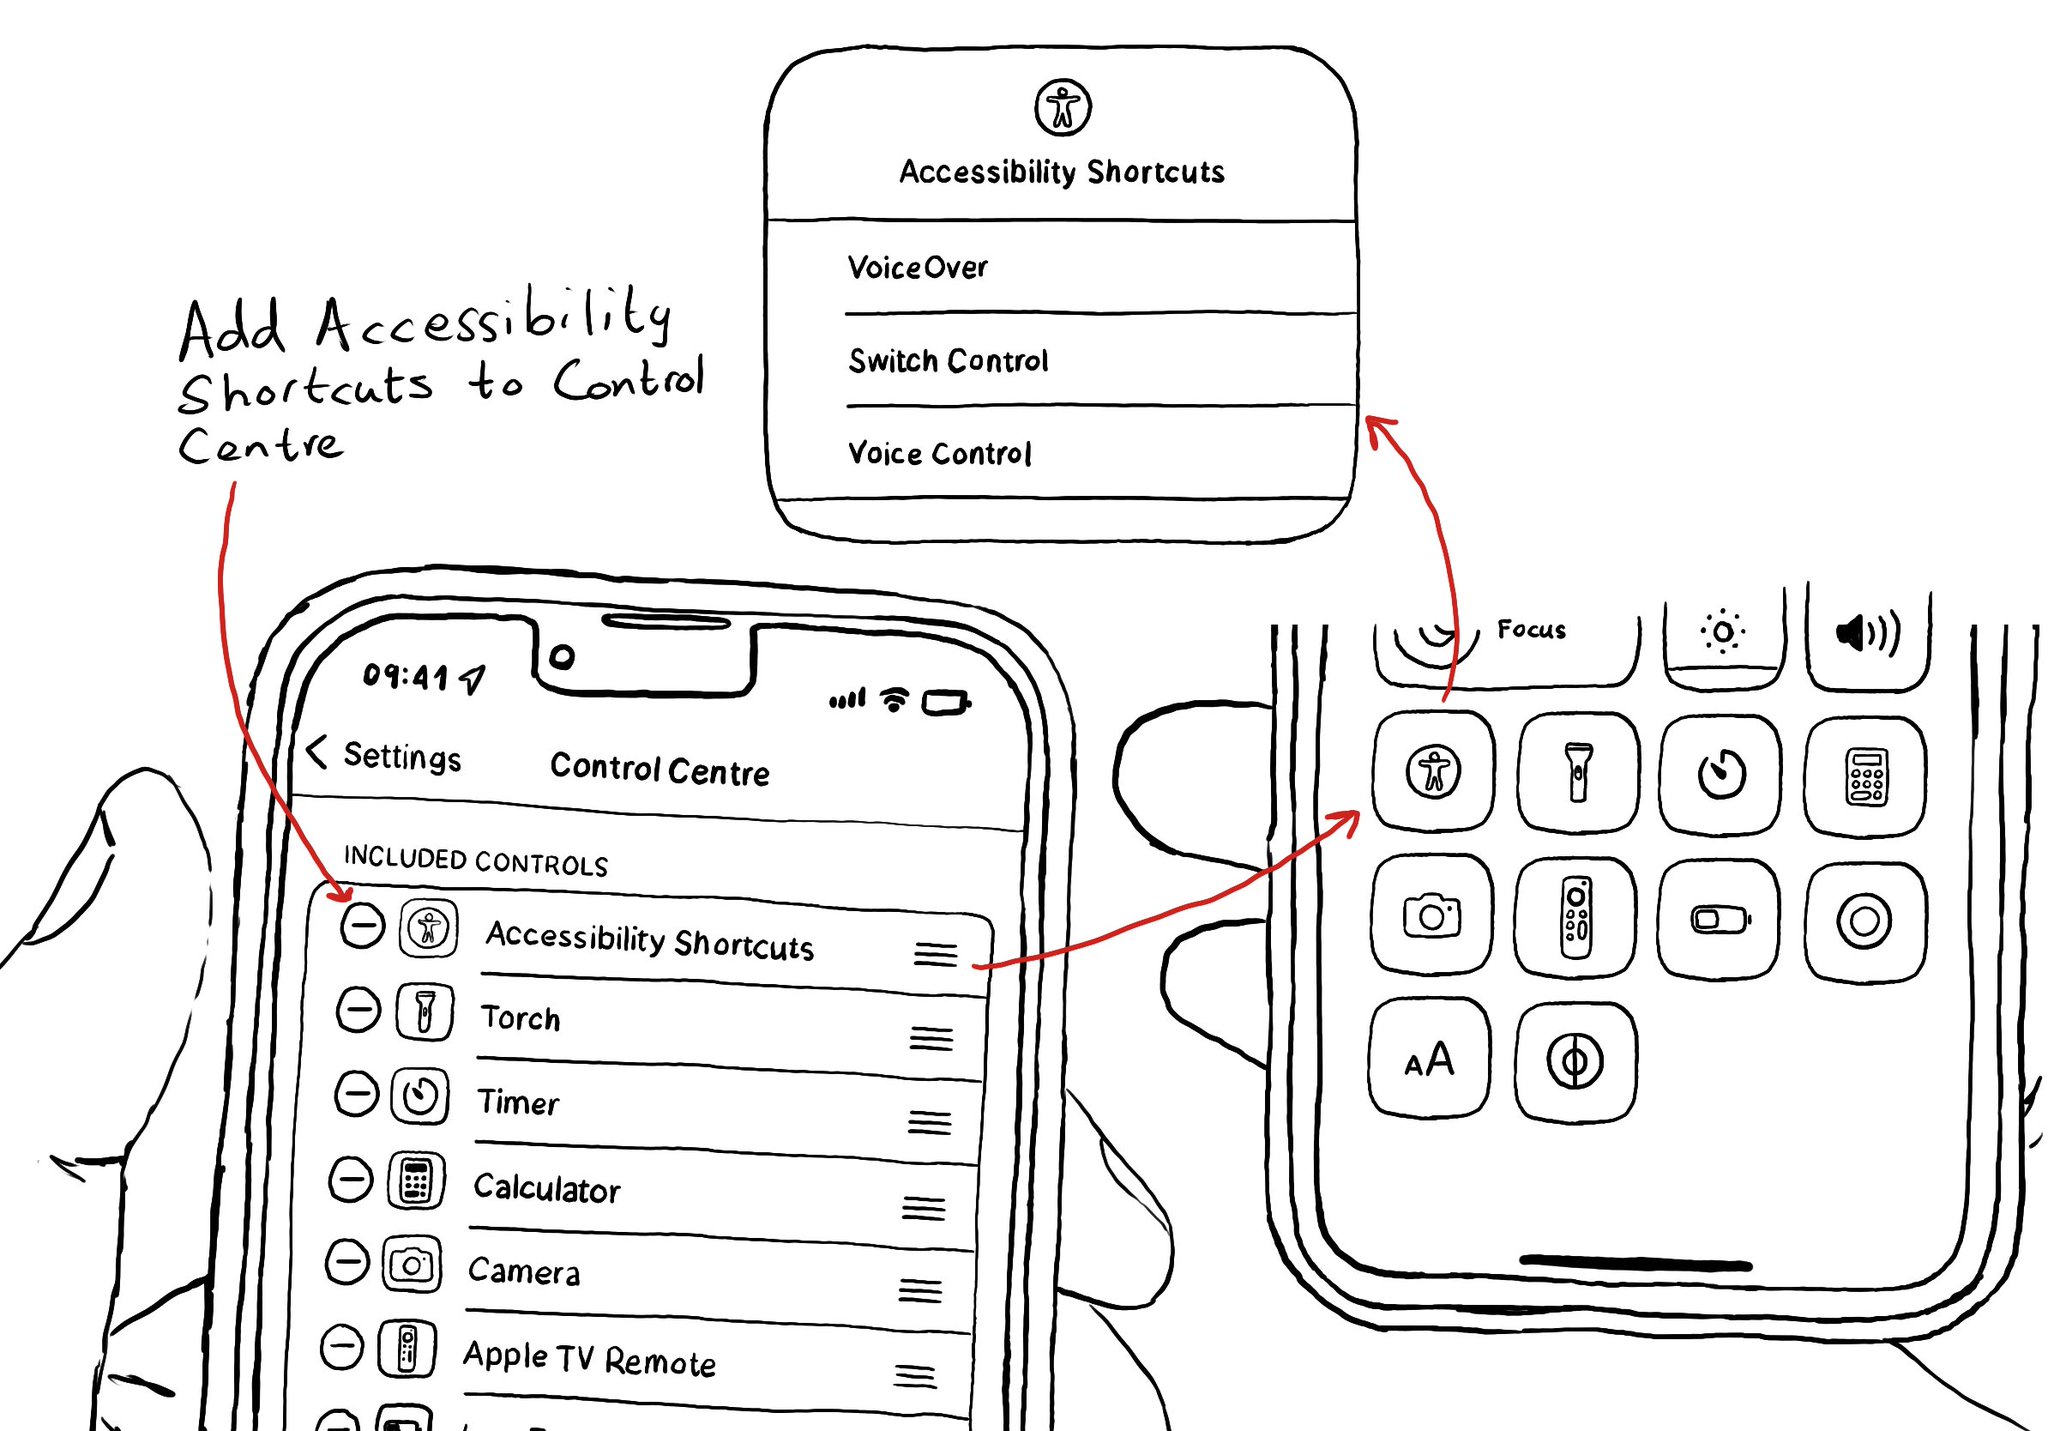
You can add your Accessibility Shortcuts to Control Centre too. One more quick access point and one more reminder to get you testing often and quickly.

How to enable Accessibility shortcuts:

https://x.com/dadederk/status/1583519154165800960?s=61&t=fK9Muzu2MyFEeJLVQZcJg

Go to Settings, Control Centre. Check if Accessibility Shortcuts are in your Included Controls. If not, select the add option for it. Once you do it, you'll find an accessibility button in Control Centre. Selecting it will show a menu with all your Accessibility Shortcuts.

You may also find interesting...

Check isReduceTransparencyEnabled to lower transparency. A great example is Spotlight. Not only transparency is removed but it keeps the main color of the background, it feels personalized and contextual but reduces noise and improves contrast.

When implementing a UISlider, it is a good idea to consider how much the slider value should change when swiping up/down to adjust it. It might not always make sense to do it in 10% increments, which is the default behaviour. Could be because the value at those intervals doesn't make sense, or feel random, or because it wouldn't provide the user with a fine enough control being able to go through the whole slider in just 10 swipes. It user will still be able to adjust the slider to any value by double tapping and holding and then moving the finger left or right, bypassing VoiceOver gestures. VoiceOver announces the new value as it changes.

To capture the gesture, you can override the accessibilityPerformEscape() function. In there you can dismiss your view, and return true if you could successfully handle it. https://developer.apple.com/documentation/objectivec/nsobject-swift.class/accessibilityperformescape()

Created in Swift with Ignite.

Supporting Swift for Swifts