Meet the rotor. A menu that you activate (and change options) by rotating two fingers on the screen. It lets you select different navigation modes and customizations. Like navigating through headings or changing VoiceOver’s speaking rate.
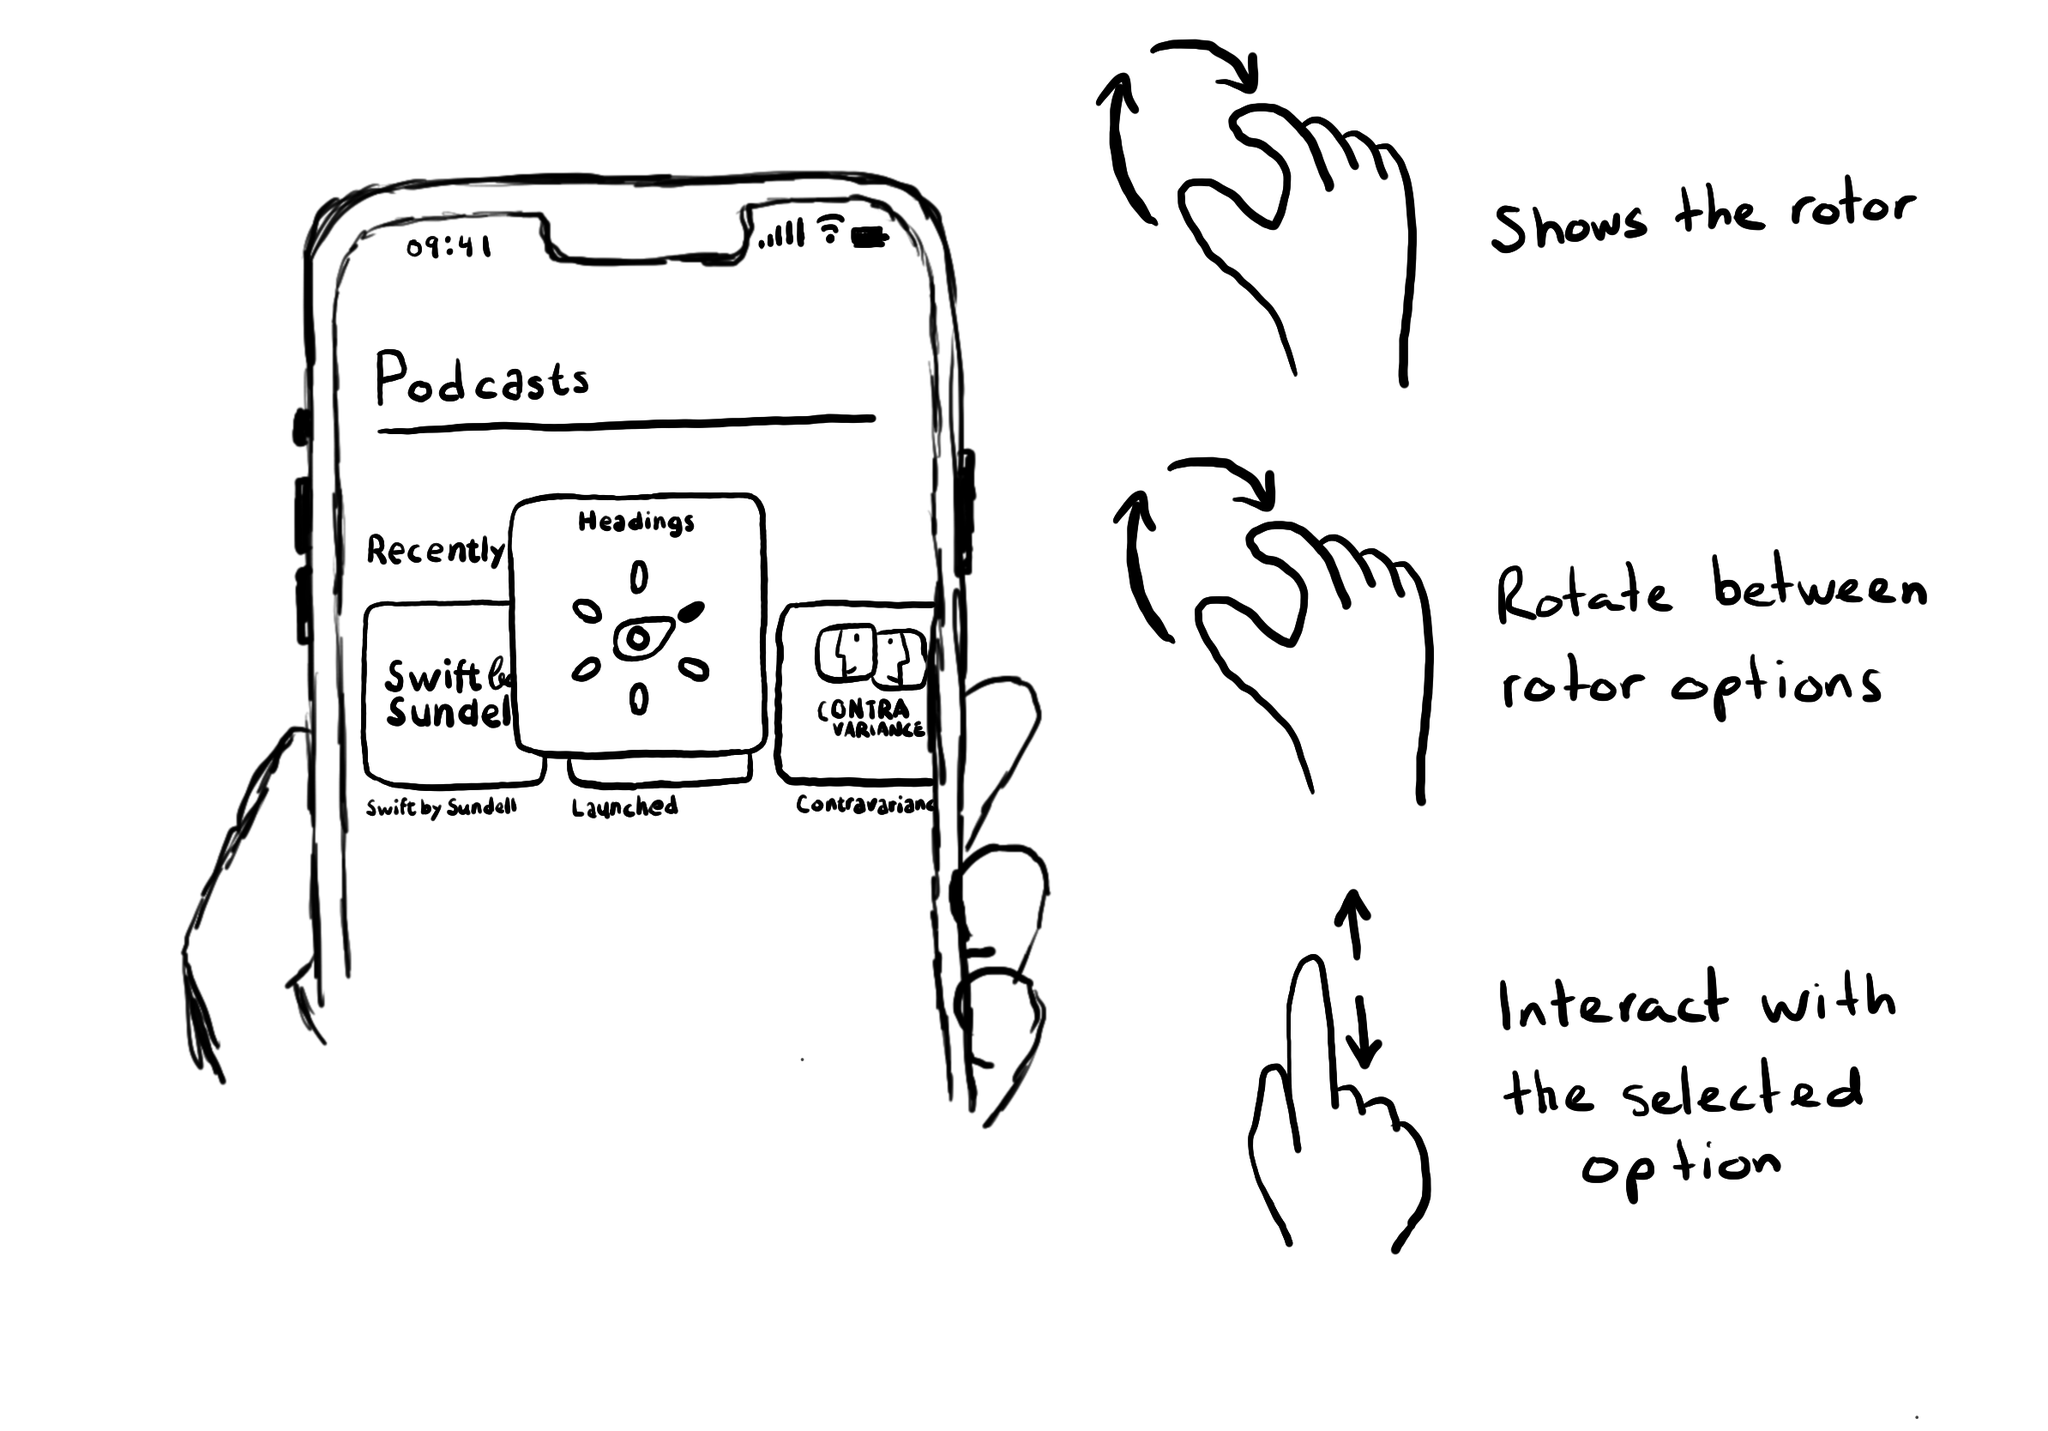
Meet the rotor. A menu that you activate (and change options) by rotating two fingers on the screen. It lets you select different navigation modes and customizations. Like navigating through headings or changing VoiceOver’s speaking rate.
Some of you have asked me how you can support what I do. This would really help, and would be hugely appreciated:
Find these posts useful? Share them at work, on social media, or with anyone that might find them interesting. Let's spread the word!
Check out any of my apps or games: Xarra!, RetroRapid!, or Mestre!.
A download and a review go a long way. They're free by default. On the App Store, ratings and reviews really help more people discover them.
Finding any of them useful? If so, and if you can afford it, purchasing lifetime access to all features or subscribing lets me buy the coffee that keeps me caffeinated. Caffeine keeps me going to maintain the apps, bring in new features that I hope you'll love, and keep writing.
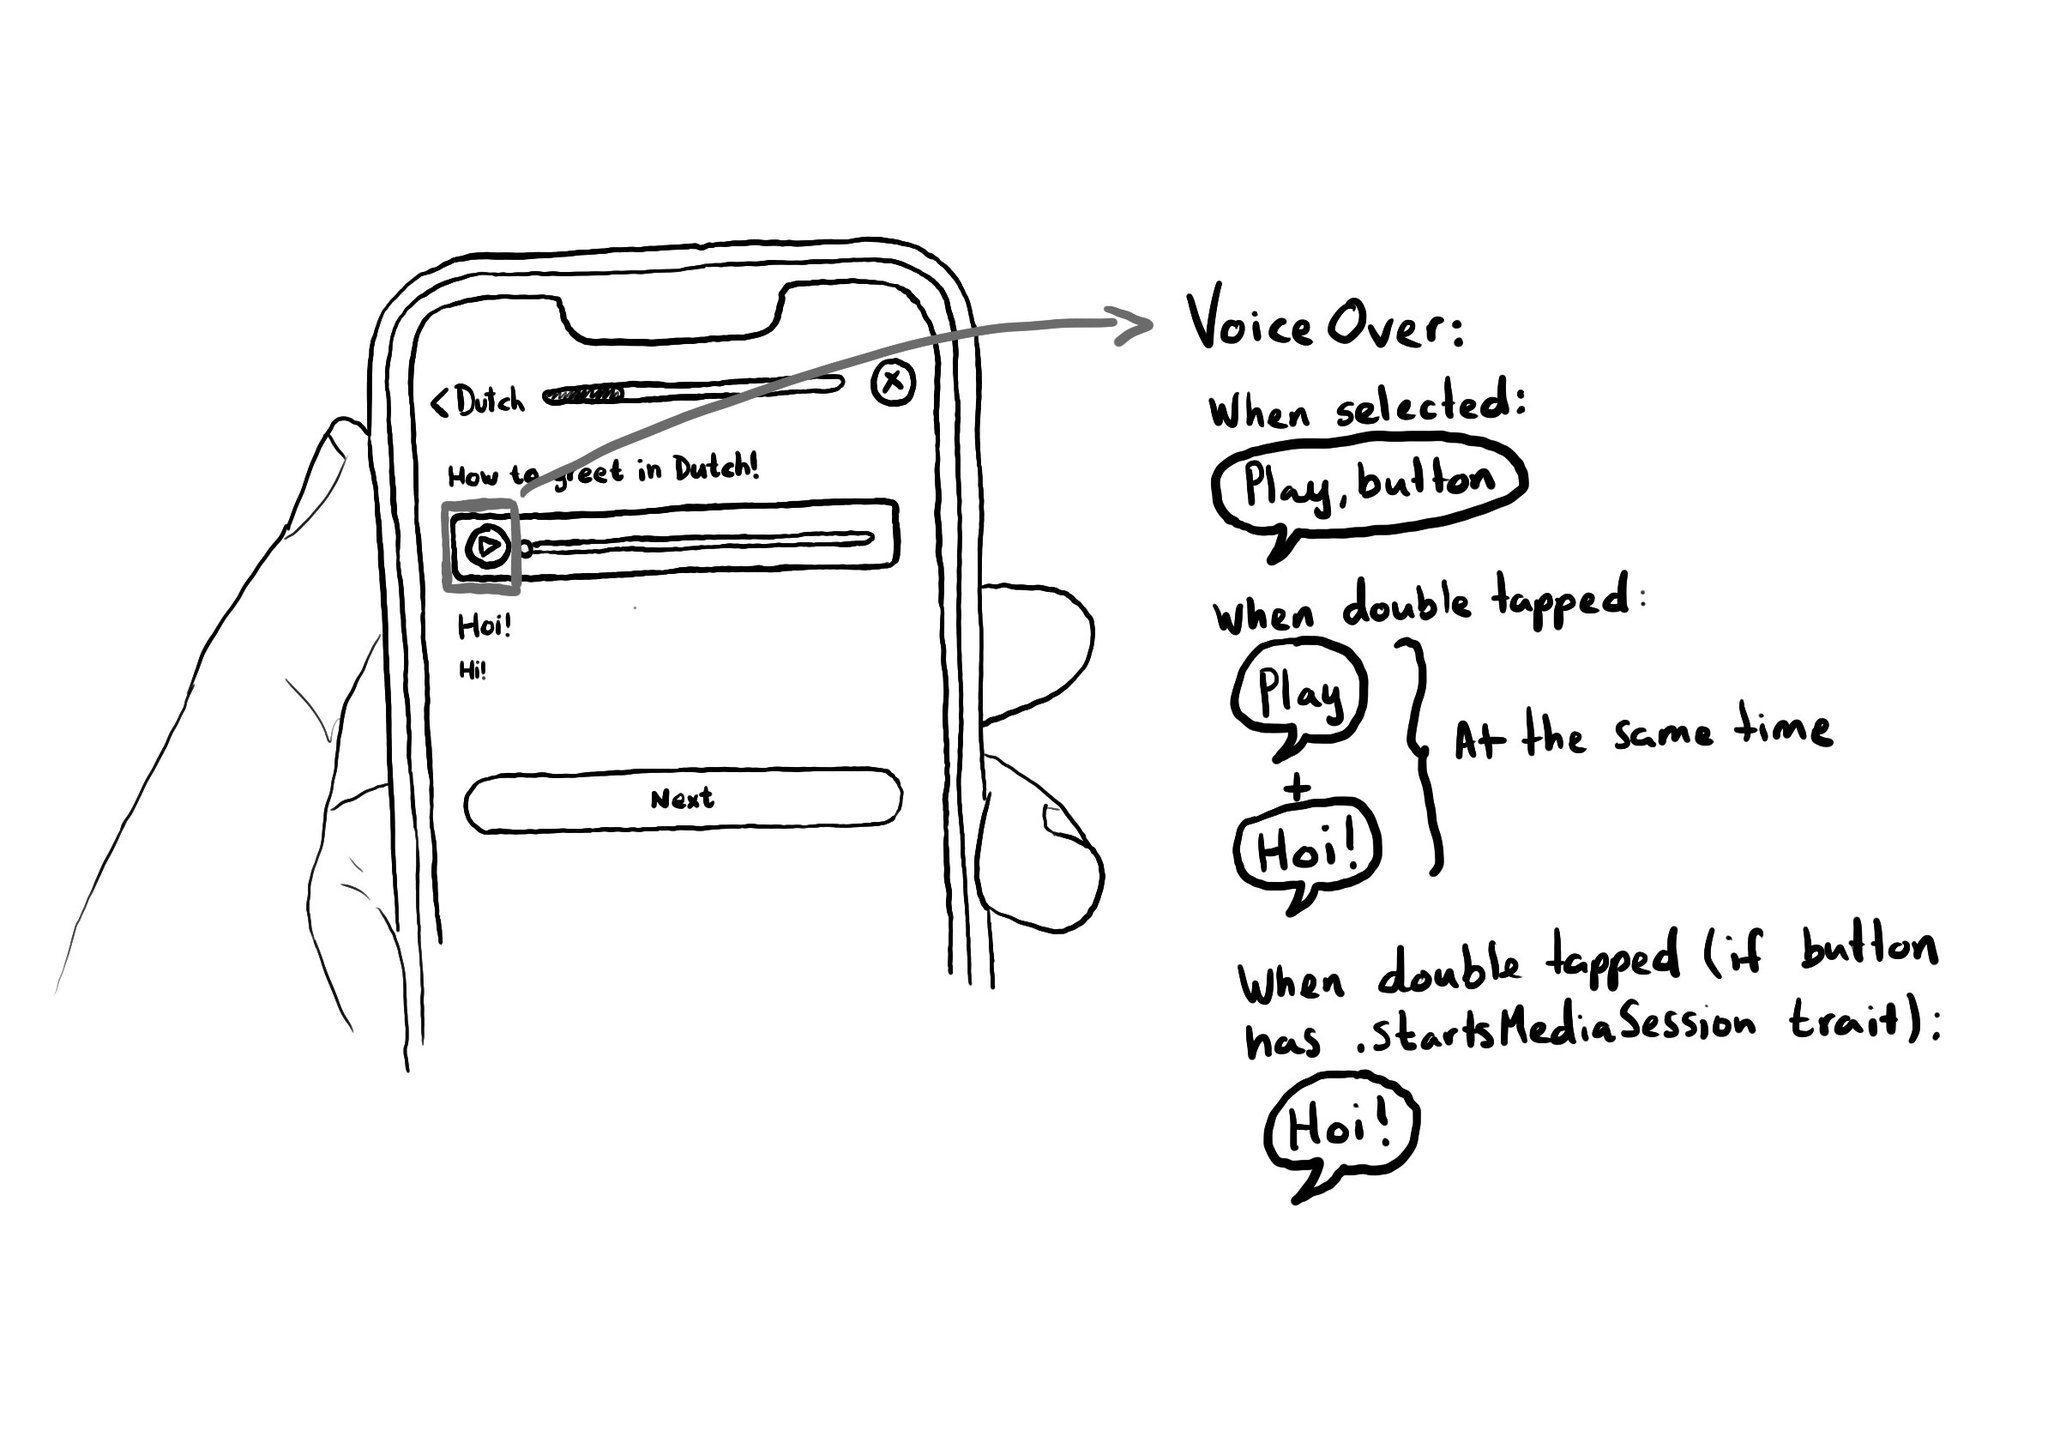
When interacting with a button with VoiceOver, the accessibility label is repeated to the user. If you are playing some audio, it could be difficult to listen to it properly. To avoid that, you can add the .startsMediaSession accessibility trait.

Optimising for navigation by making a view accessible shouldn’t come at the expense of the buttons in it not being accessible. Configuring custom actions will allow the user to access them using the Actions rotor. With the Actions rotor, users can swipe up and down to cycle through all the options, stop at the desired one, and double tap to execute that action. You can configure an array of custom actions. Custom actions can have a name that will be announced by VoiceOver and an action handler or target selector with the code that will be executed. https://developer.apple.com/documentation/objectivec/nsobject-swift.class/accessibilitycustomactions
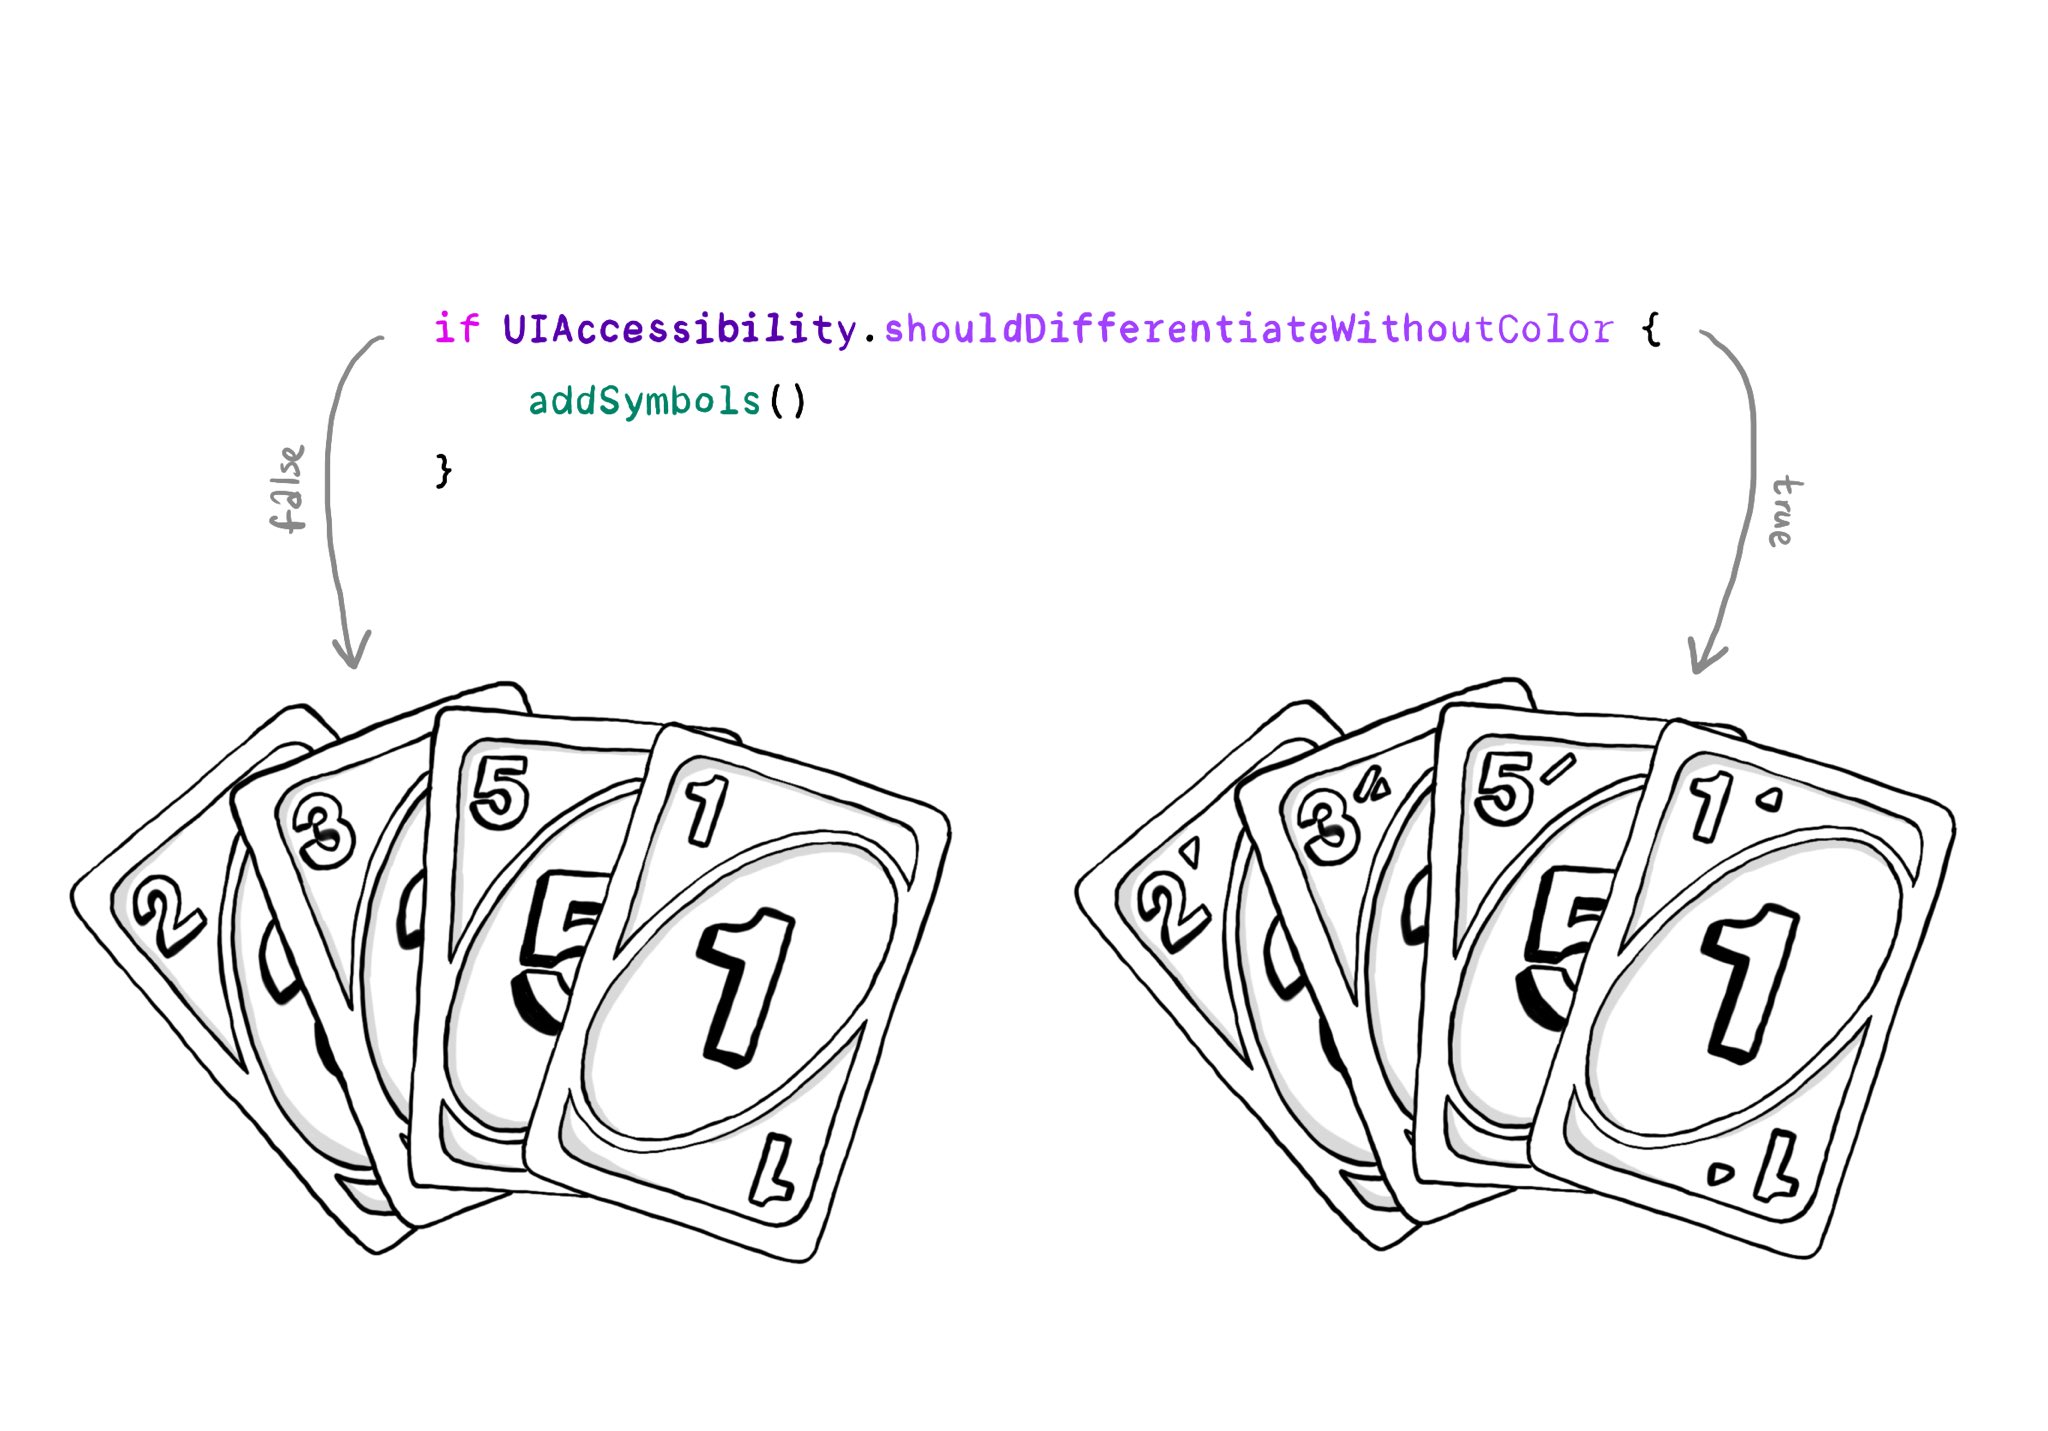
You should convey important information in multiple modes, not just color. If you are still required to do so, at the very least you should complement that info with other modes, like symbols, if the user requested differentiation without color.
Content © Daniel Devesa Derksen-Staats on Accessibility up to 11! is licensed under CC BY 4.0. License details