Tips and tricks to build accessible iOS apps
#365DaysIOSAccessibility
A year-long journey exploring iOS accessibility, one day at a time. Each post shares practical insights, tips, and techniques to make your iOS apps more accessible.
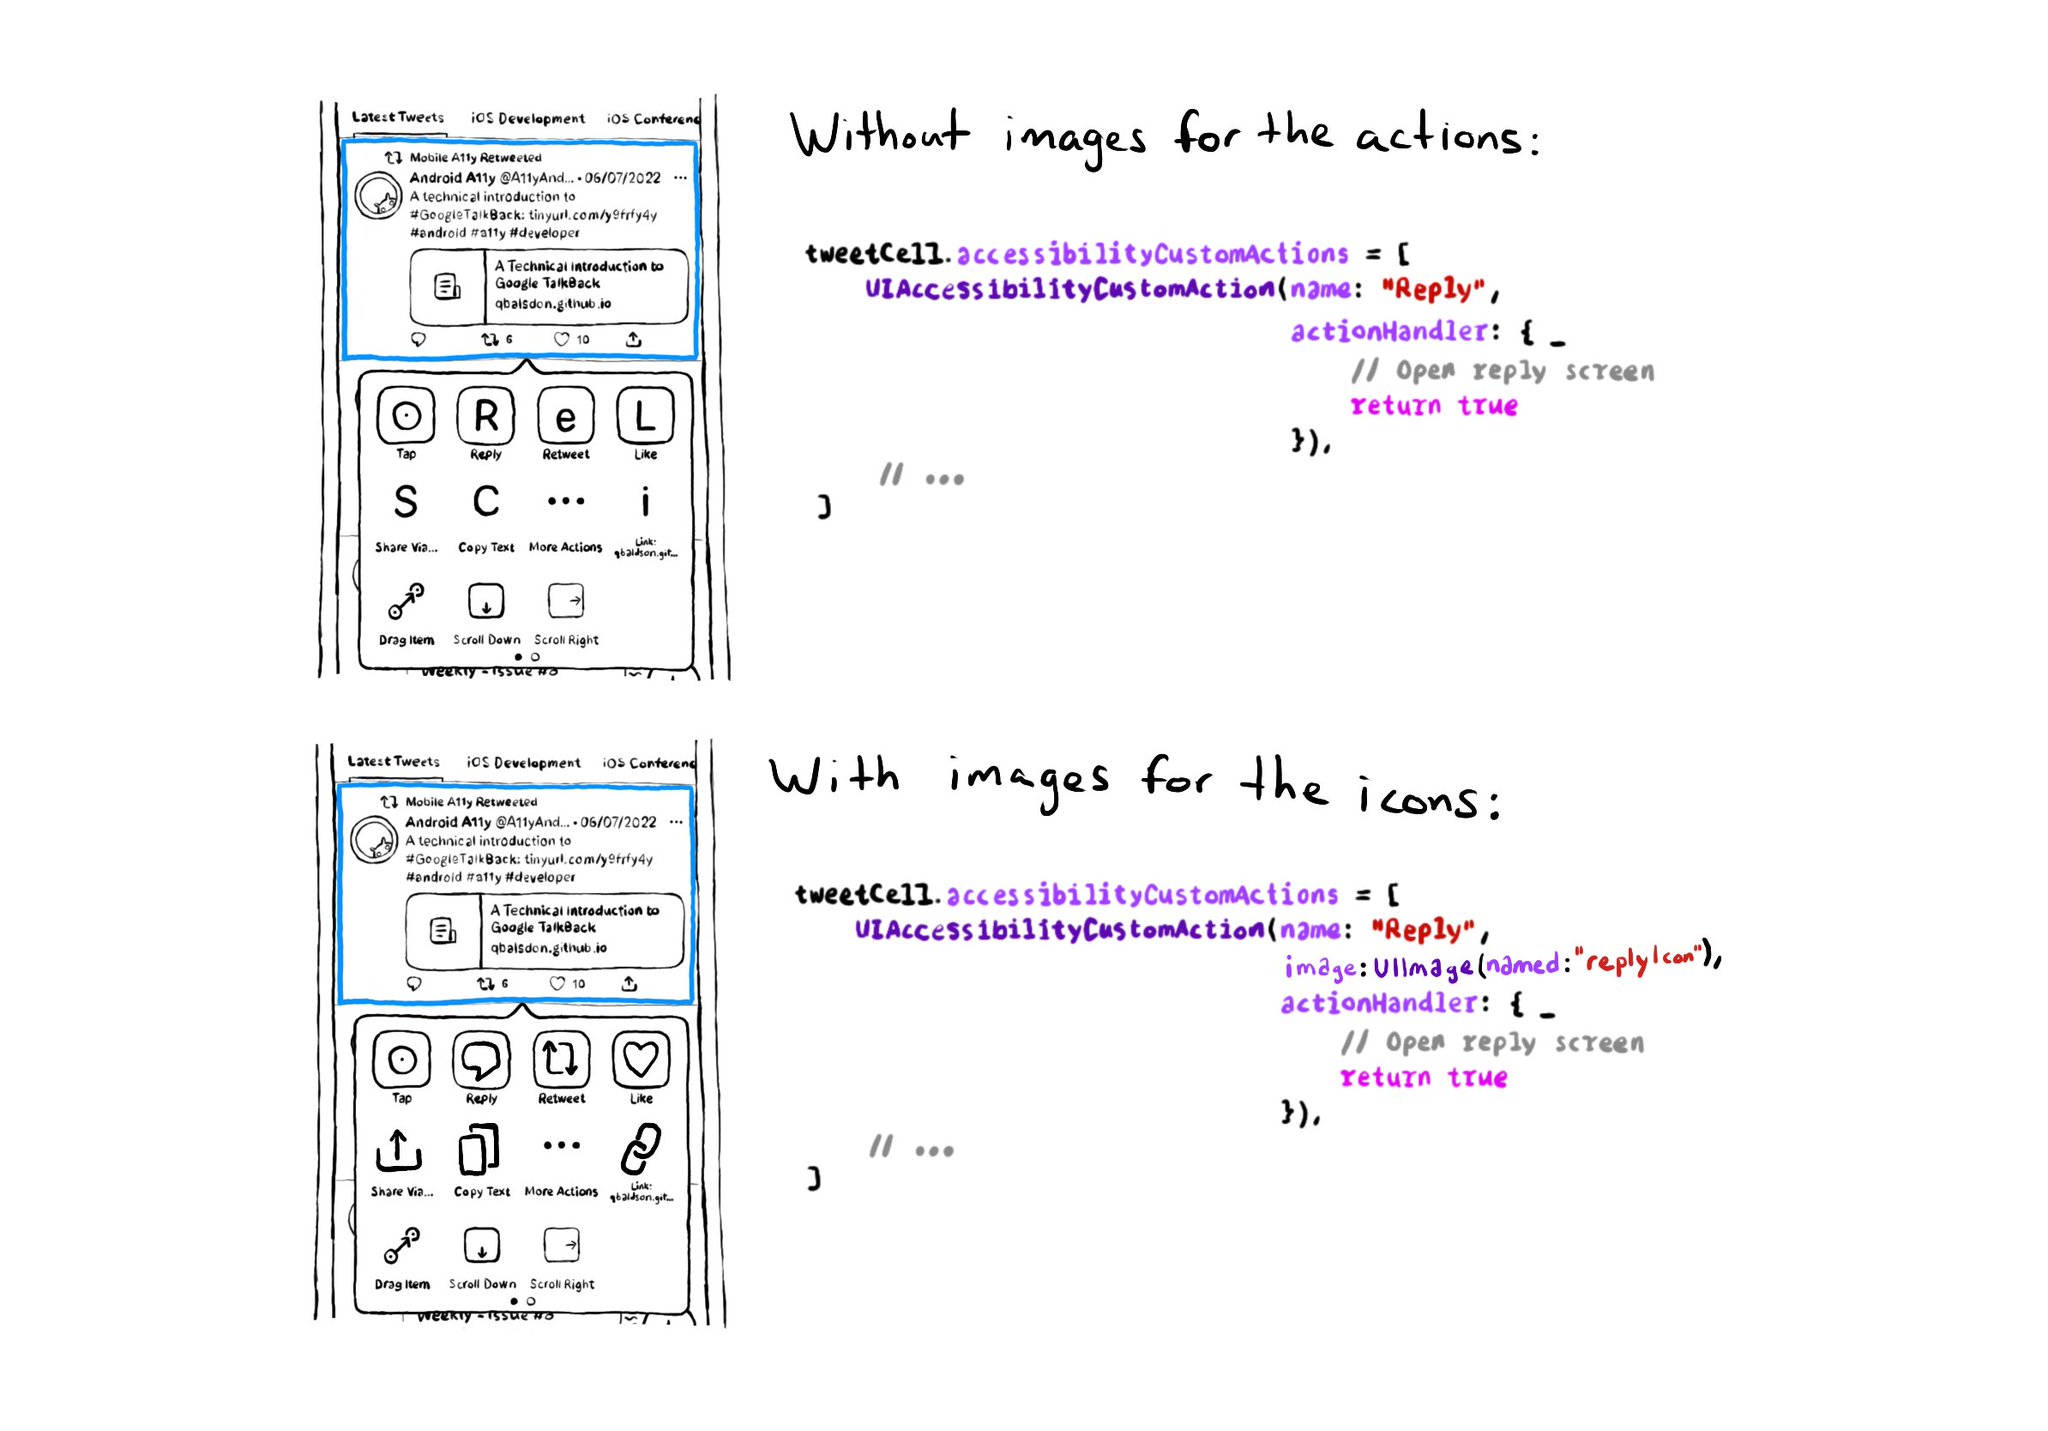
Since iOS 14, UIAccessibilityCustomAction has an initialiser that accepts an image, as well as a name and action handler. Configuring one will make your custom actions easier to spot in the Switch Control menu. https://developer.apple.com/documentation/uikit/uiaccessibilitycustomaction/init(name:image:actionhandler:)
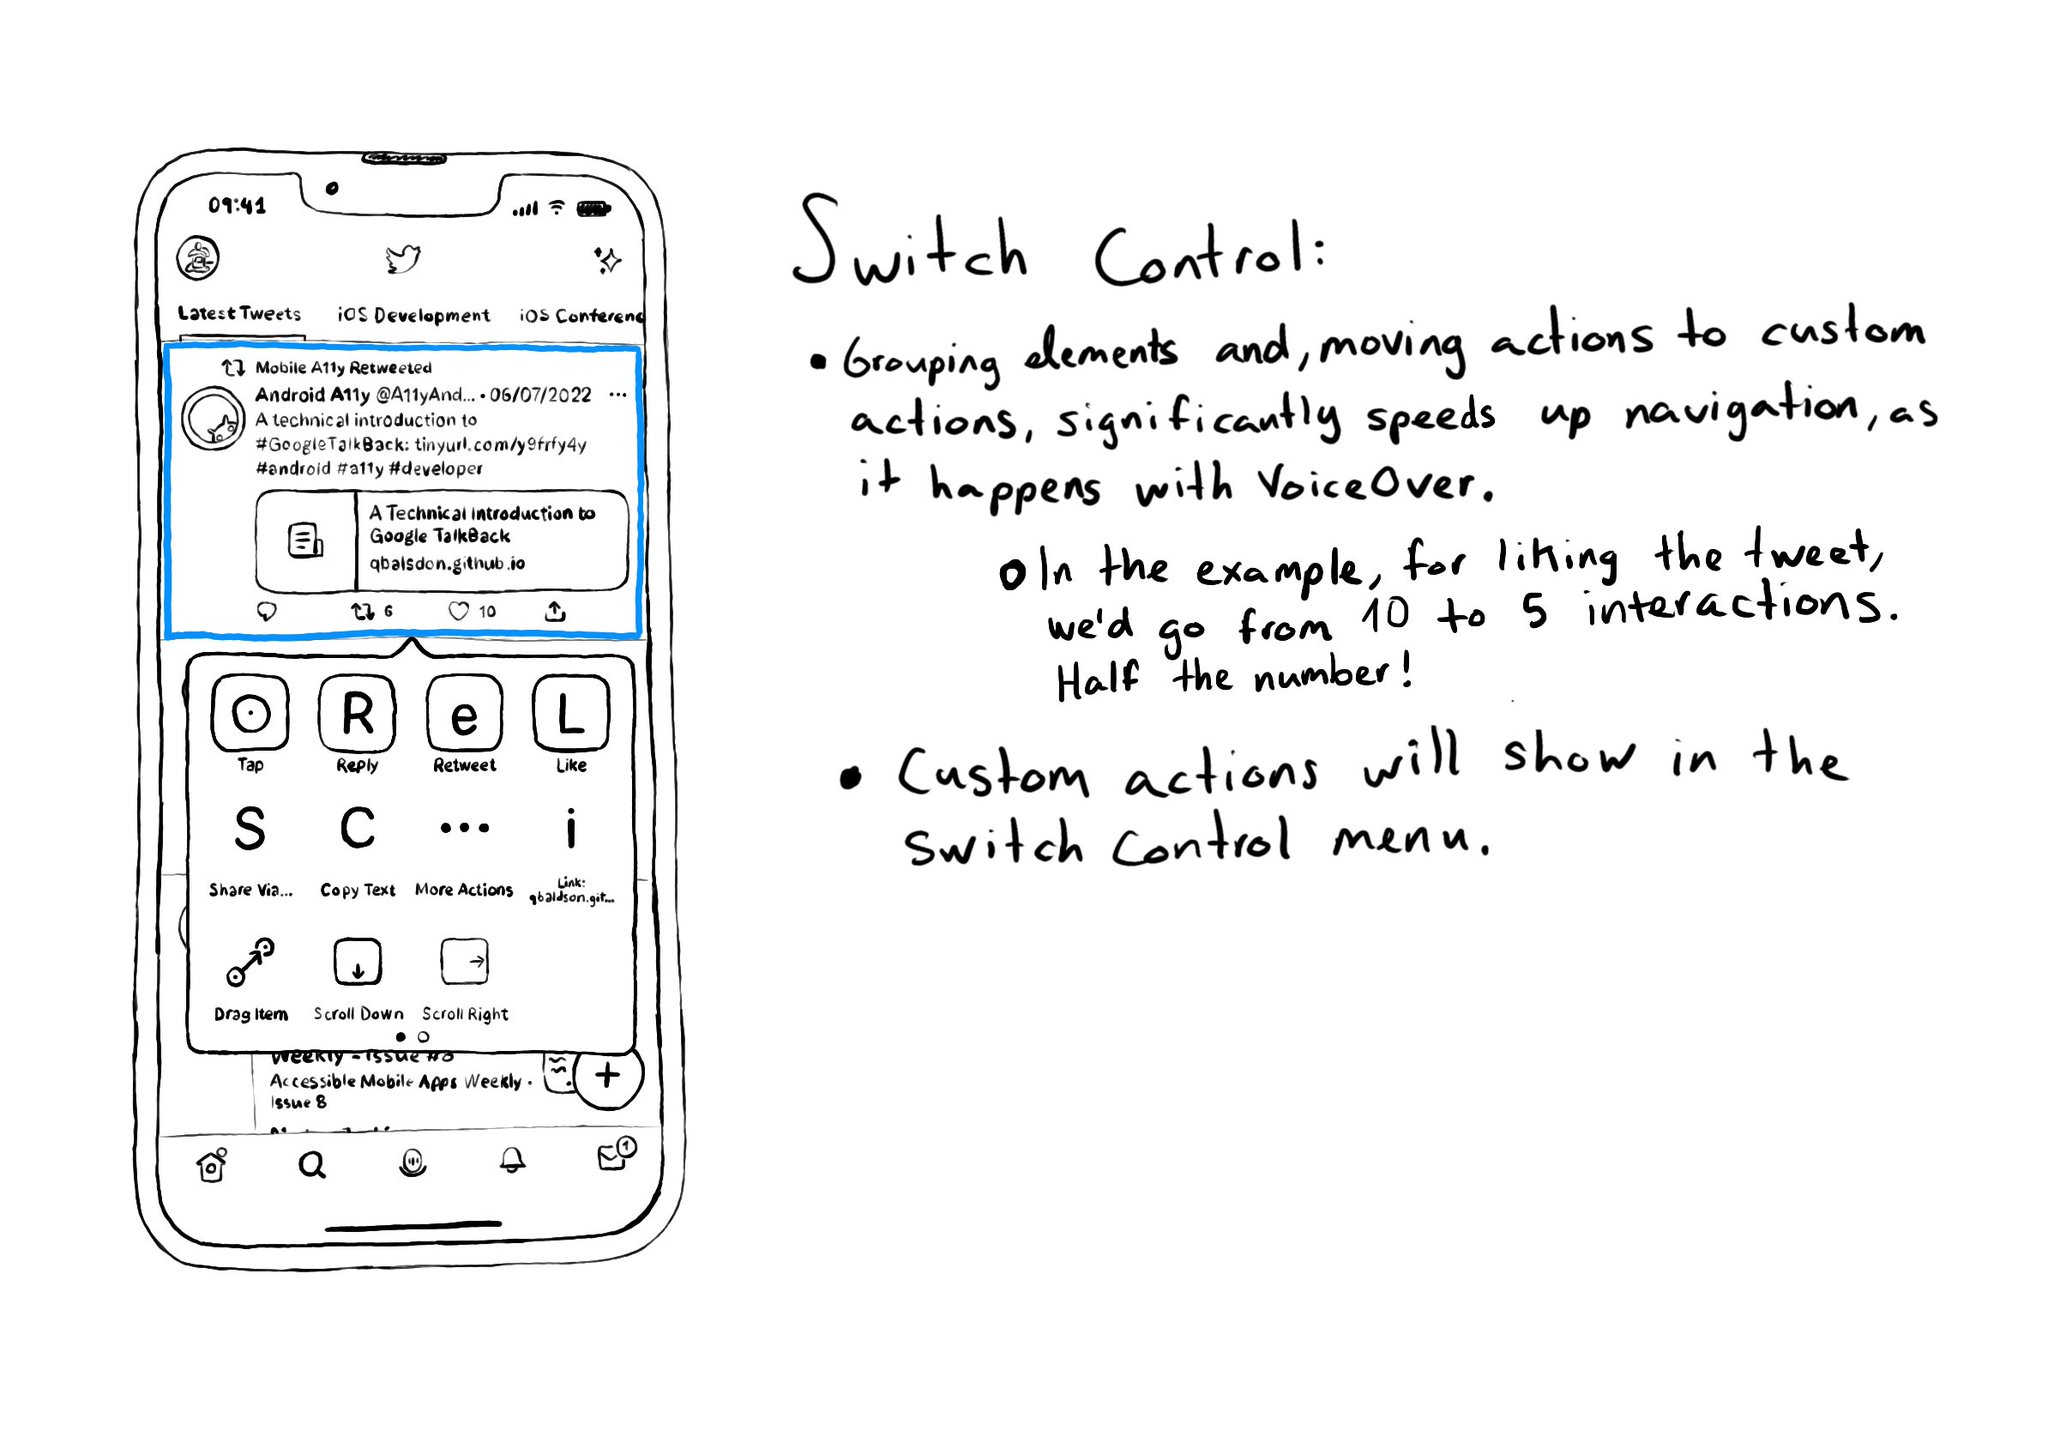
Custom actions work as great on Switch Control as they do in VoiceOver. It makes navigation much, much, faster and you’ll be able to find all those custom actions in the Switch Control menu.
Potential benefits from grouping logical pieces of information and moving buttons to custom actions: reduce redundancy (by removing repetitive controls) and reduce cognitive load (by making easier to know what item will be affected by each action)
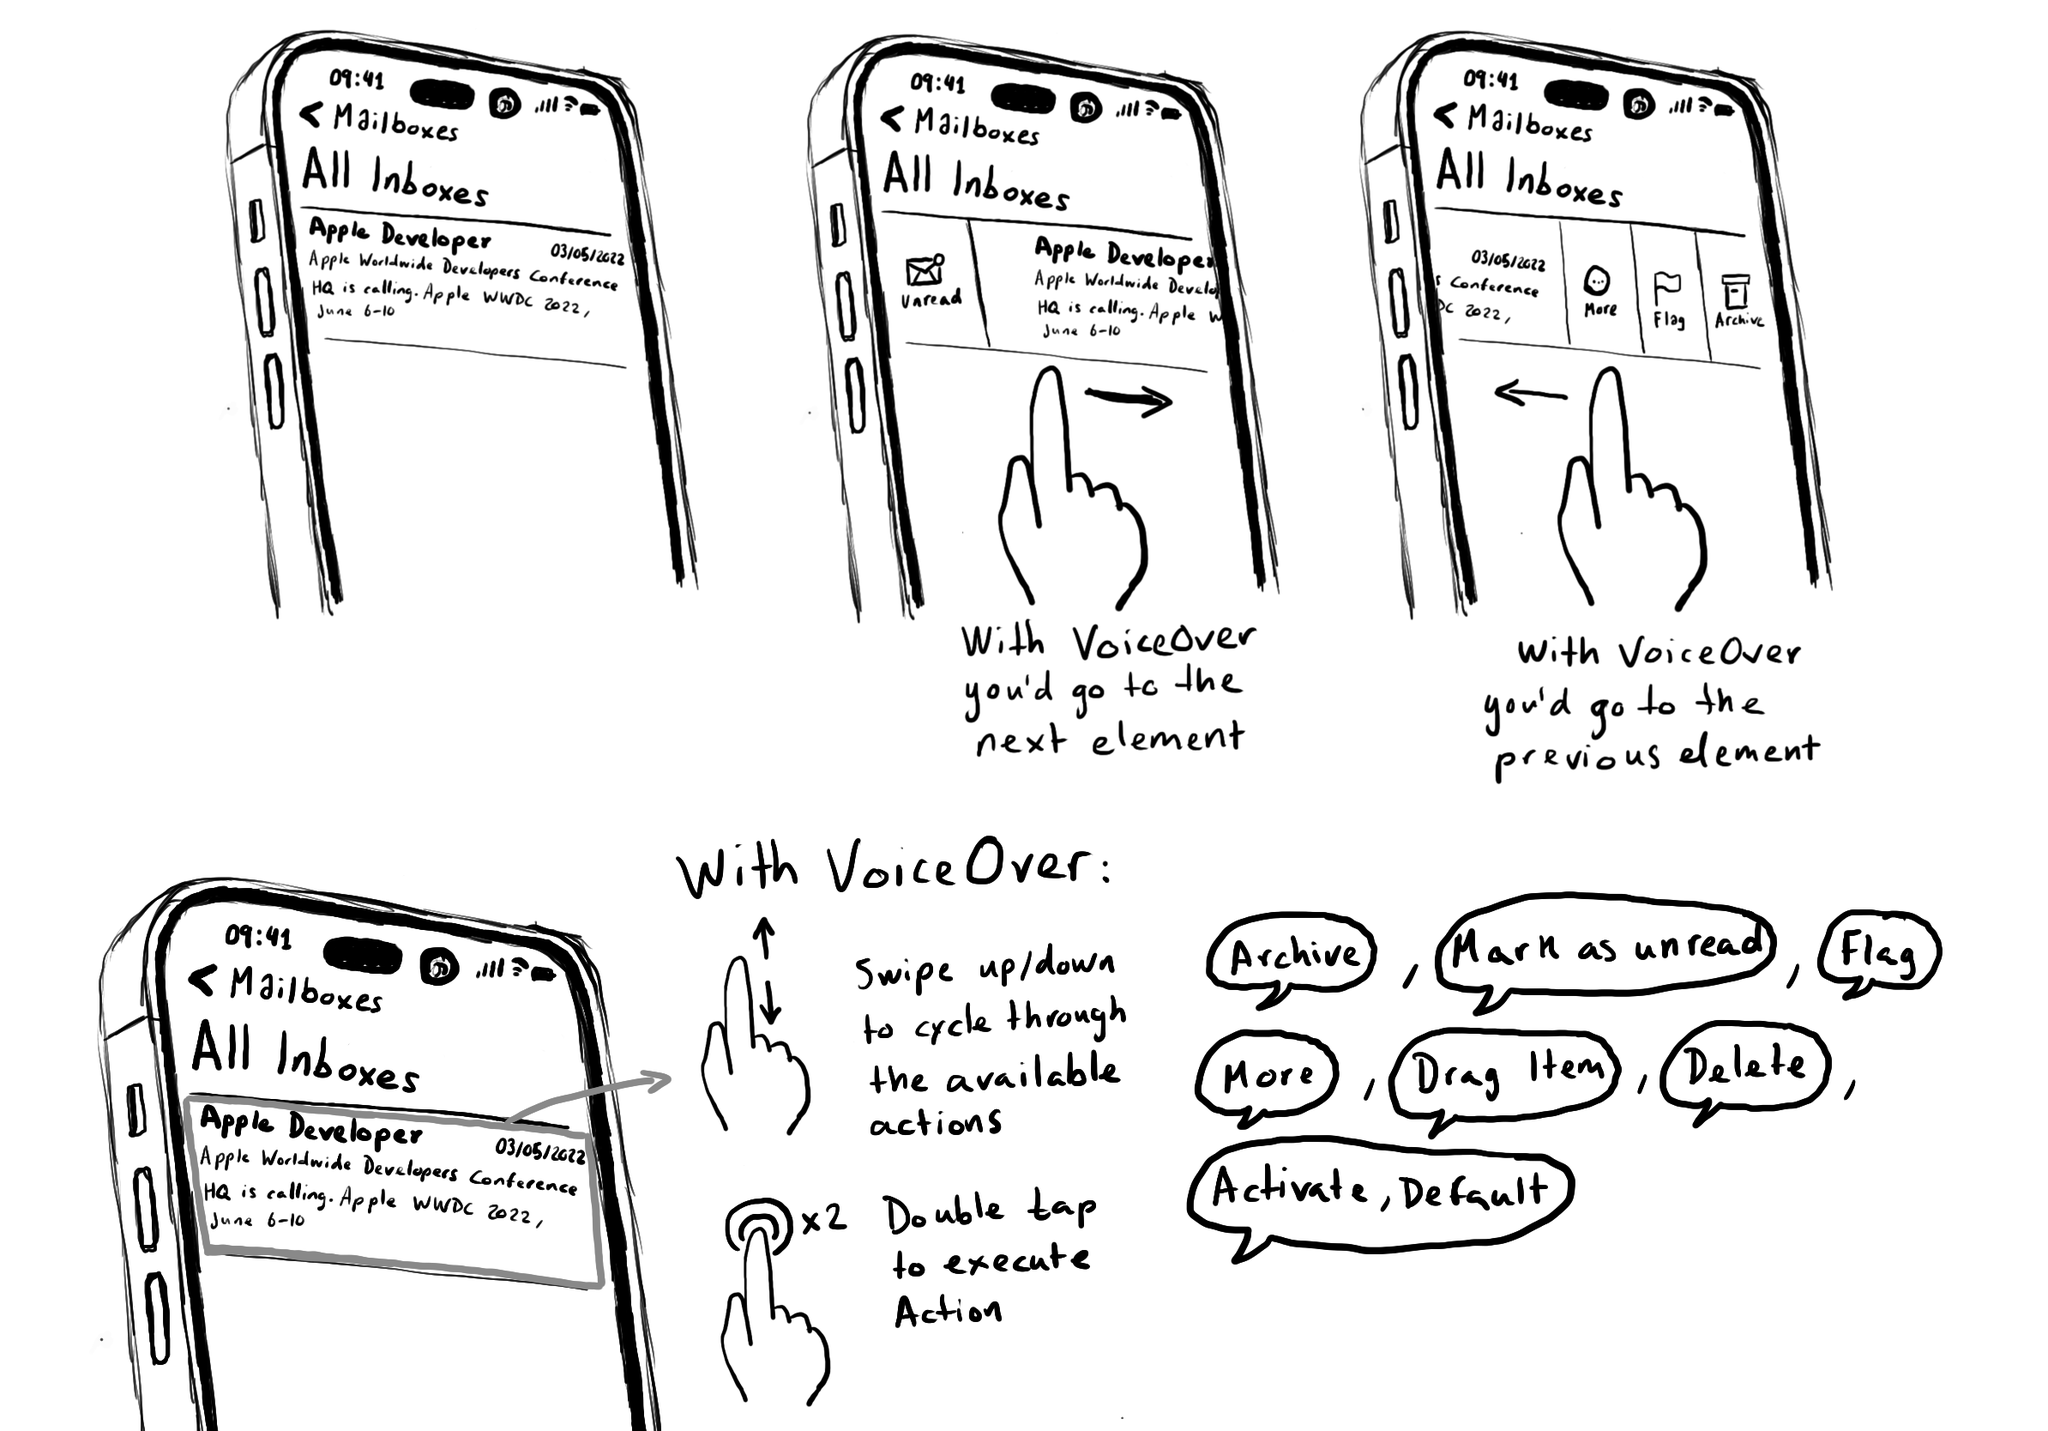
Custom actions are also great for actions that are executed with a gesture that is overridden by VoiceOver. Think of the unread, flag and archive hidden options that you can make visible by swiping left/right on a message row in the Mail app.

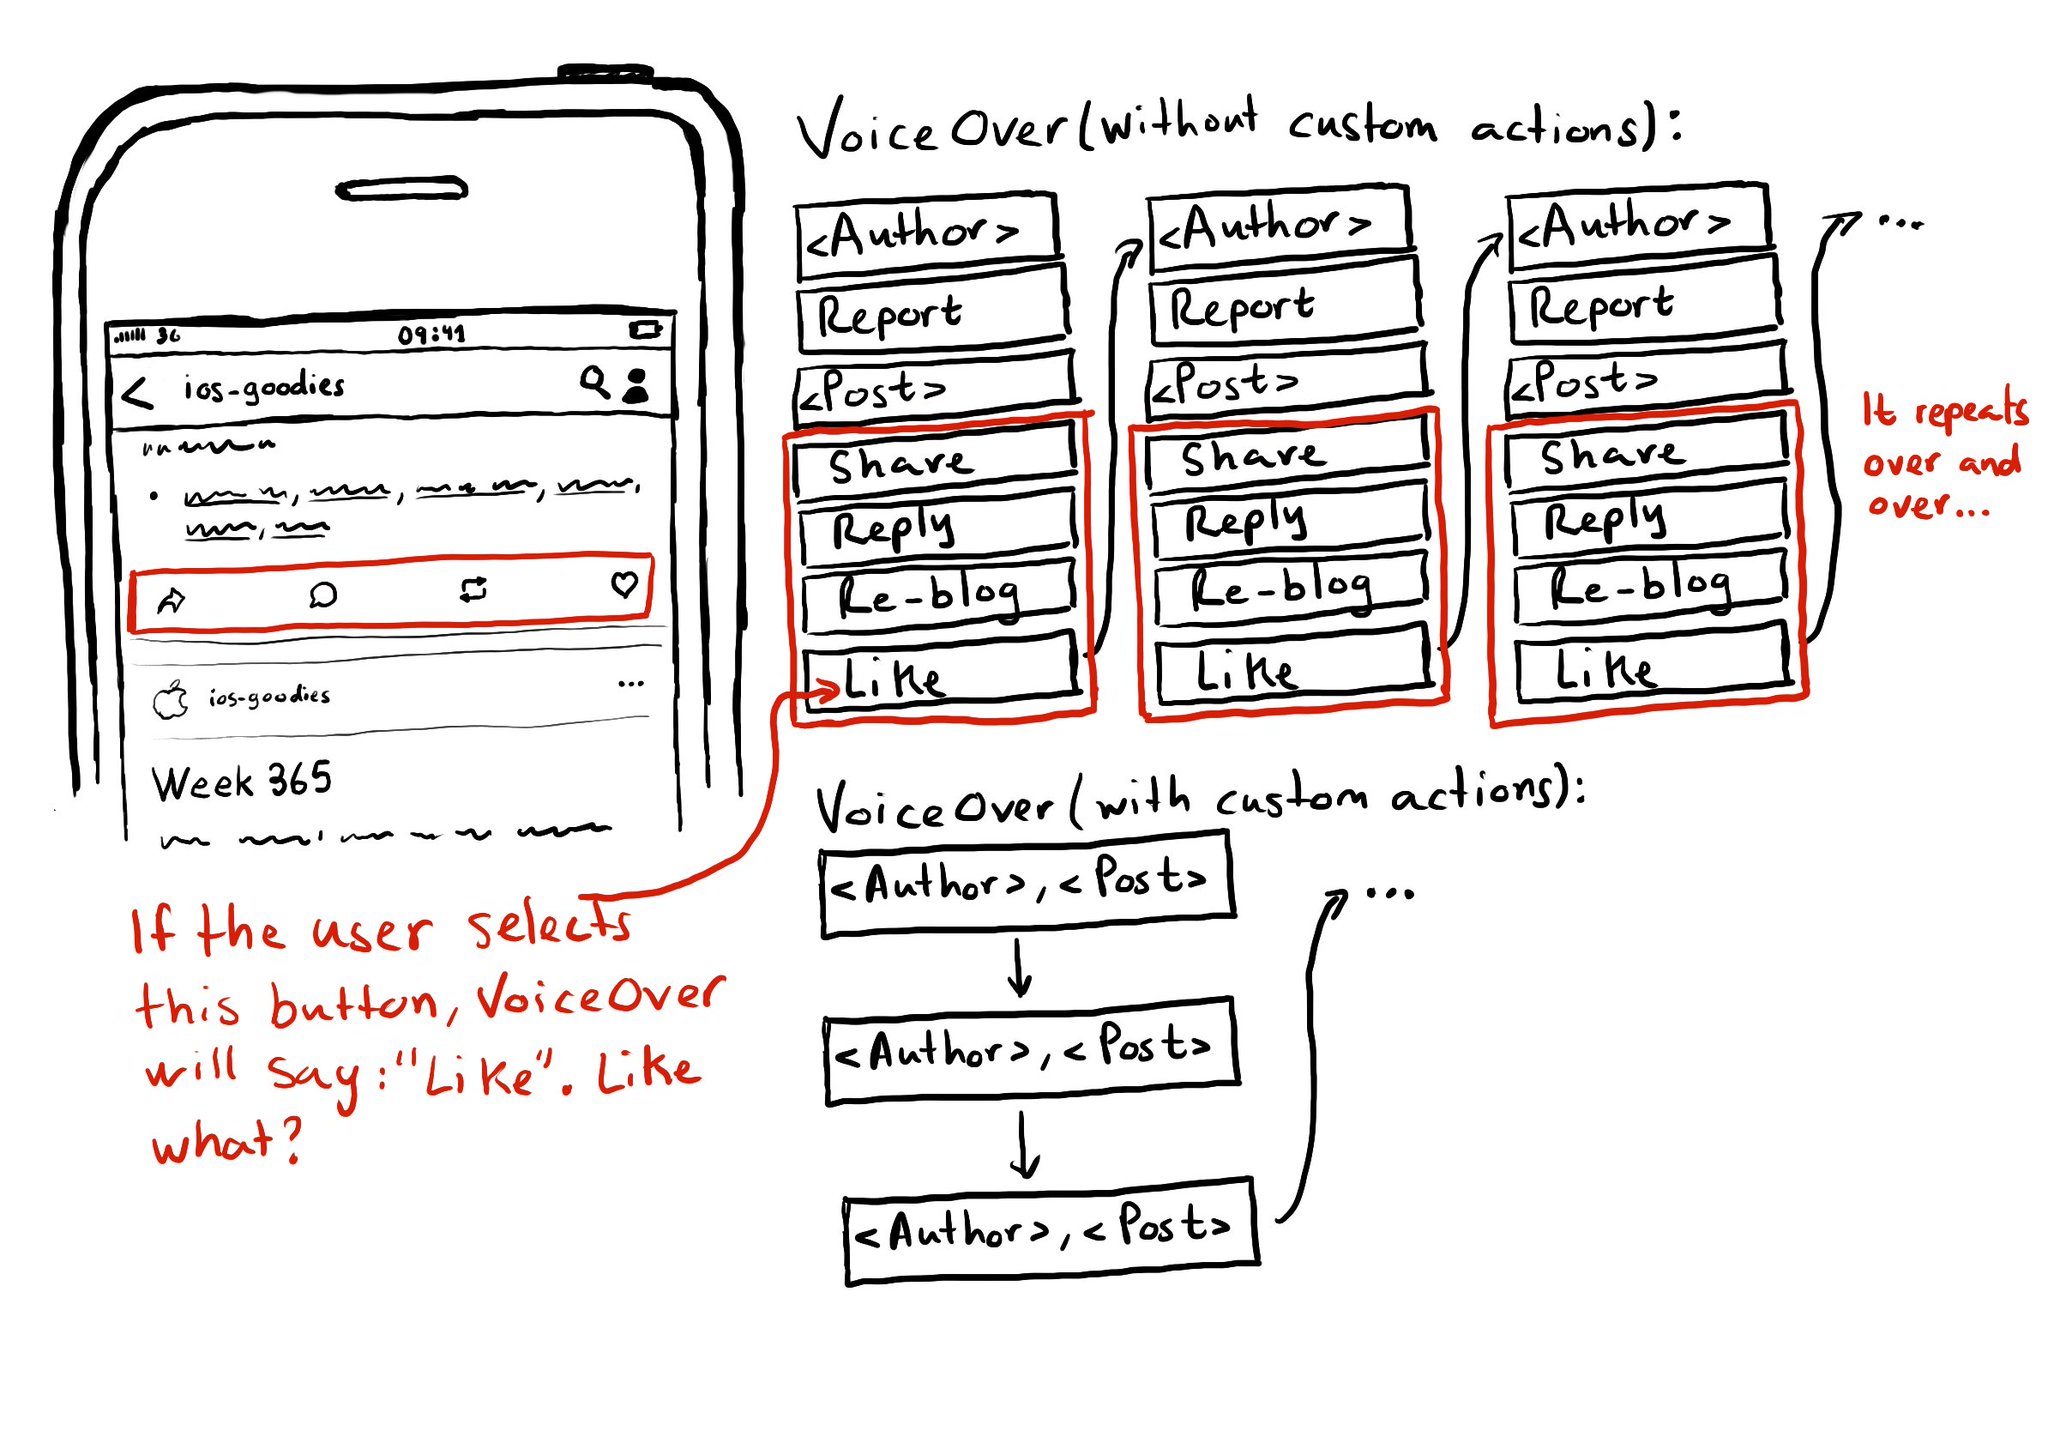
Optimising for navigation by making a view accessible shouldn’t come at the expense of the buttons in it not being accessible. Configuring custom actions will allow the user to access them using the Actions rotor. With the Actions rotor, users can swipe up and down to cycle through all the options, stop at the desired one, and double tap to execute that action. You can configure an array of custom actions. Custom actions can have a name that will be announced by VoiceOver and an action handler or target selector with the code that will be executed. https://developer.apple.com/documentation/objectivec/nsobject-swift.class/accessibilitycustomactions
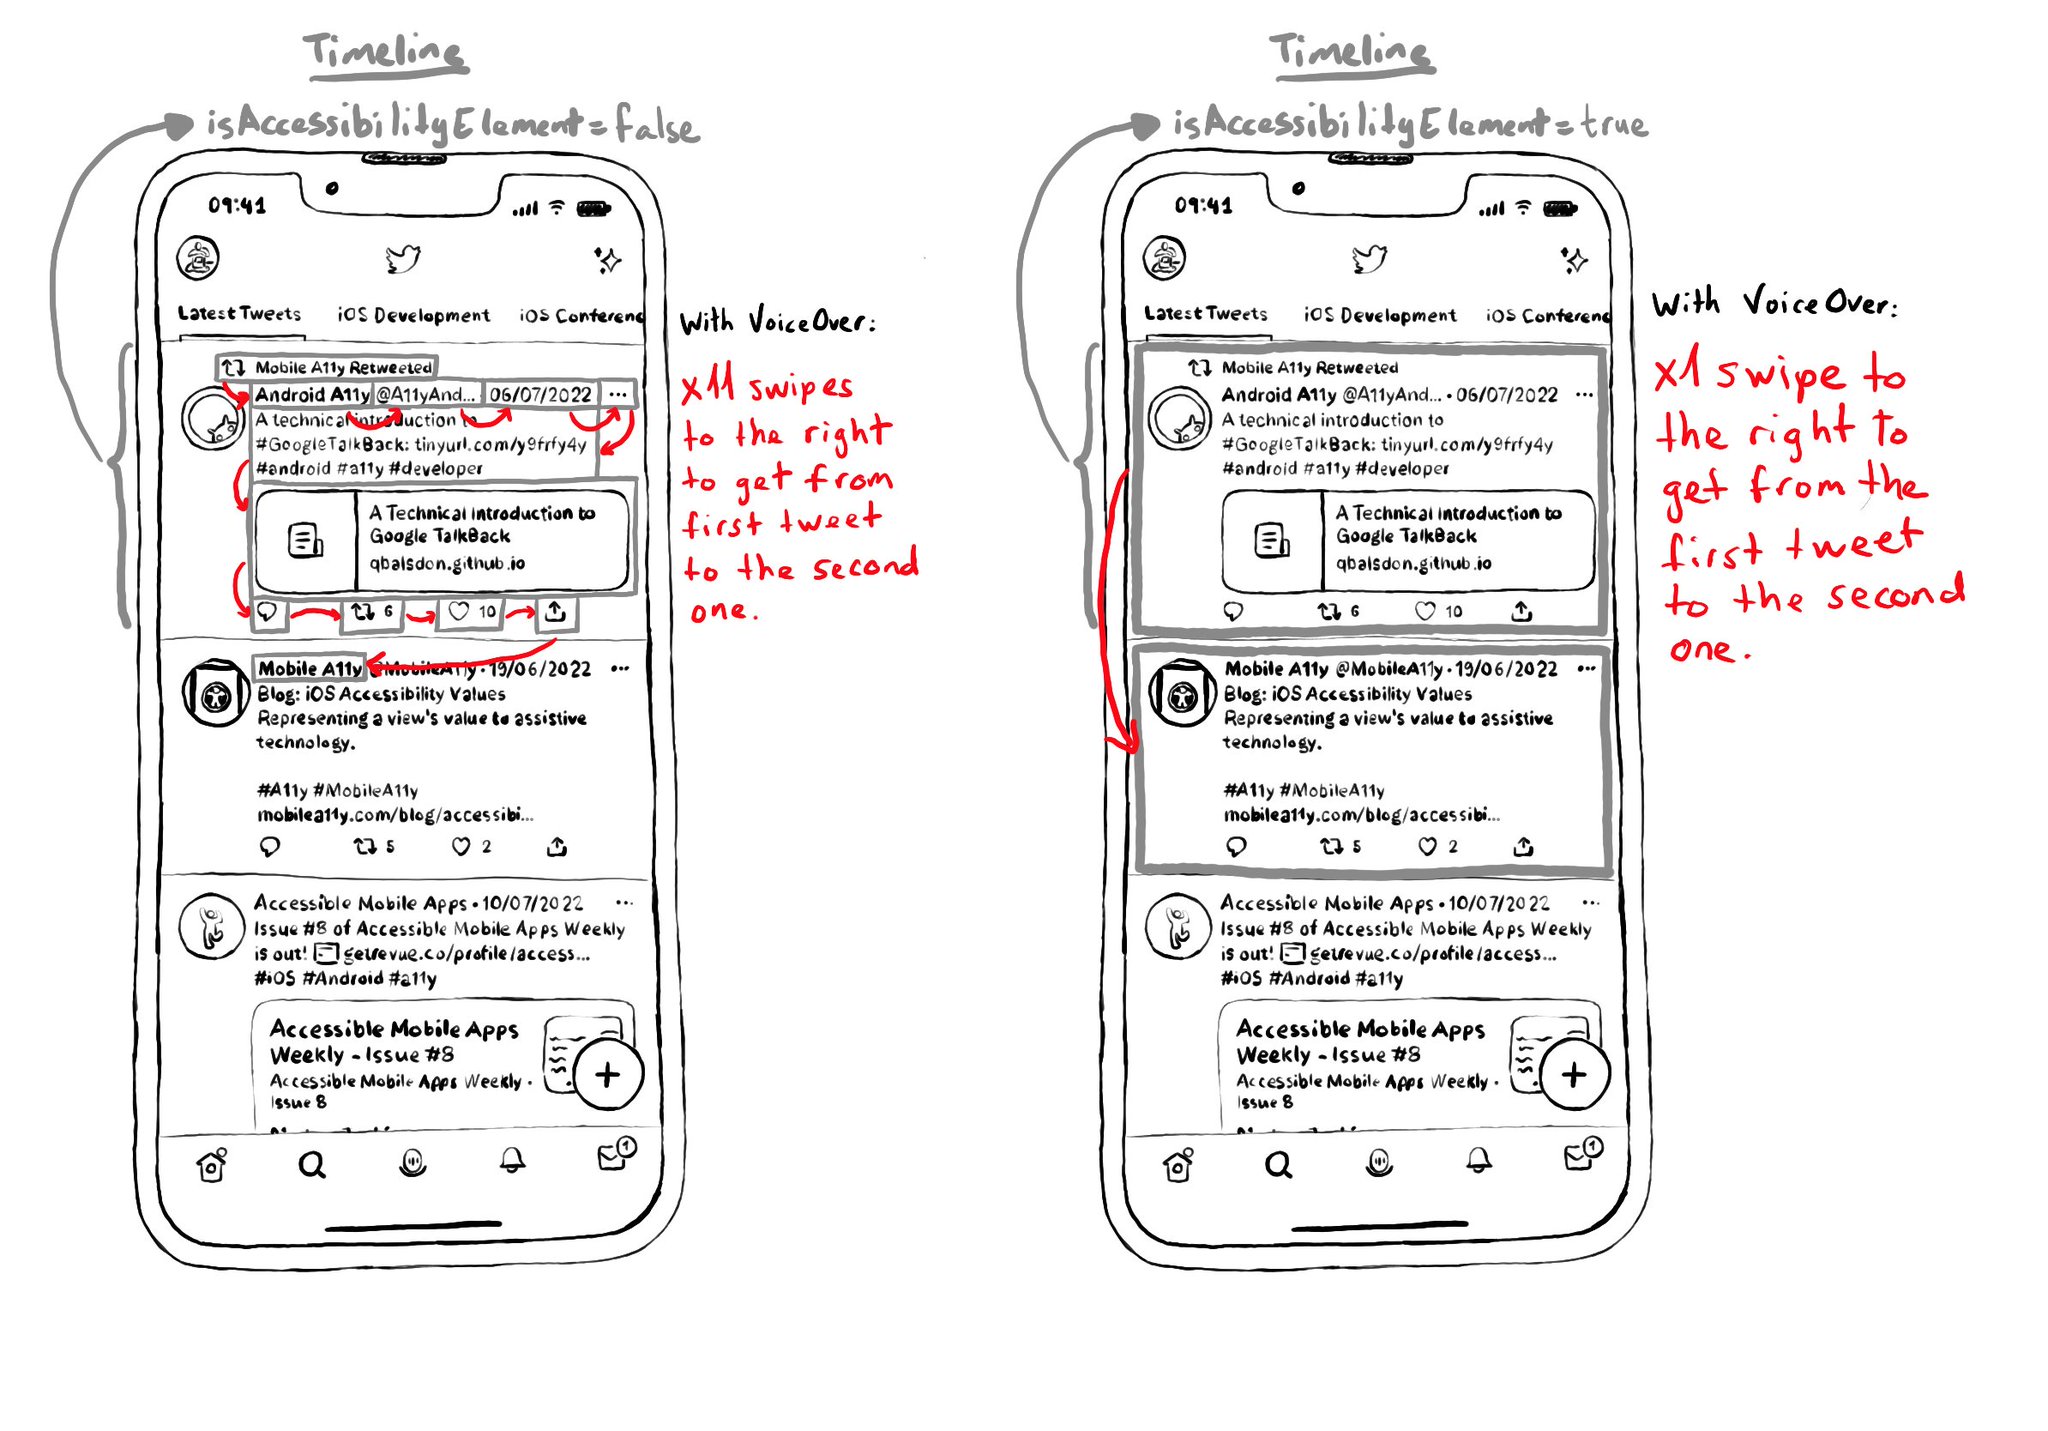
Sometimes you want to prioritise ease of navigation, and that's when configuring isAccessibilityElement to true on a container view makes sense. This is especially true in table/collection views and with complex cells with lots of elements. Take the example from a tweet (from Day 62's tweet). If the tweet has 9 accessible elements, you'd need 9 swipes to the right to go to the next tweet in the list. But ideally, I single swipe should be enough. https://x.com/dadederk/status/1549417799746994177 On the other hand, for the detail screen for a single tweet, you want to optimise for ease of access to each one of the elements, instead of navigation. In that case it would be better for the tweet view not to be an accessibility element.
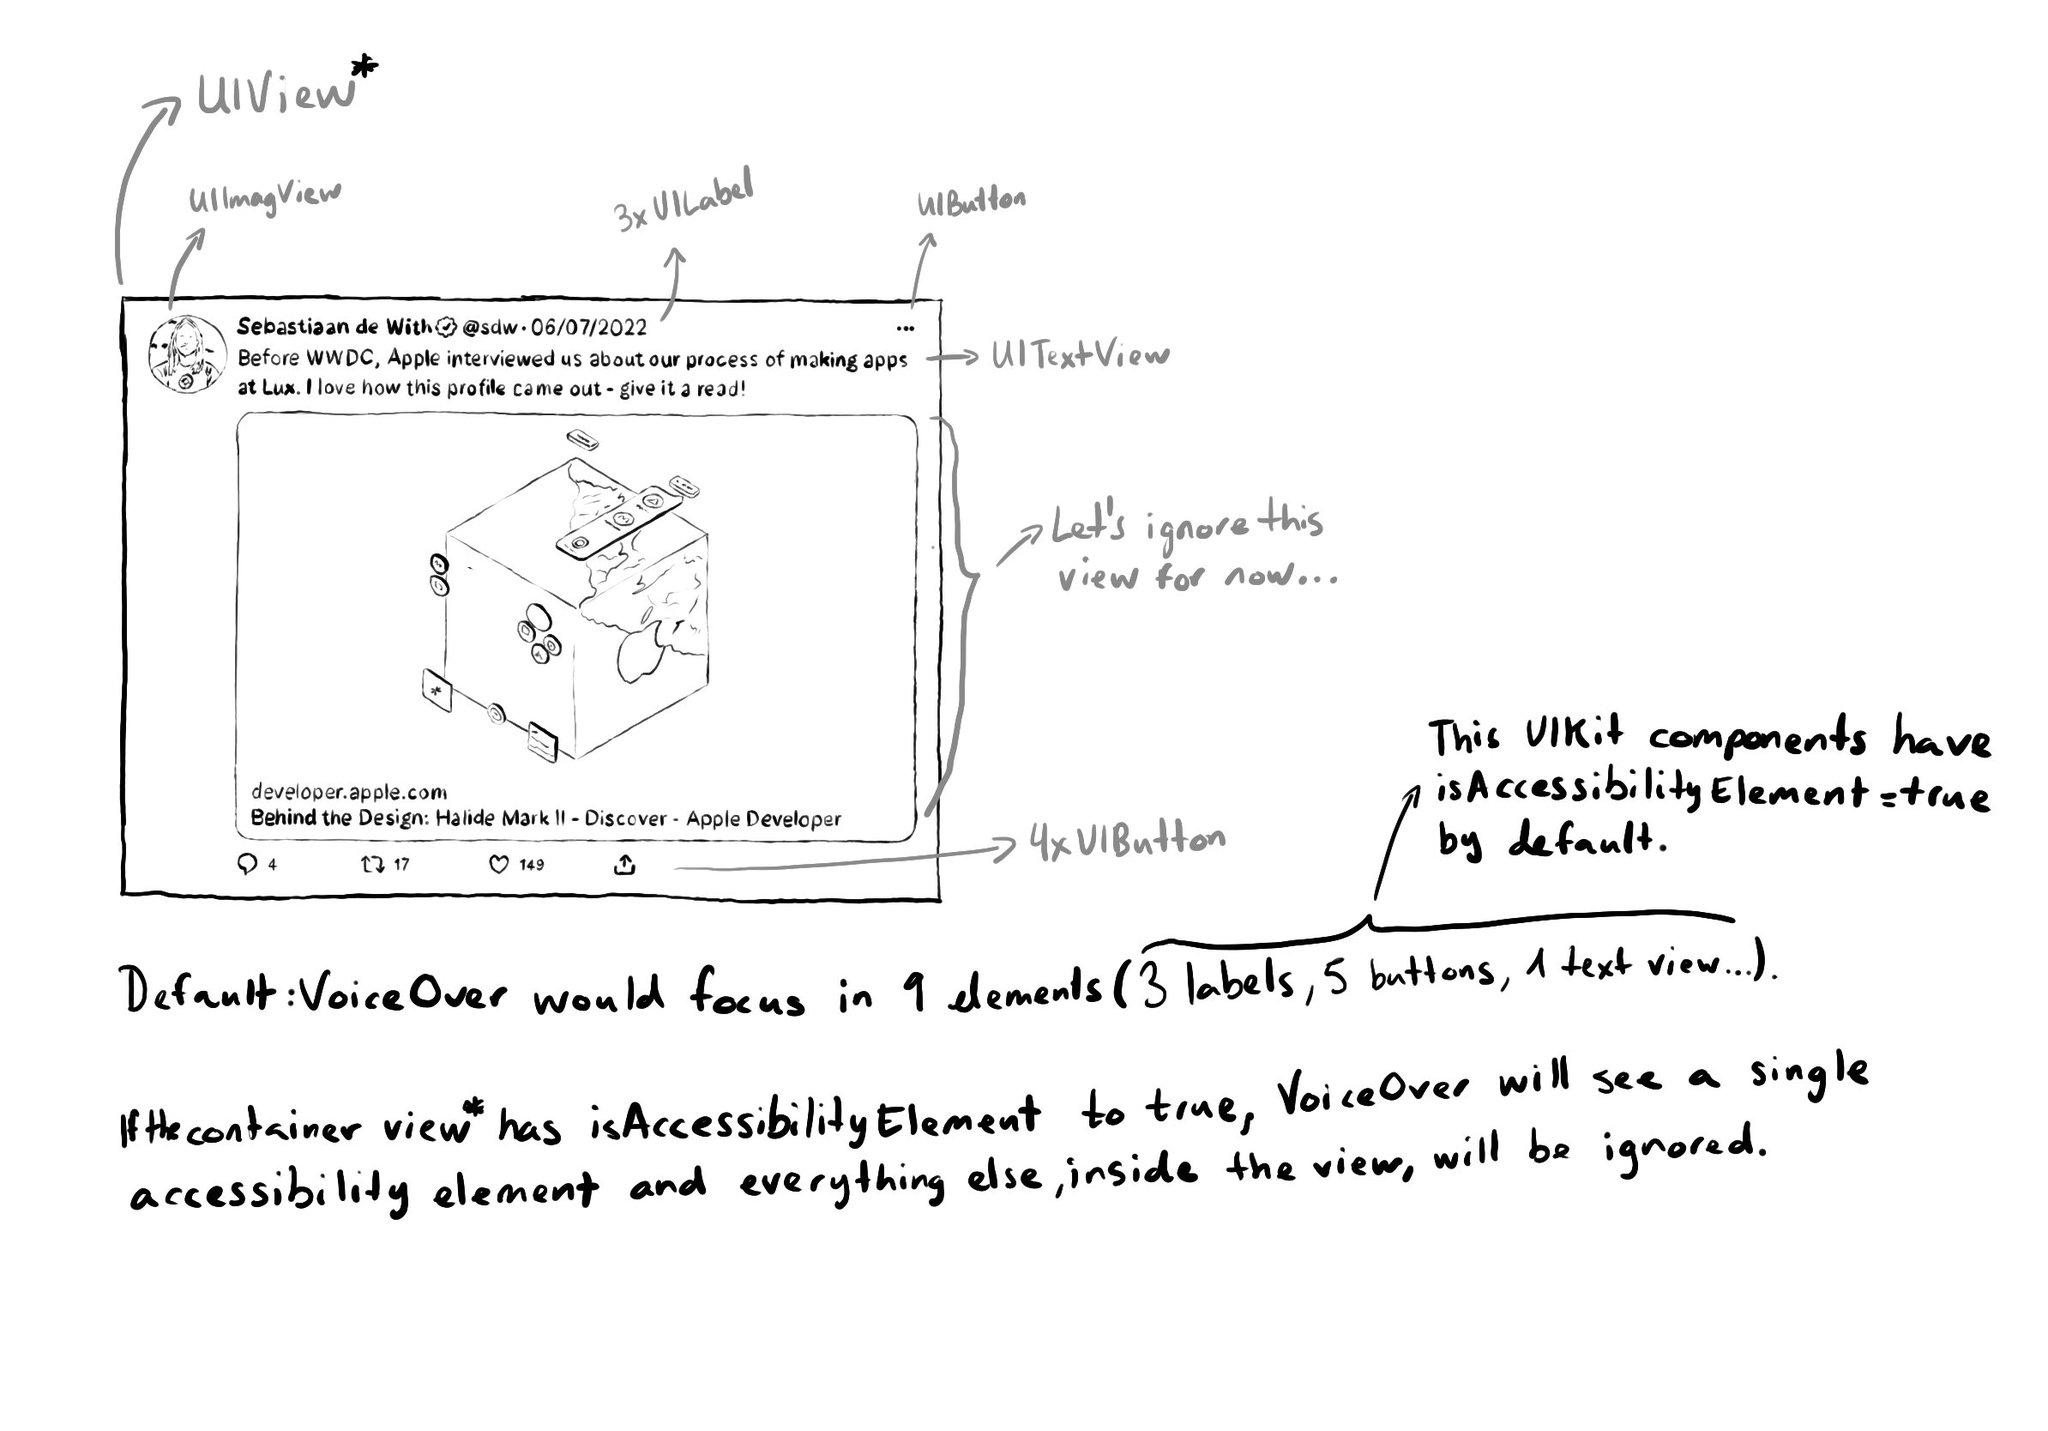
When setting isAccessibilityElement to true, assistive tech like VoiceOver will stop looking for other accessible elements in that view hierarchy. So if we make a view accessible, its subviews, including buttons and labels won't be accessible.
To capture the gesture, you can override the accessibilityPerformEscape() function. In there you can dismiss your view, and return true if you could successfully handle it. https://developer.apple.com/documentation/objectivec/nsobject-swift.class/accessibilityperformescape()
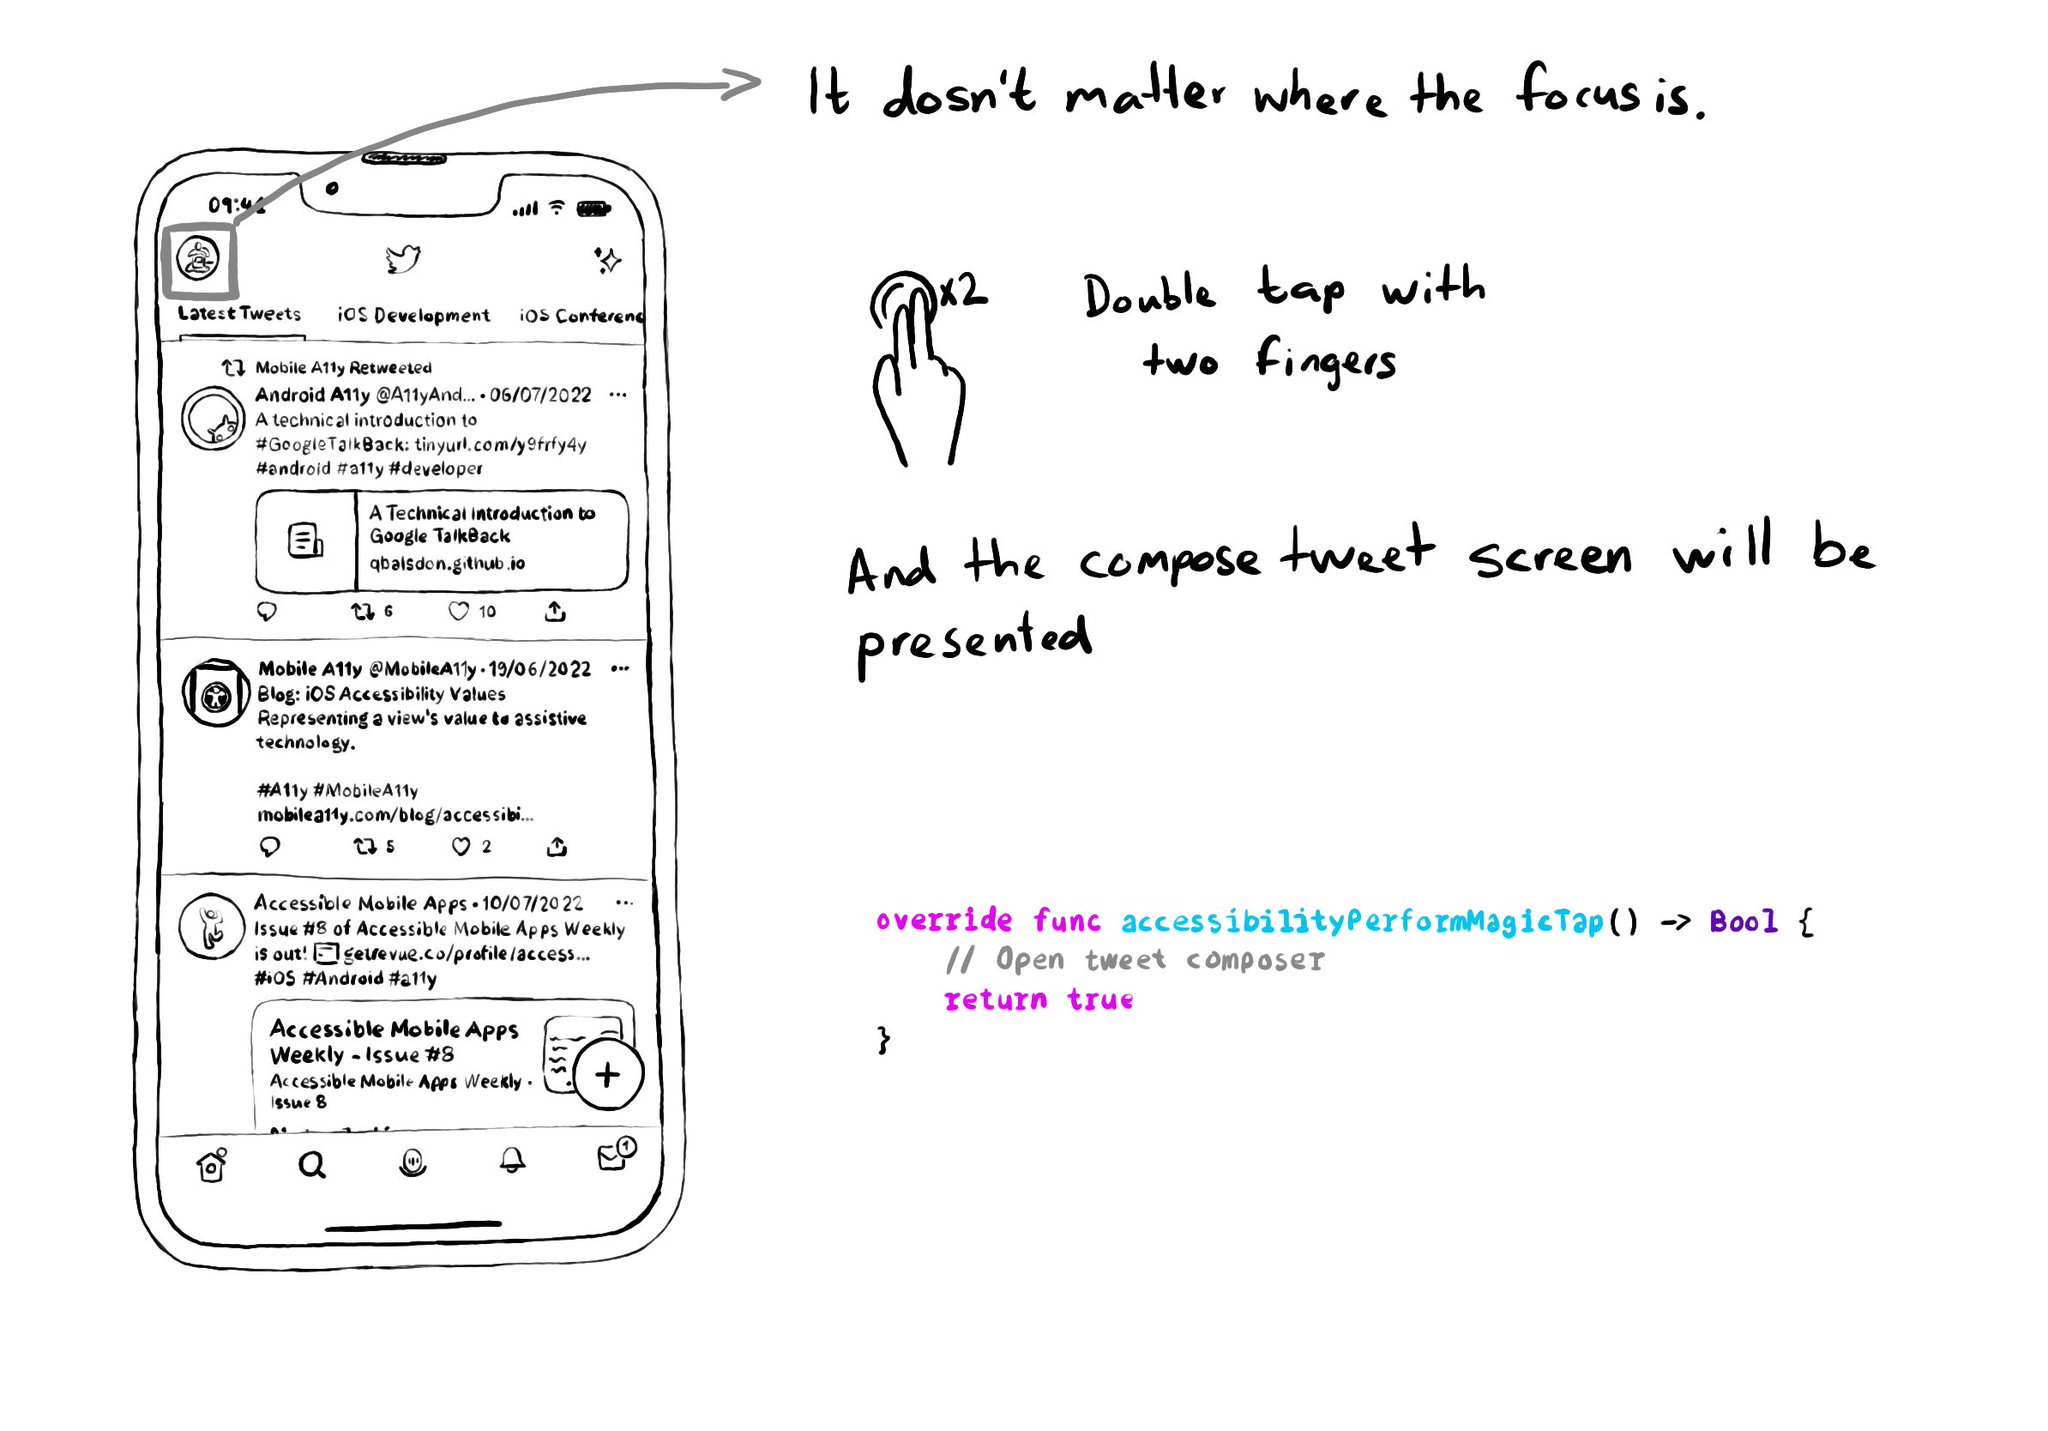
VoiceOver has a very cool gesture called the Magic Tap (double tap with two fingers). It should execute the most important task for the current state of the app. Examples: start/stop timer, play/pause music, take a photo, compose a tweet... You just need to override accessibilityPerformMagicTap() to capture that gesture, execute the desired code, and return true if handled successfully. https://developer.apple.com/documentation/objectivec/nsobject-swift.class/accessibilityperformmagictap()
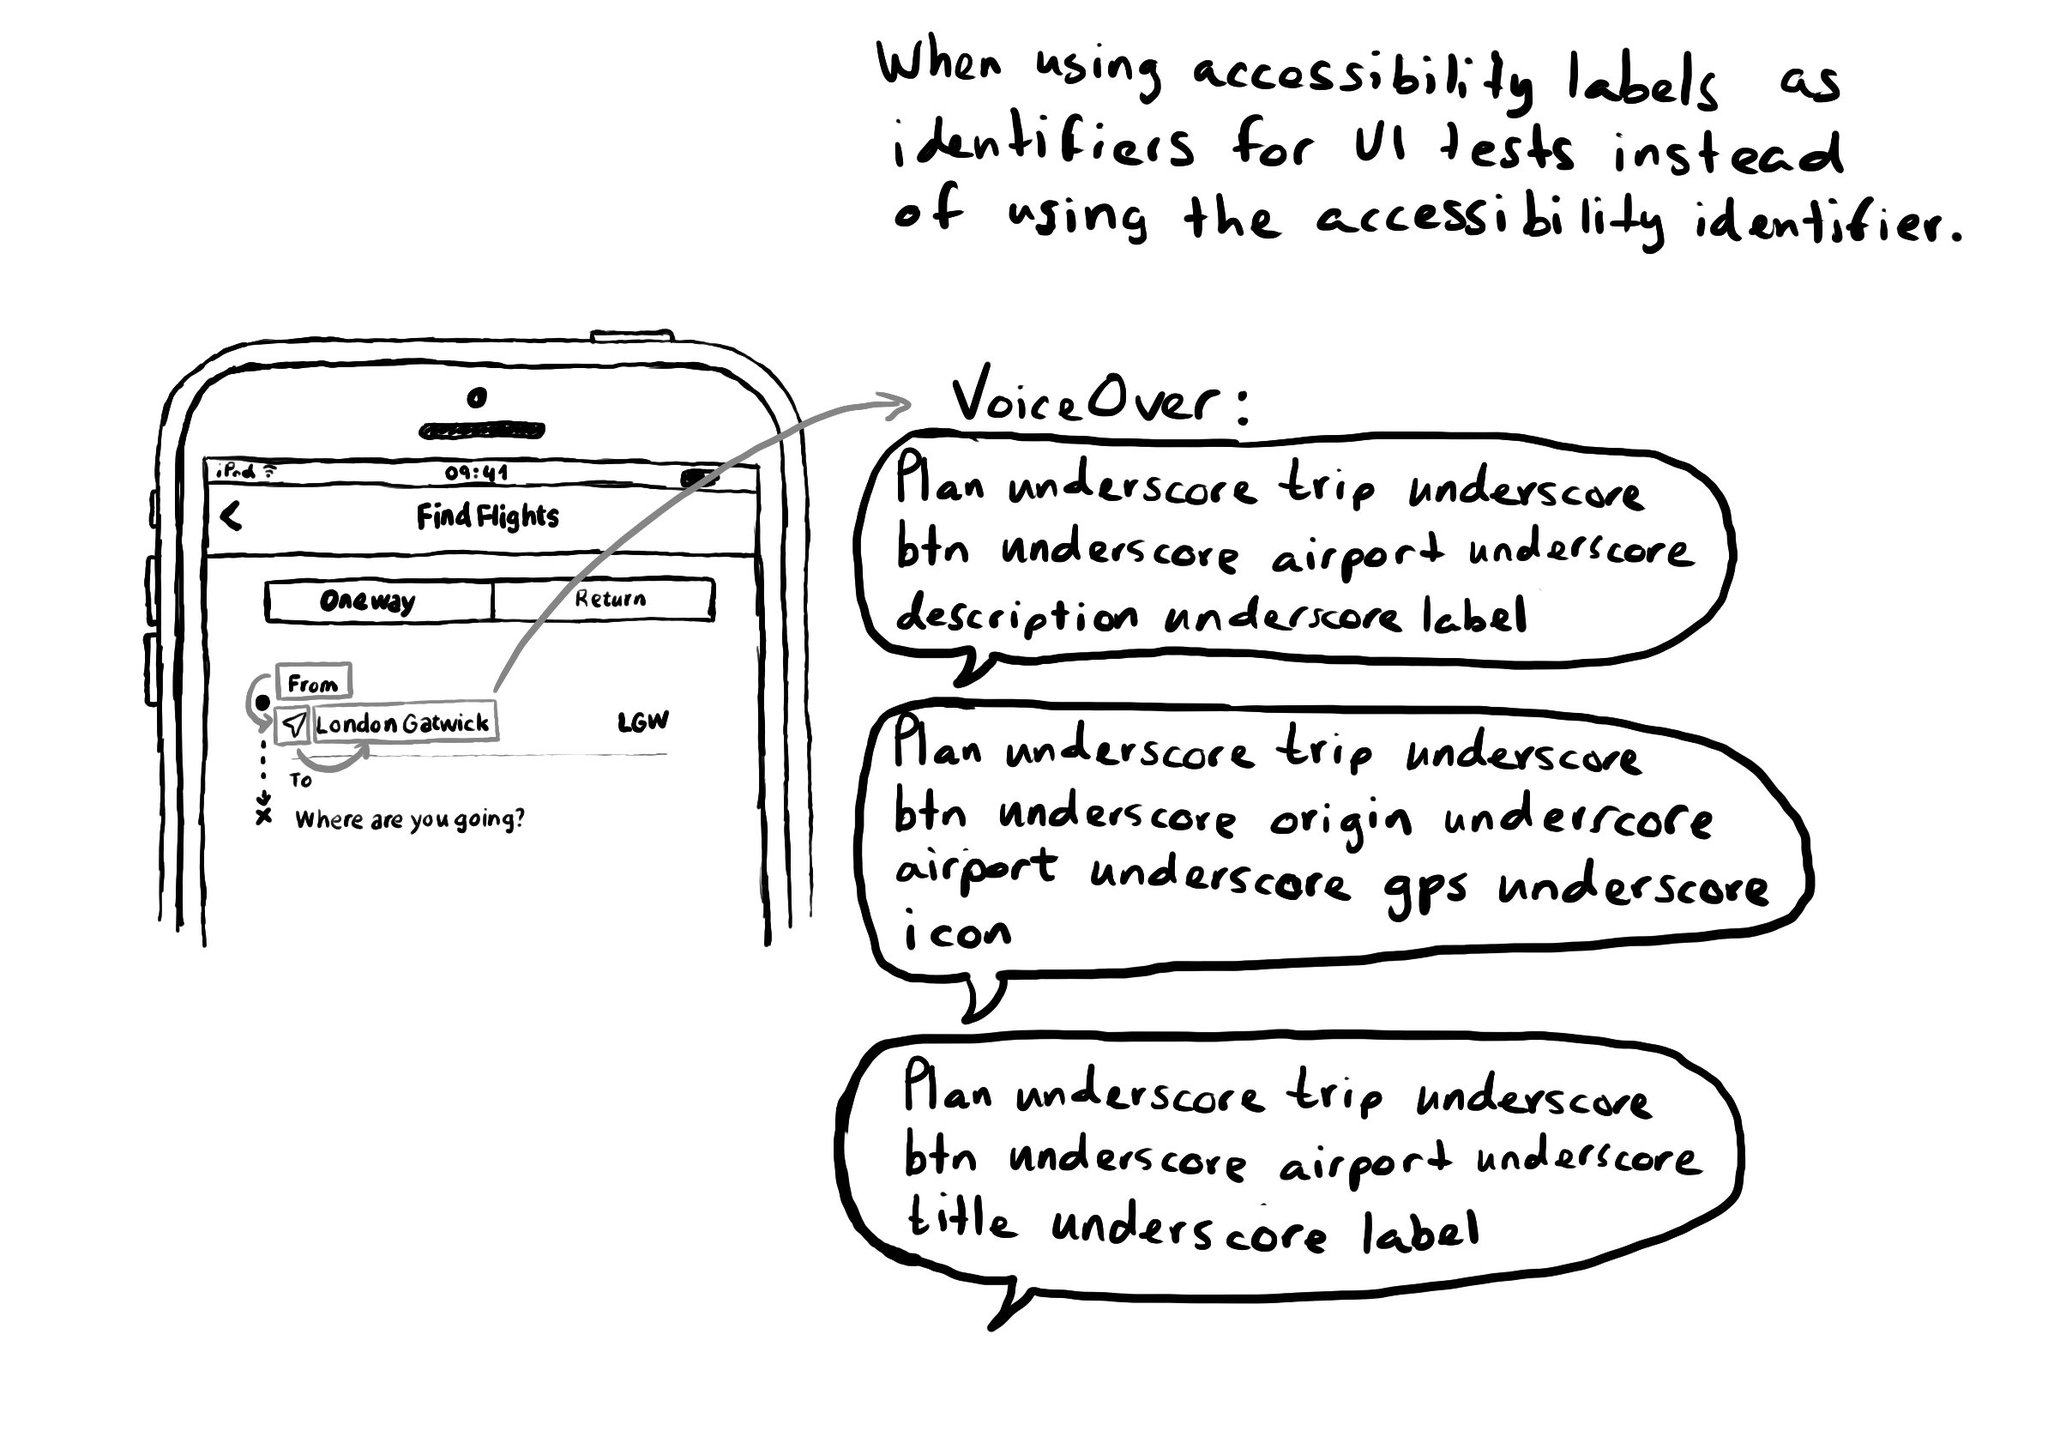
Please, don't use accessibility labels as ids for your UI tests. It can completely ruin the experience for VoiceOver users. There is actually an accessibility identifier property that you can use instead to uniquely identify your UI elements.
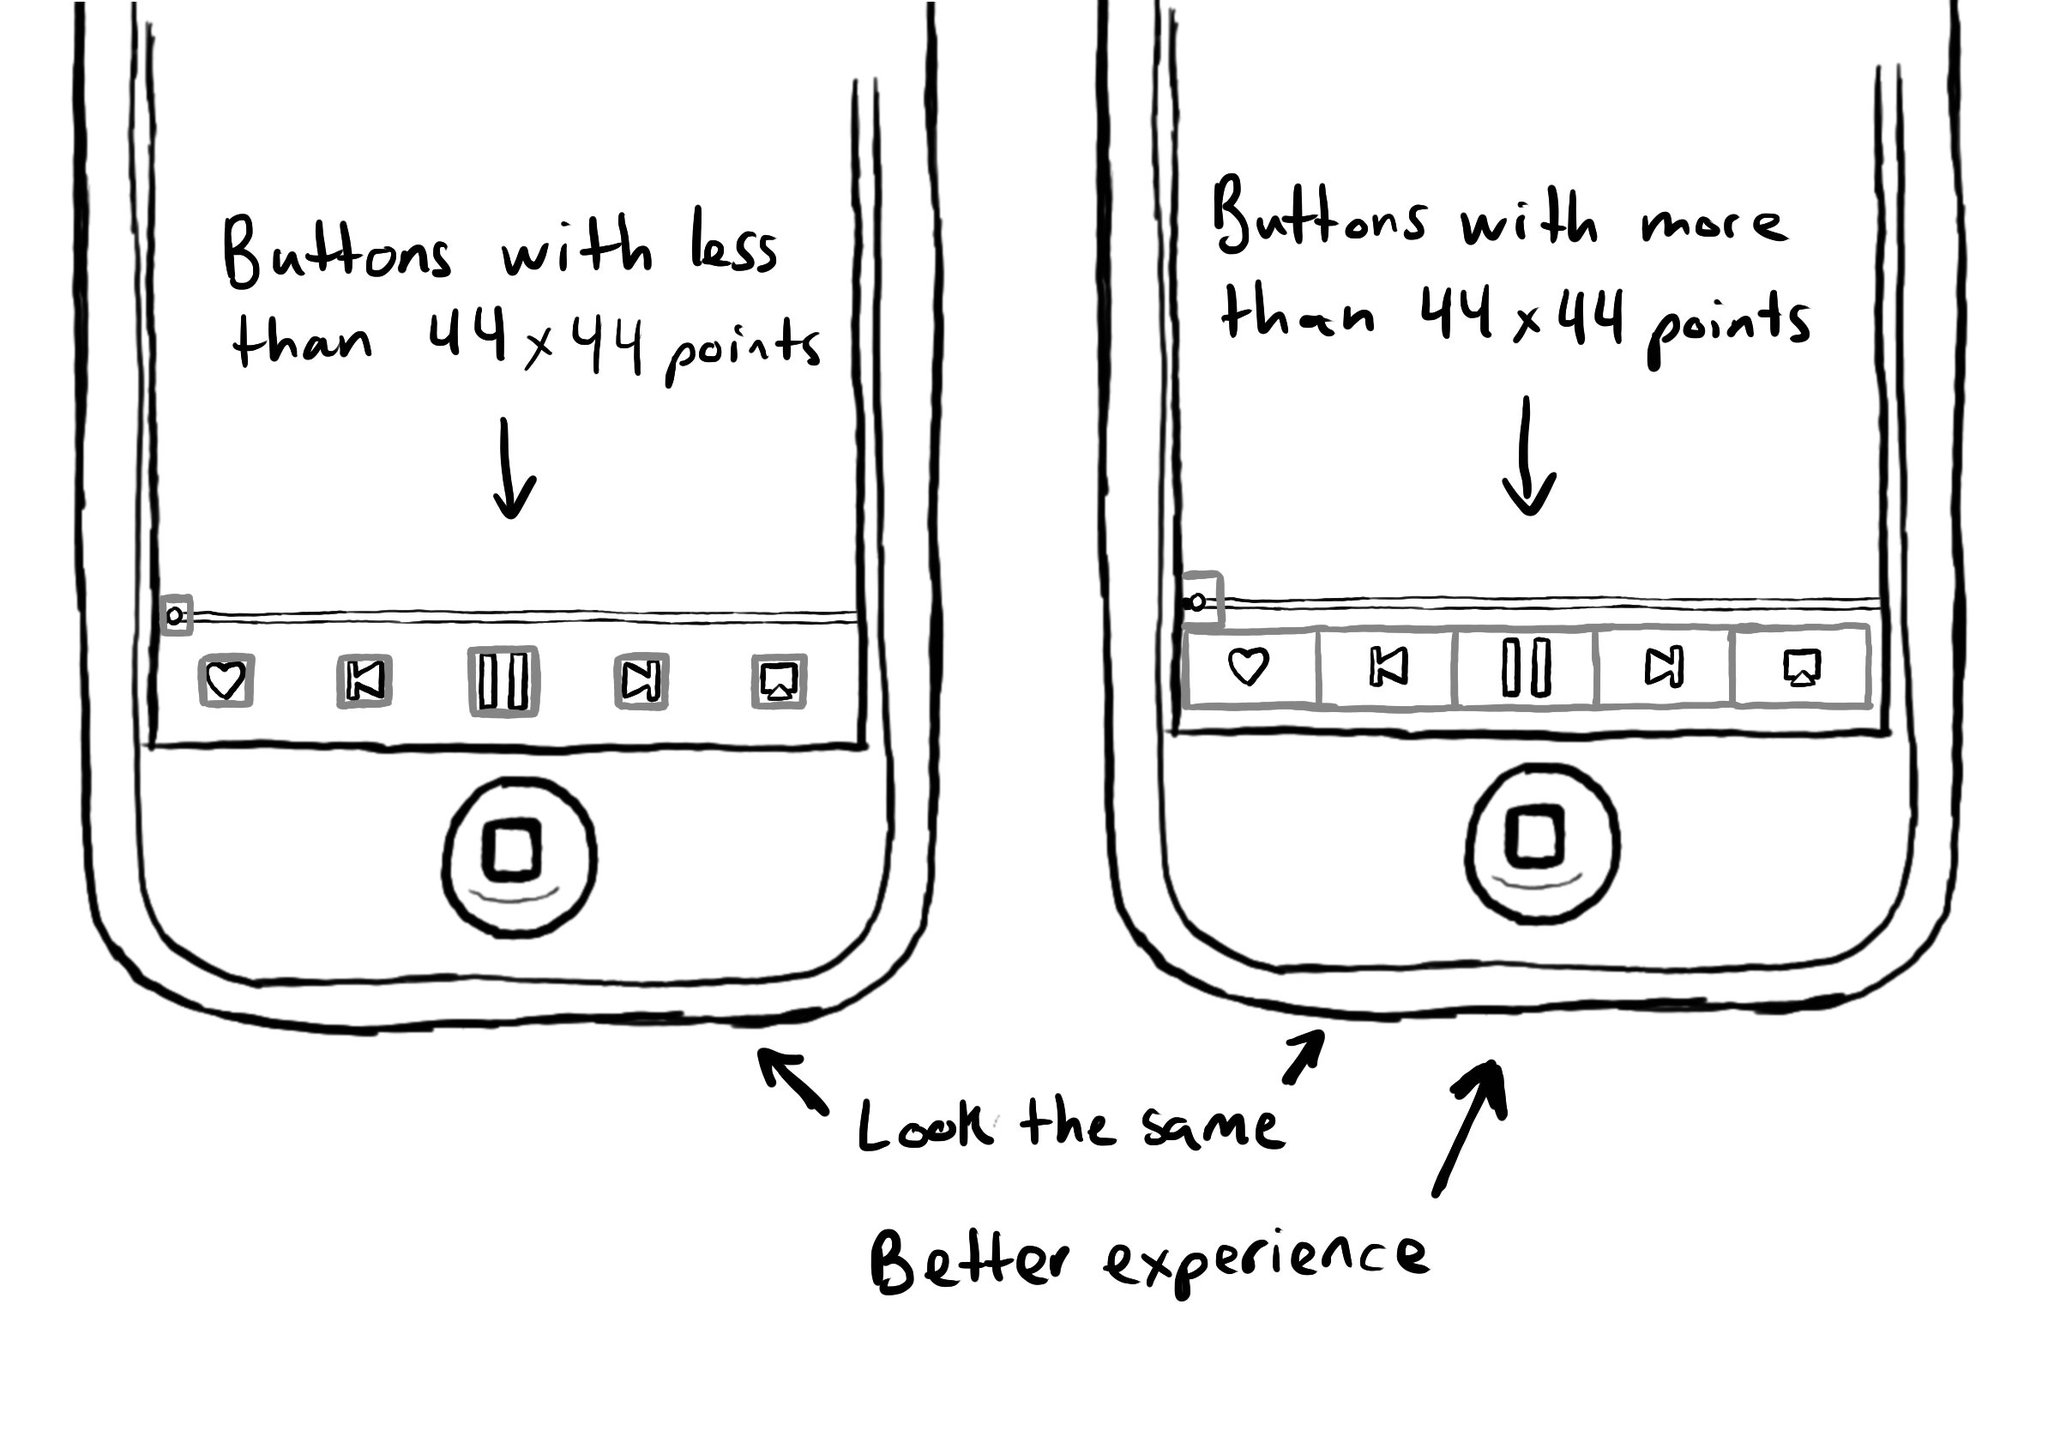
Apple recommends in their guidelines a minimum tappable area size of 44x44 points for all controls. A lot of times this can be corrected in an app without changing how it looks, but making it objectively easier to interact with for everyone.
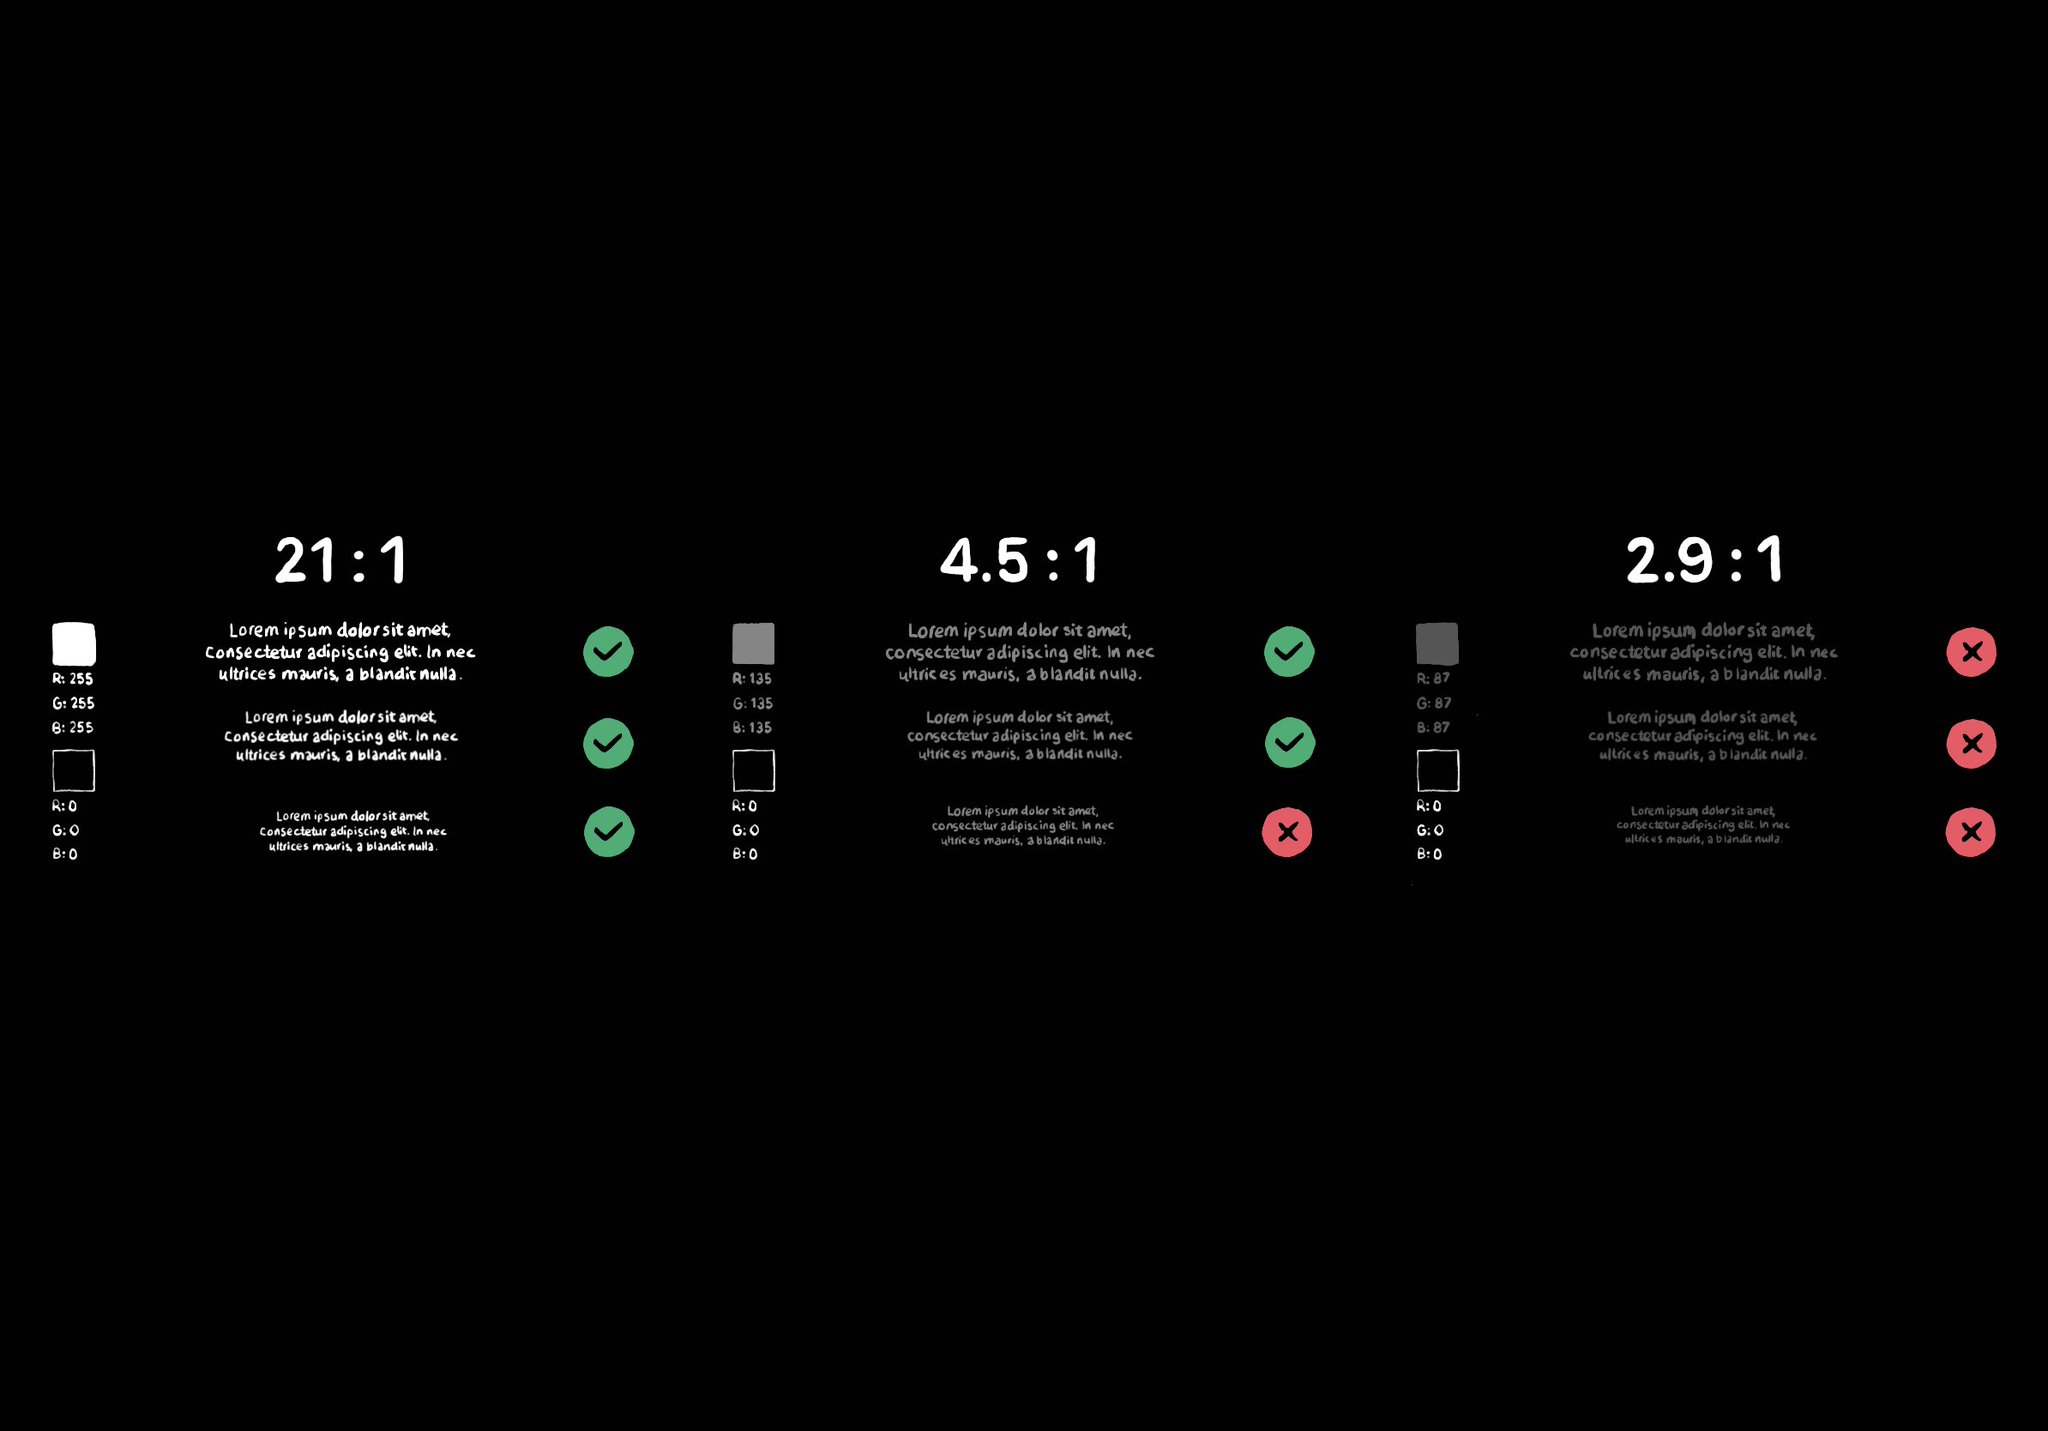
Color contrast between text and background is very important for perceivability. As colors come closer to each other, they’re more difficult to distinguish. Notice that colors that work well with big font sizes may not for smaller text.

It is possible to embed icons within text using NSTextAttachment and NSAttributedString. If you do, please remember to override the accessibility label, otherwise VoiceOver will announce it as "Attachment.png File".
Example code in the image:
```swift
let magnifyingGlassIcon = UIImage(systemName: "magnifyingglass")!
let searchButton = UIButton()
let searchTutorialLabel = UILabel()
searchButton.accessibilityLabel = "search"
let textAttachment = NSTextAttachment(image: magnifyingGlassIcon)
let string = "Select the
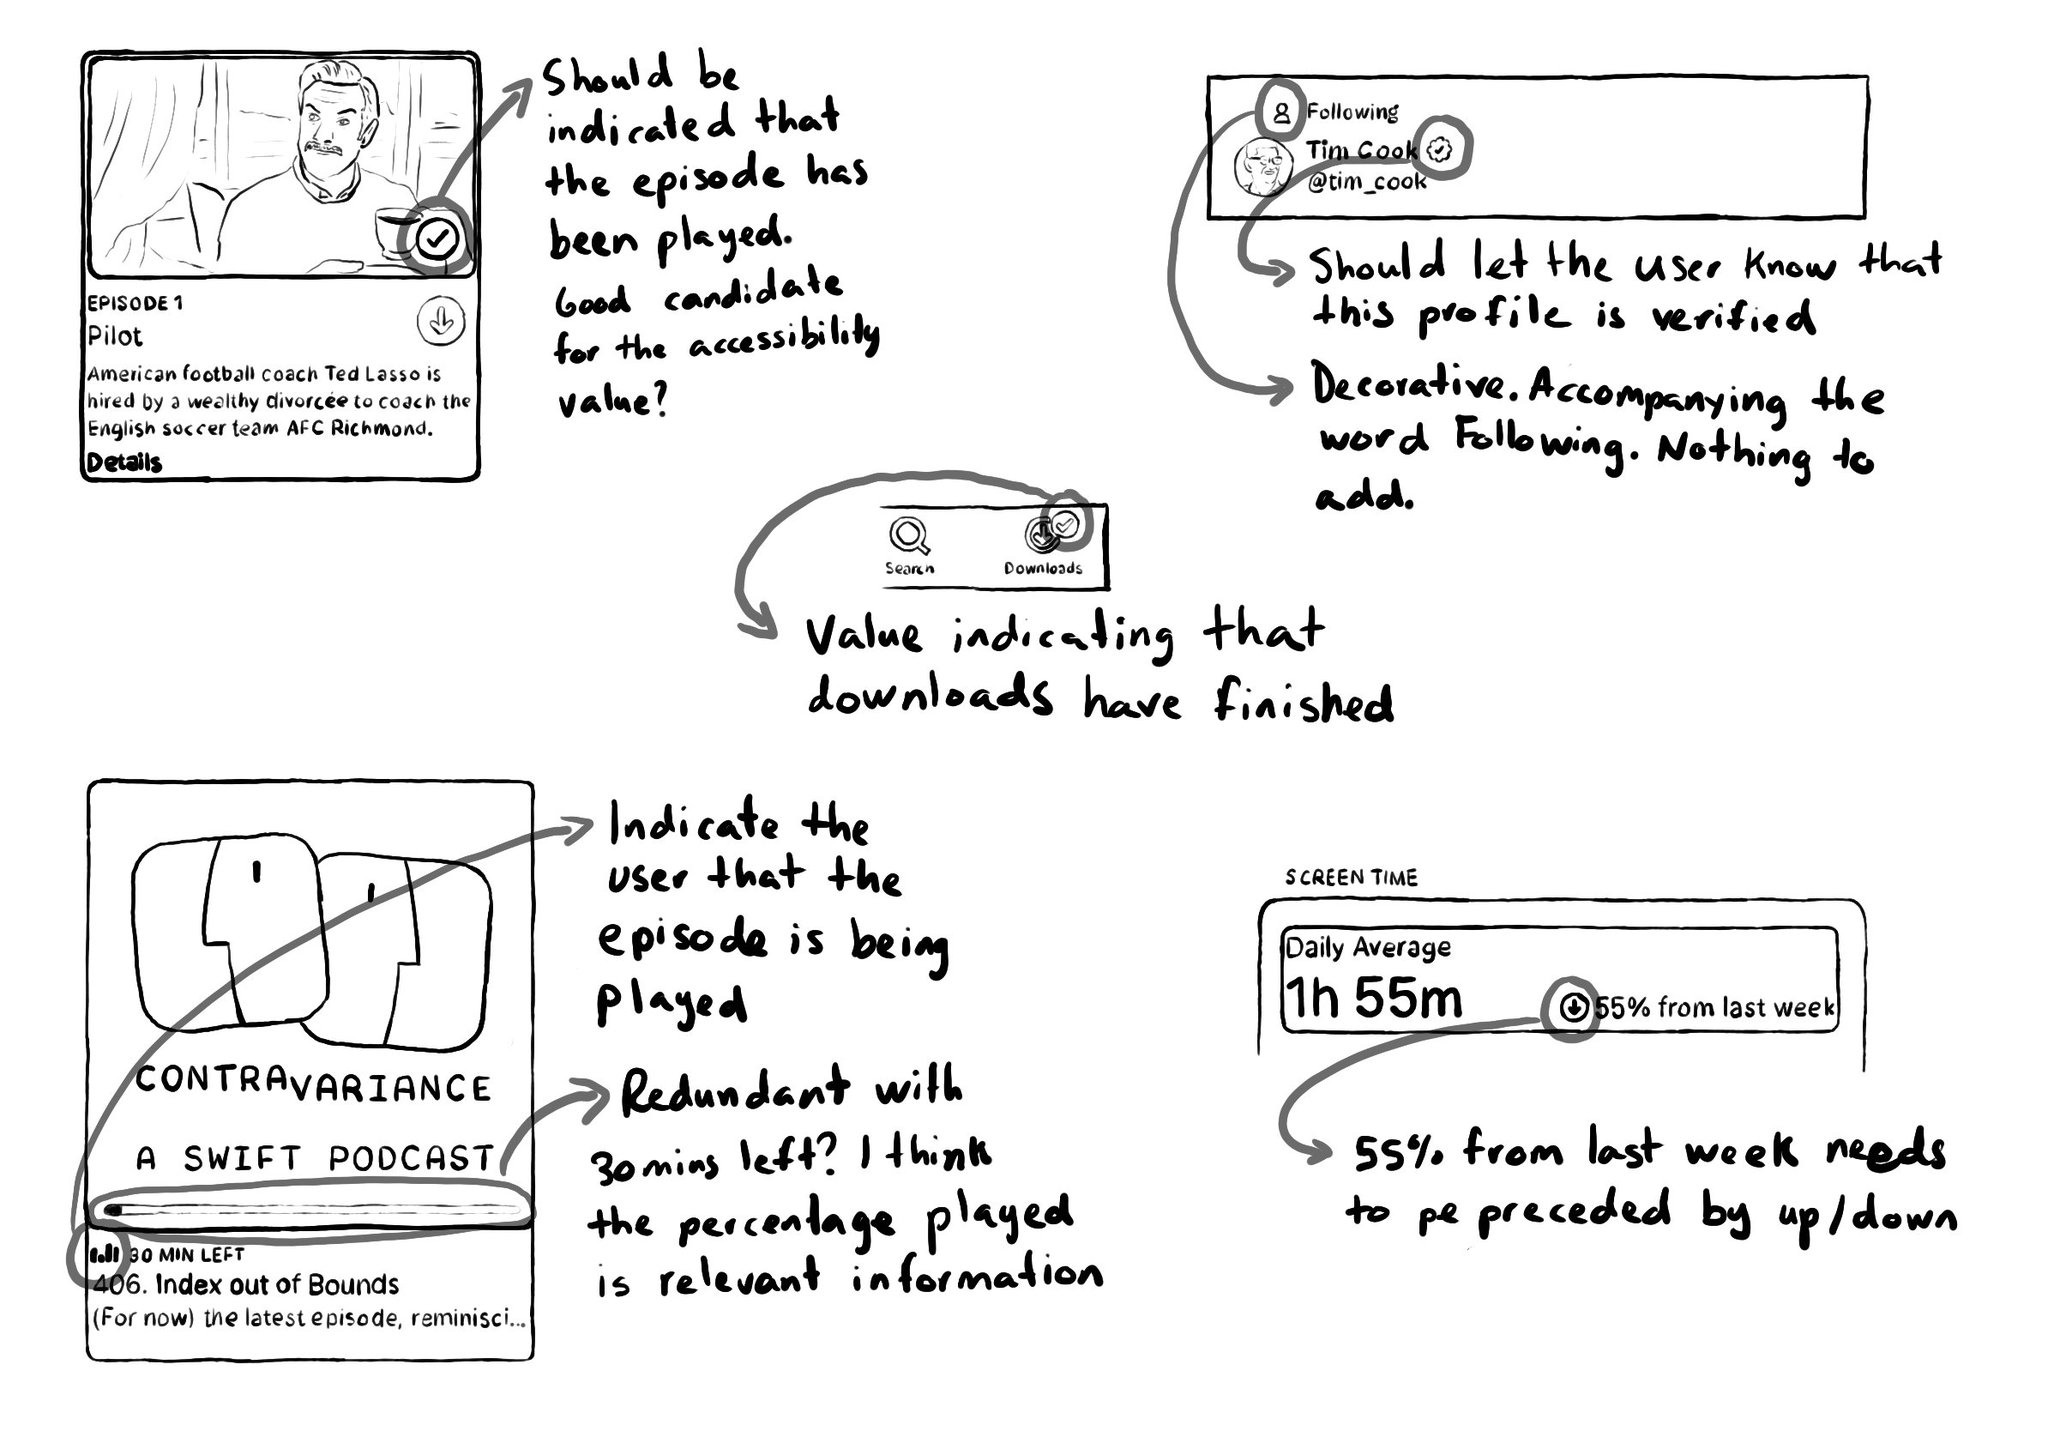
When thinking about accessibility labels and values, it is easy to miss adding information or state that are represented by little visual cues and icons: a checkmark indicating something has been played, a down arrow indicating a downward trend...
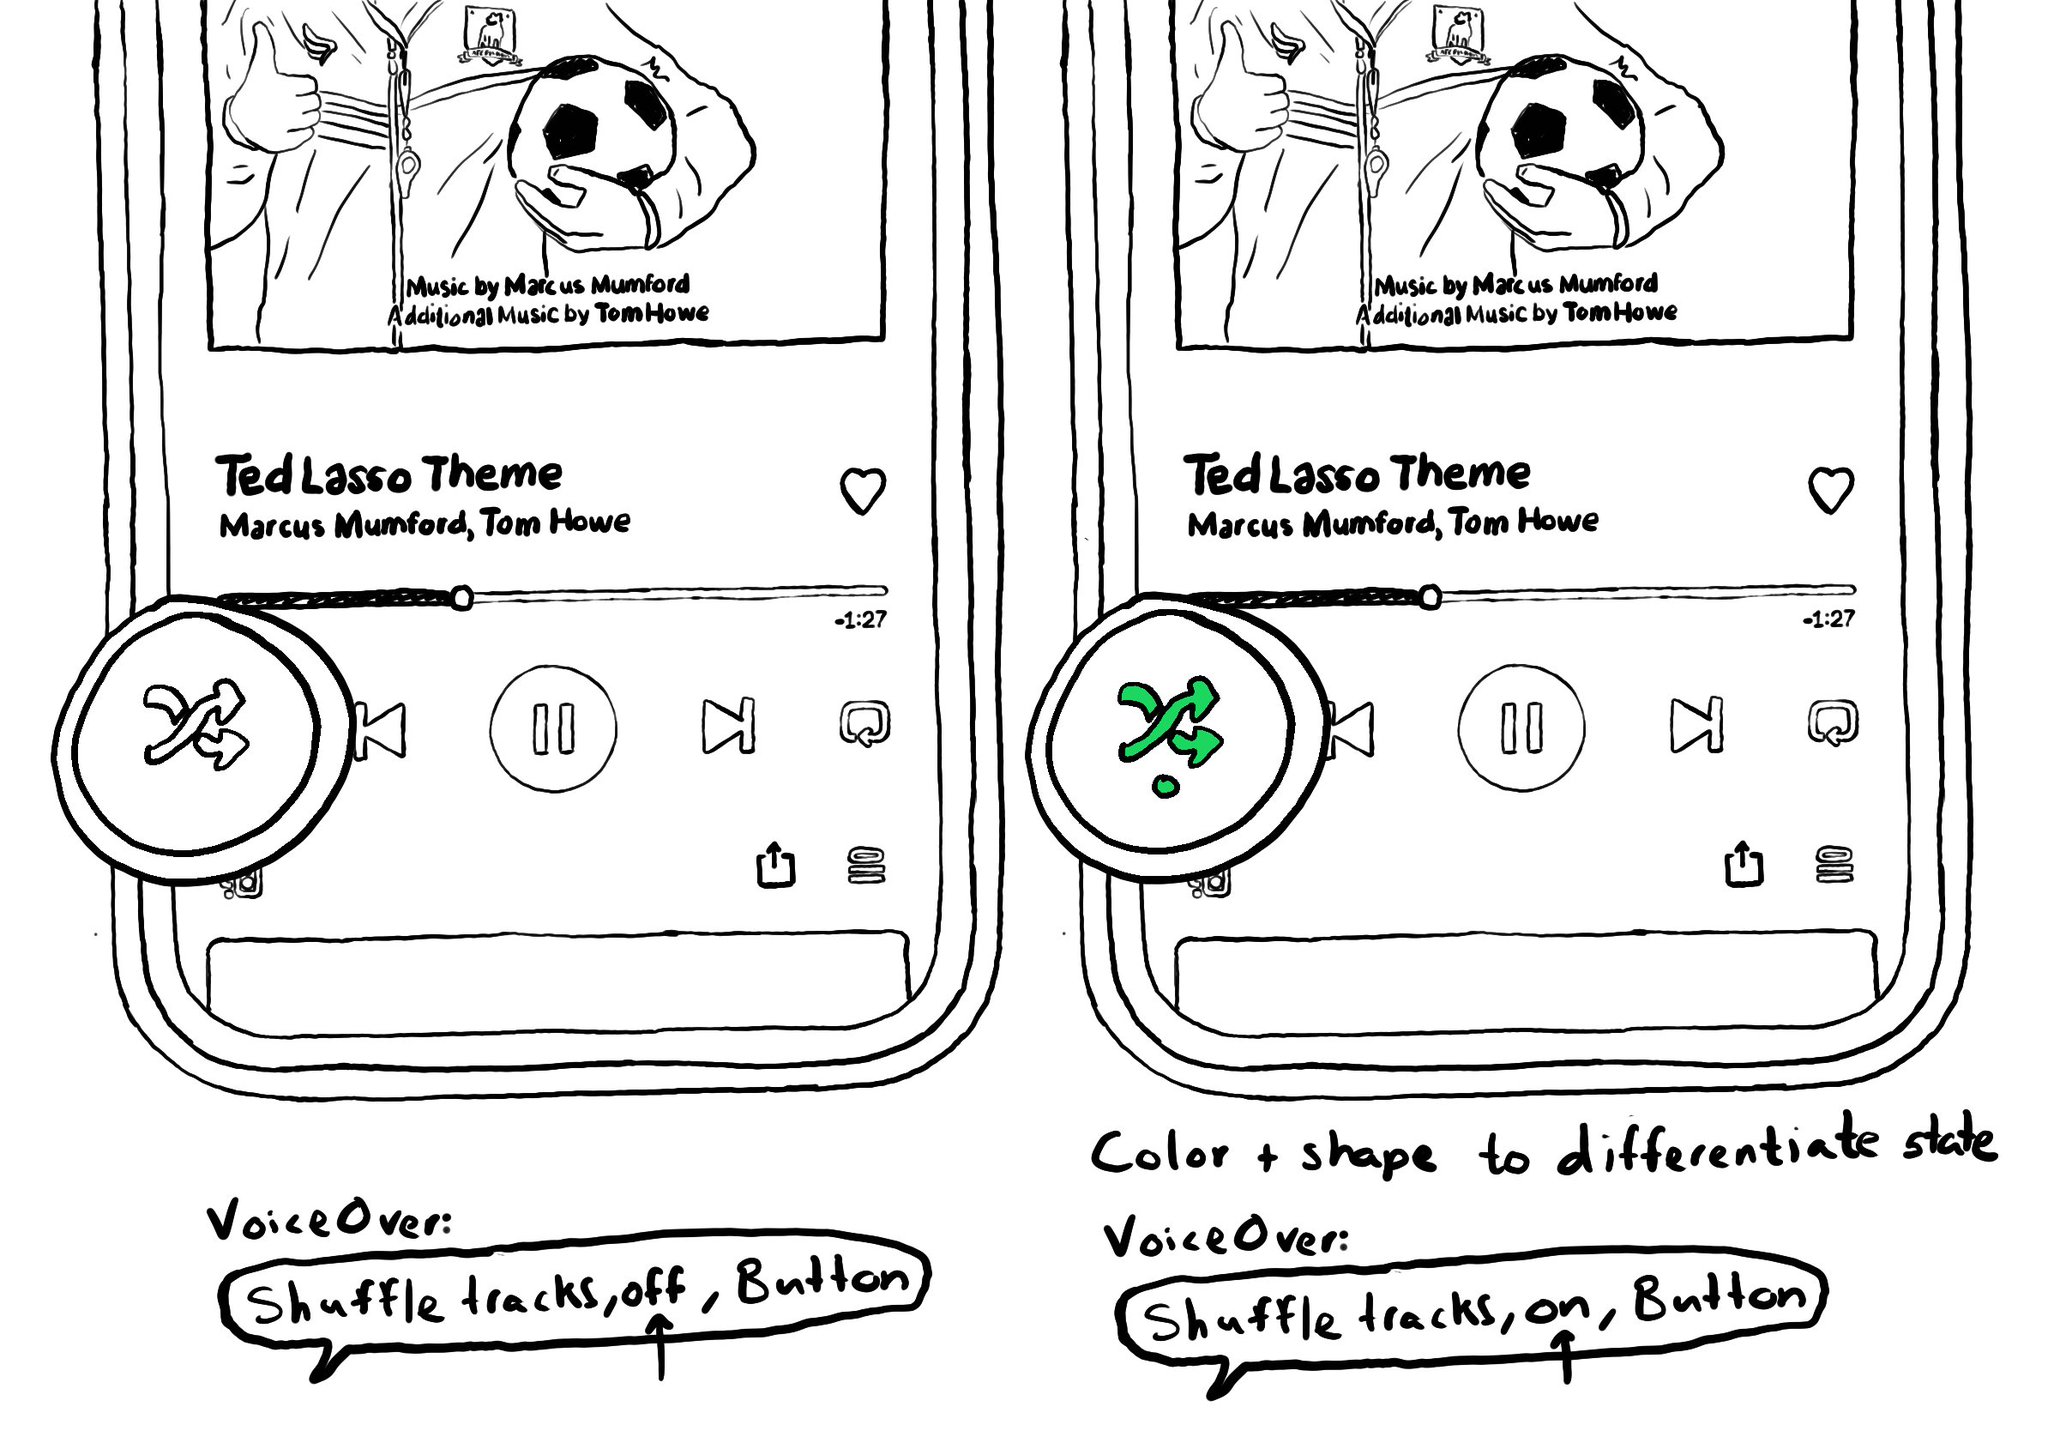
Convey important information in multiple modes (sounds, haptics, colour, iconography, messaging...) so no-one misses it. Take Spotify's shuffle button. It is green when on, white when off, but it has also a dot indicator. https://wearecolorblind.com/examples/spotify-shuffle-and-repeat-buttons/
Showing 166-180 of 234 posts