Tips and tricks to build accessible iOS apps
#365DaysIOSAccessibility
A year-long journey exploring iOS accessibility, one day at a time. Each post shares practical insights, tips, and techniques to make your iOS apps more accessible.
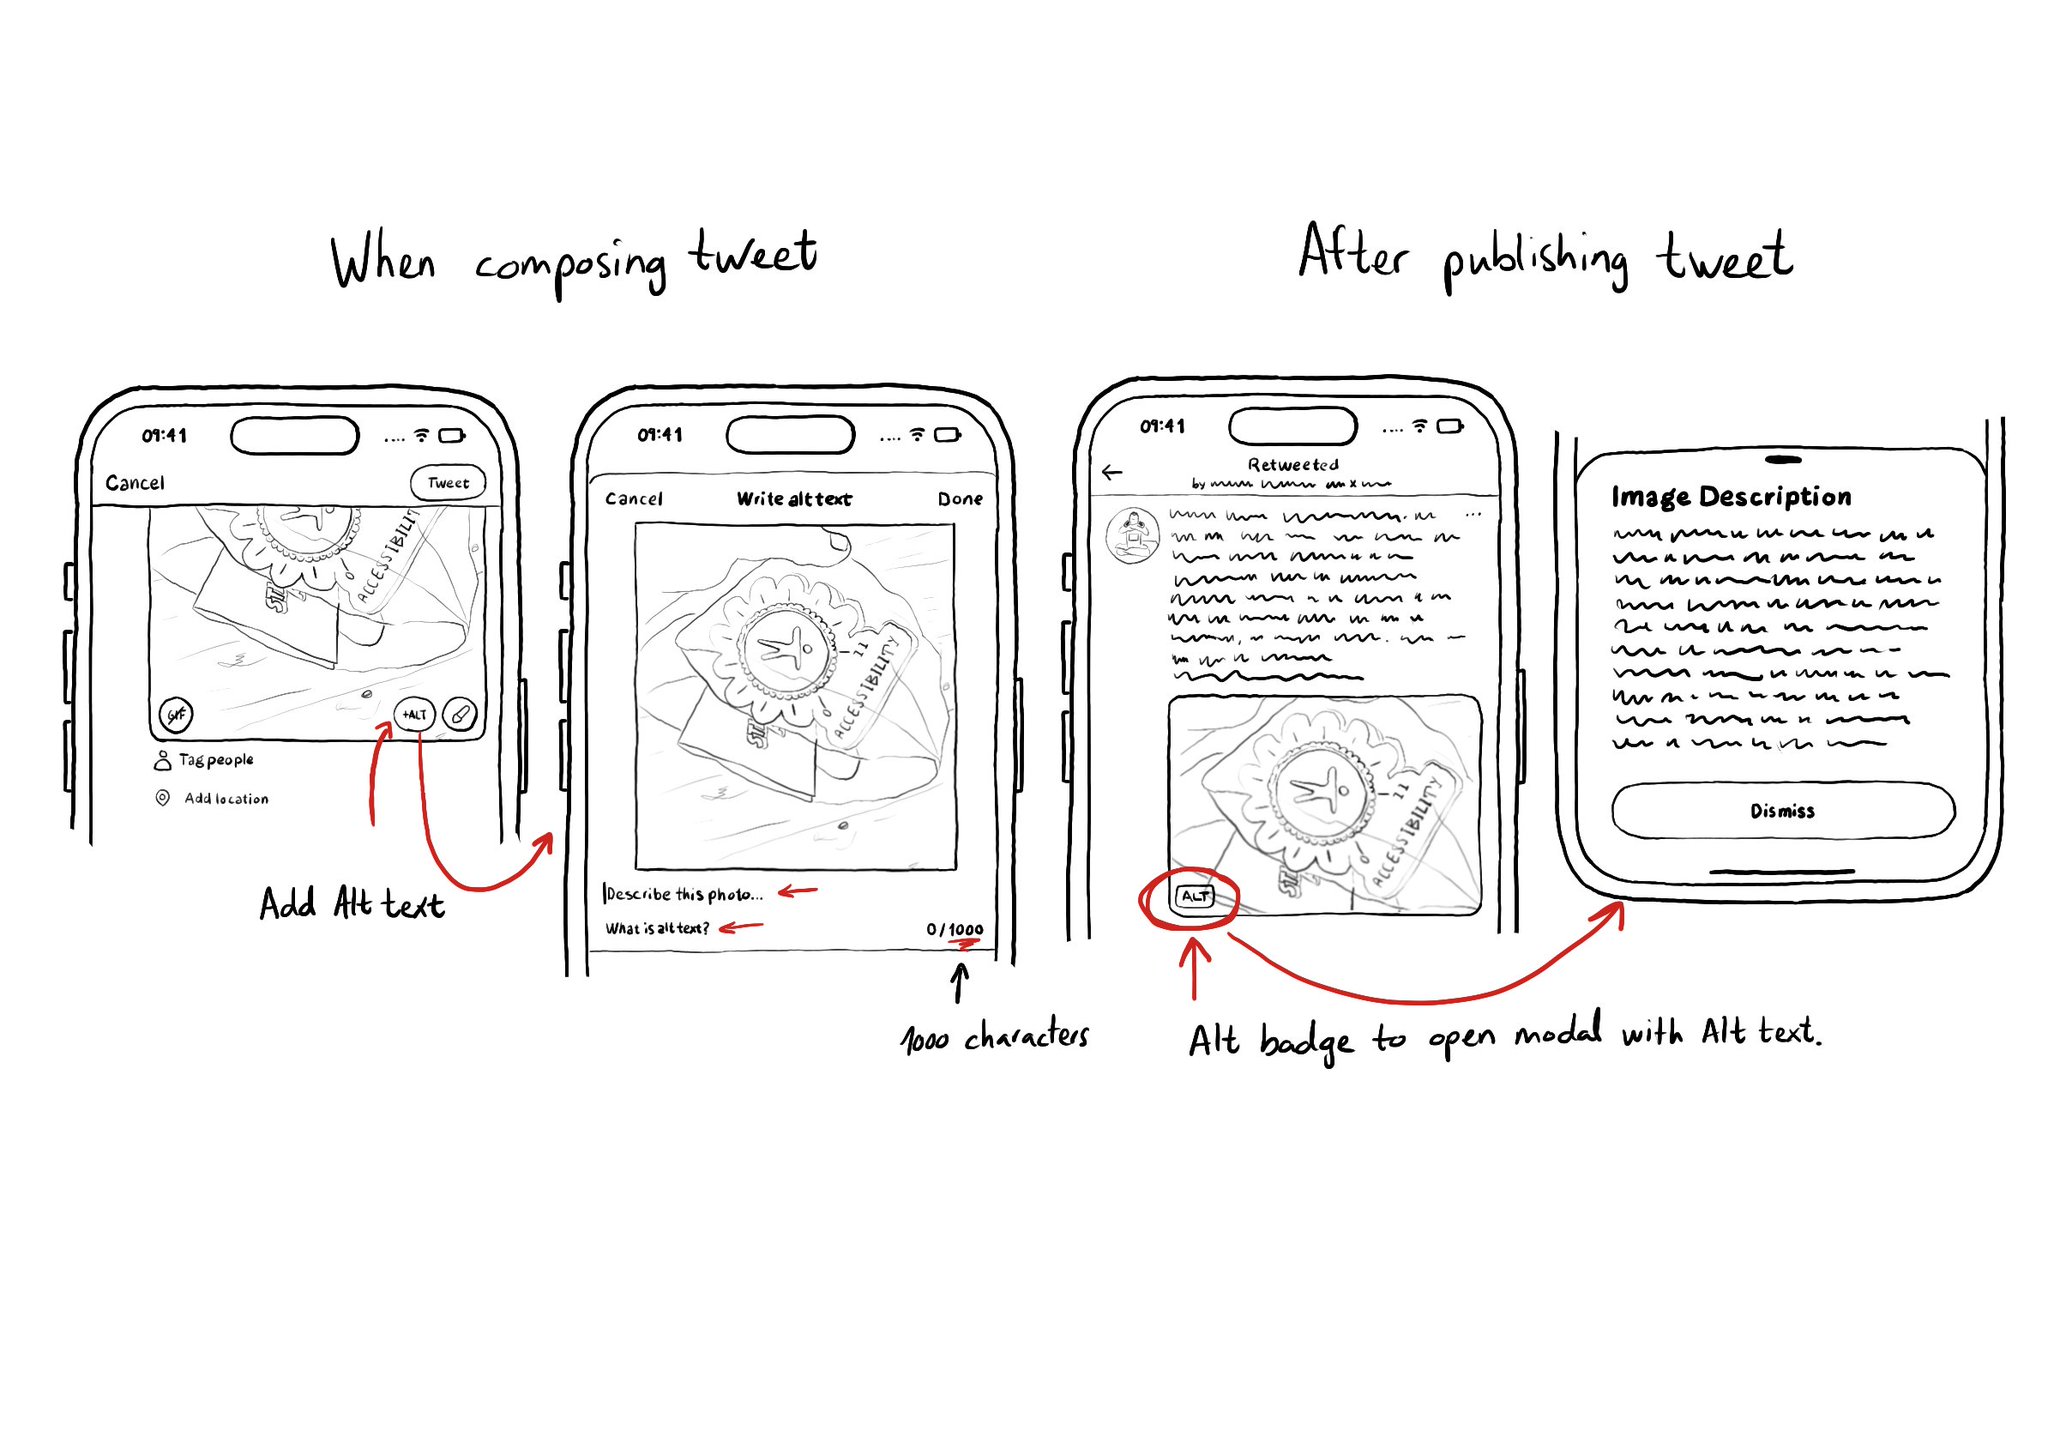
It is not just about applying accessibility APIs, but about caring, and thinking of features that can make your app more accessible and inclusive to everyone. Twitter's alt-text feature is a great example. Thanks, @TwitterA11y! You'll be missed.

When using Voice Control, say: "Show names". You'll see all the accessibility labels for interactive elements overlaid on the screen. It will help you identify labels that can be improved, or actually missing. Labels are not just for VoiceOver.
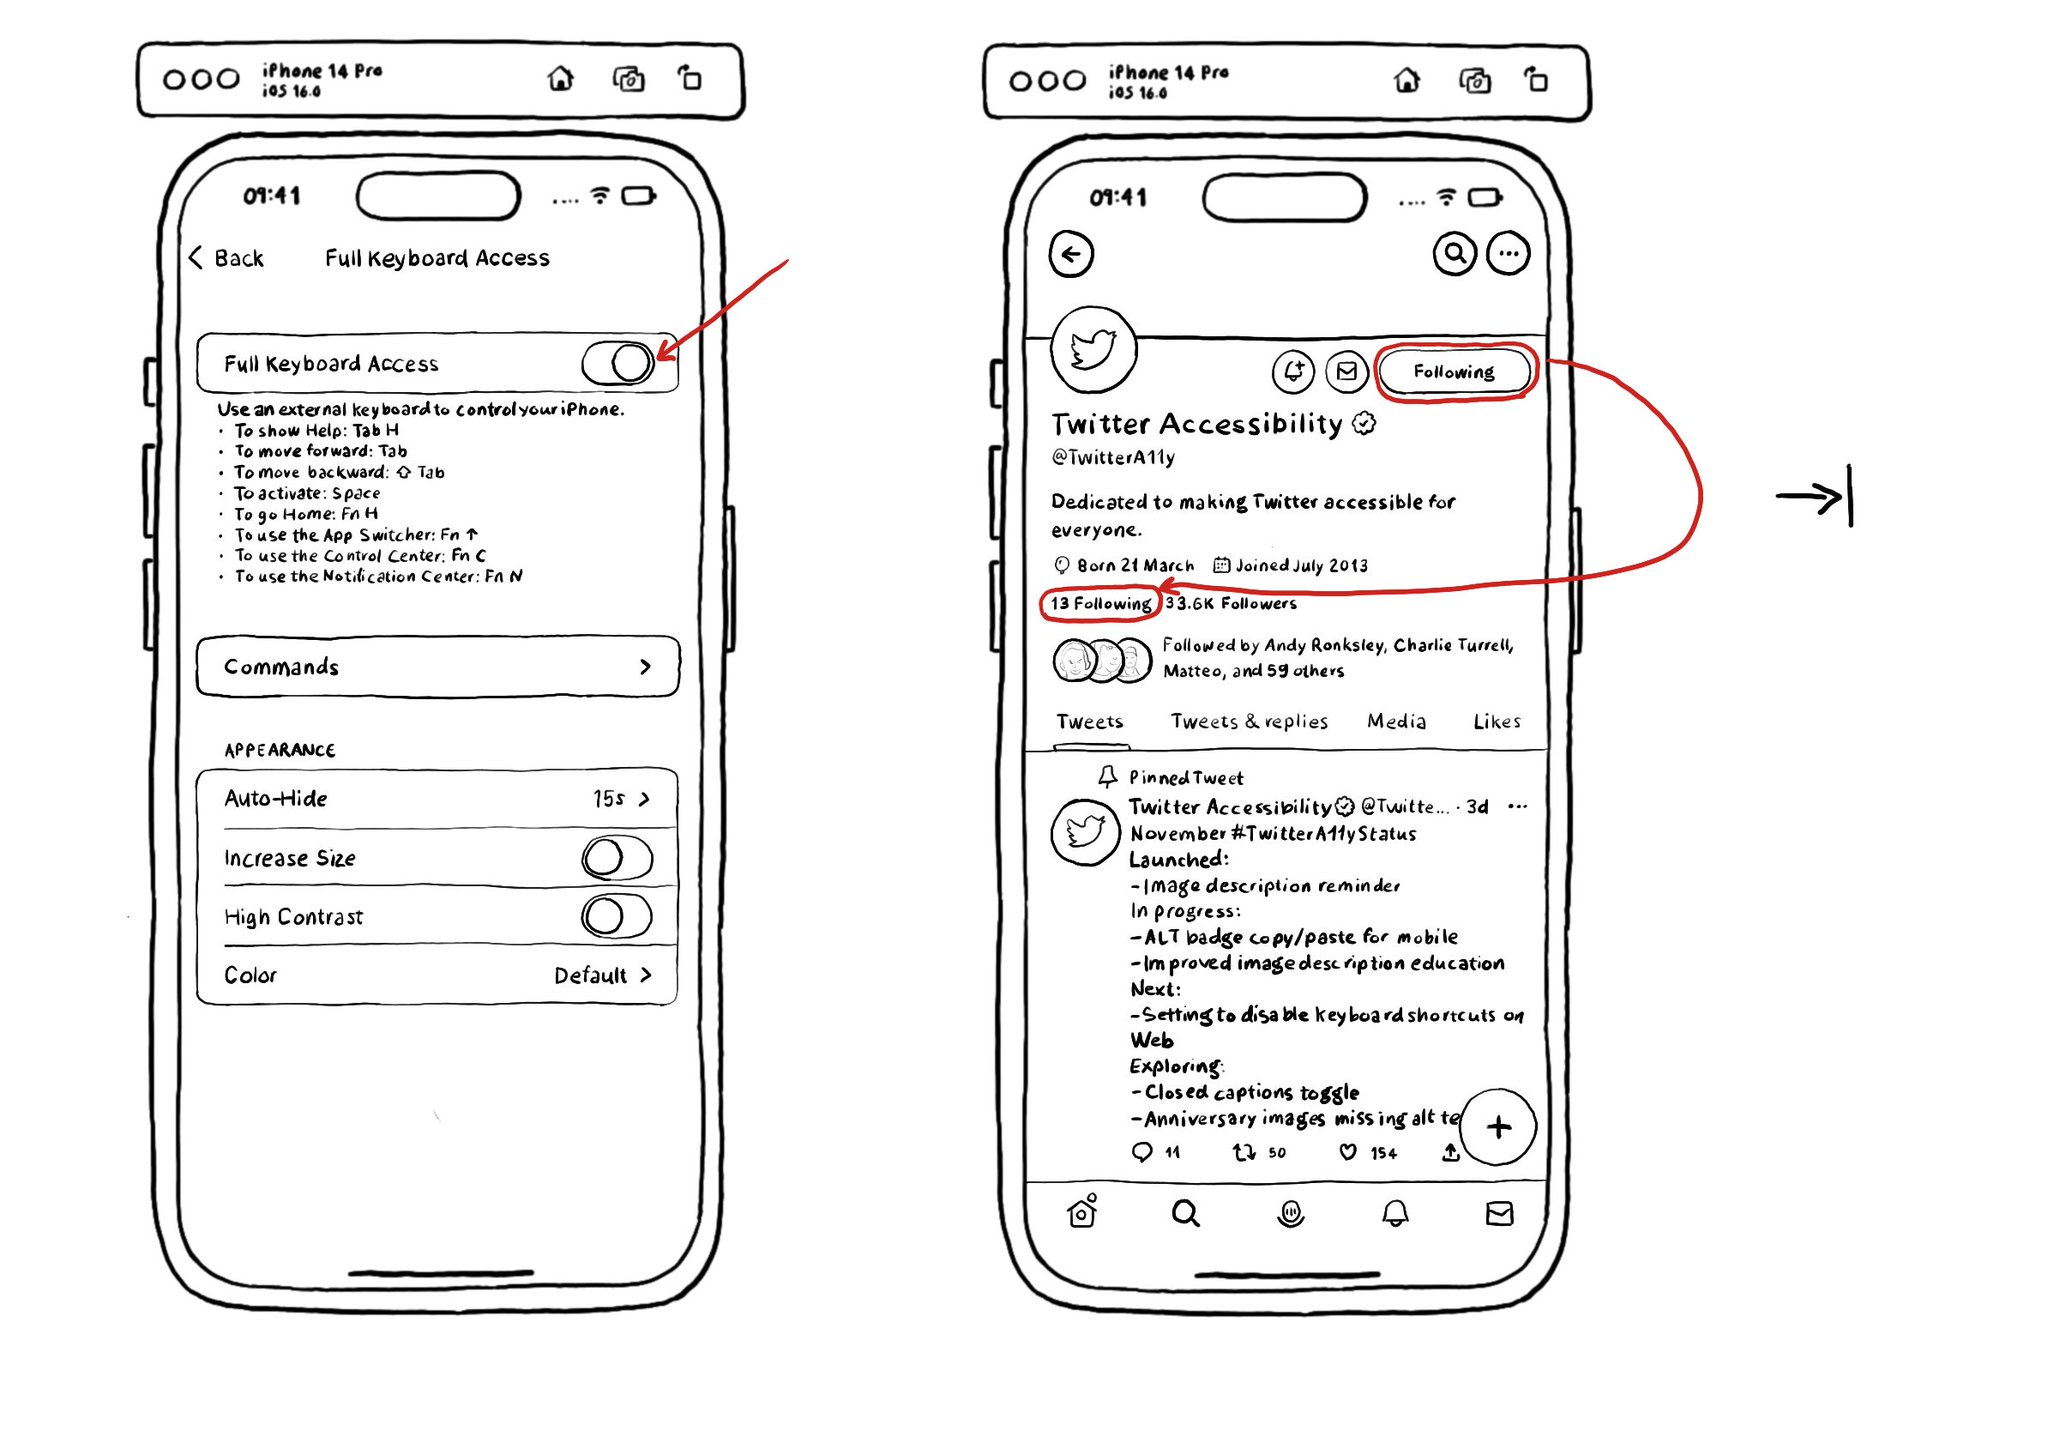
Full Keyboard Access can be tested in the simulator! So convenient! You can enable it from Accessibility's settings in the simulator. And from there, you can navigate your app by just using your computer's keyboard.
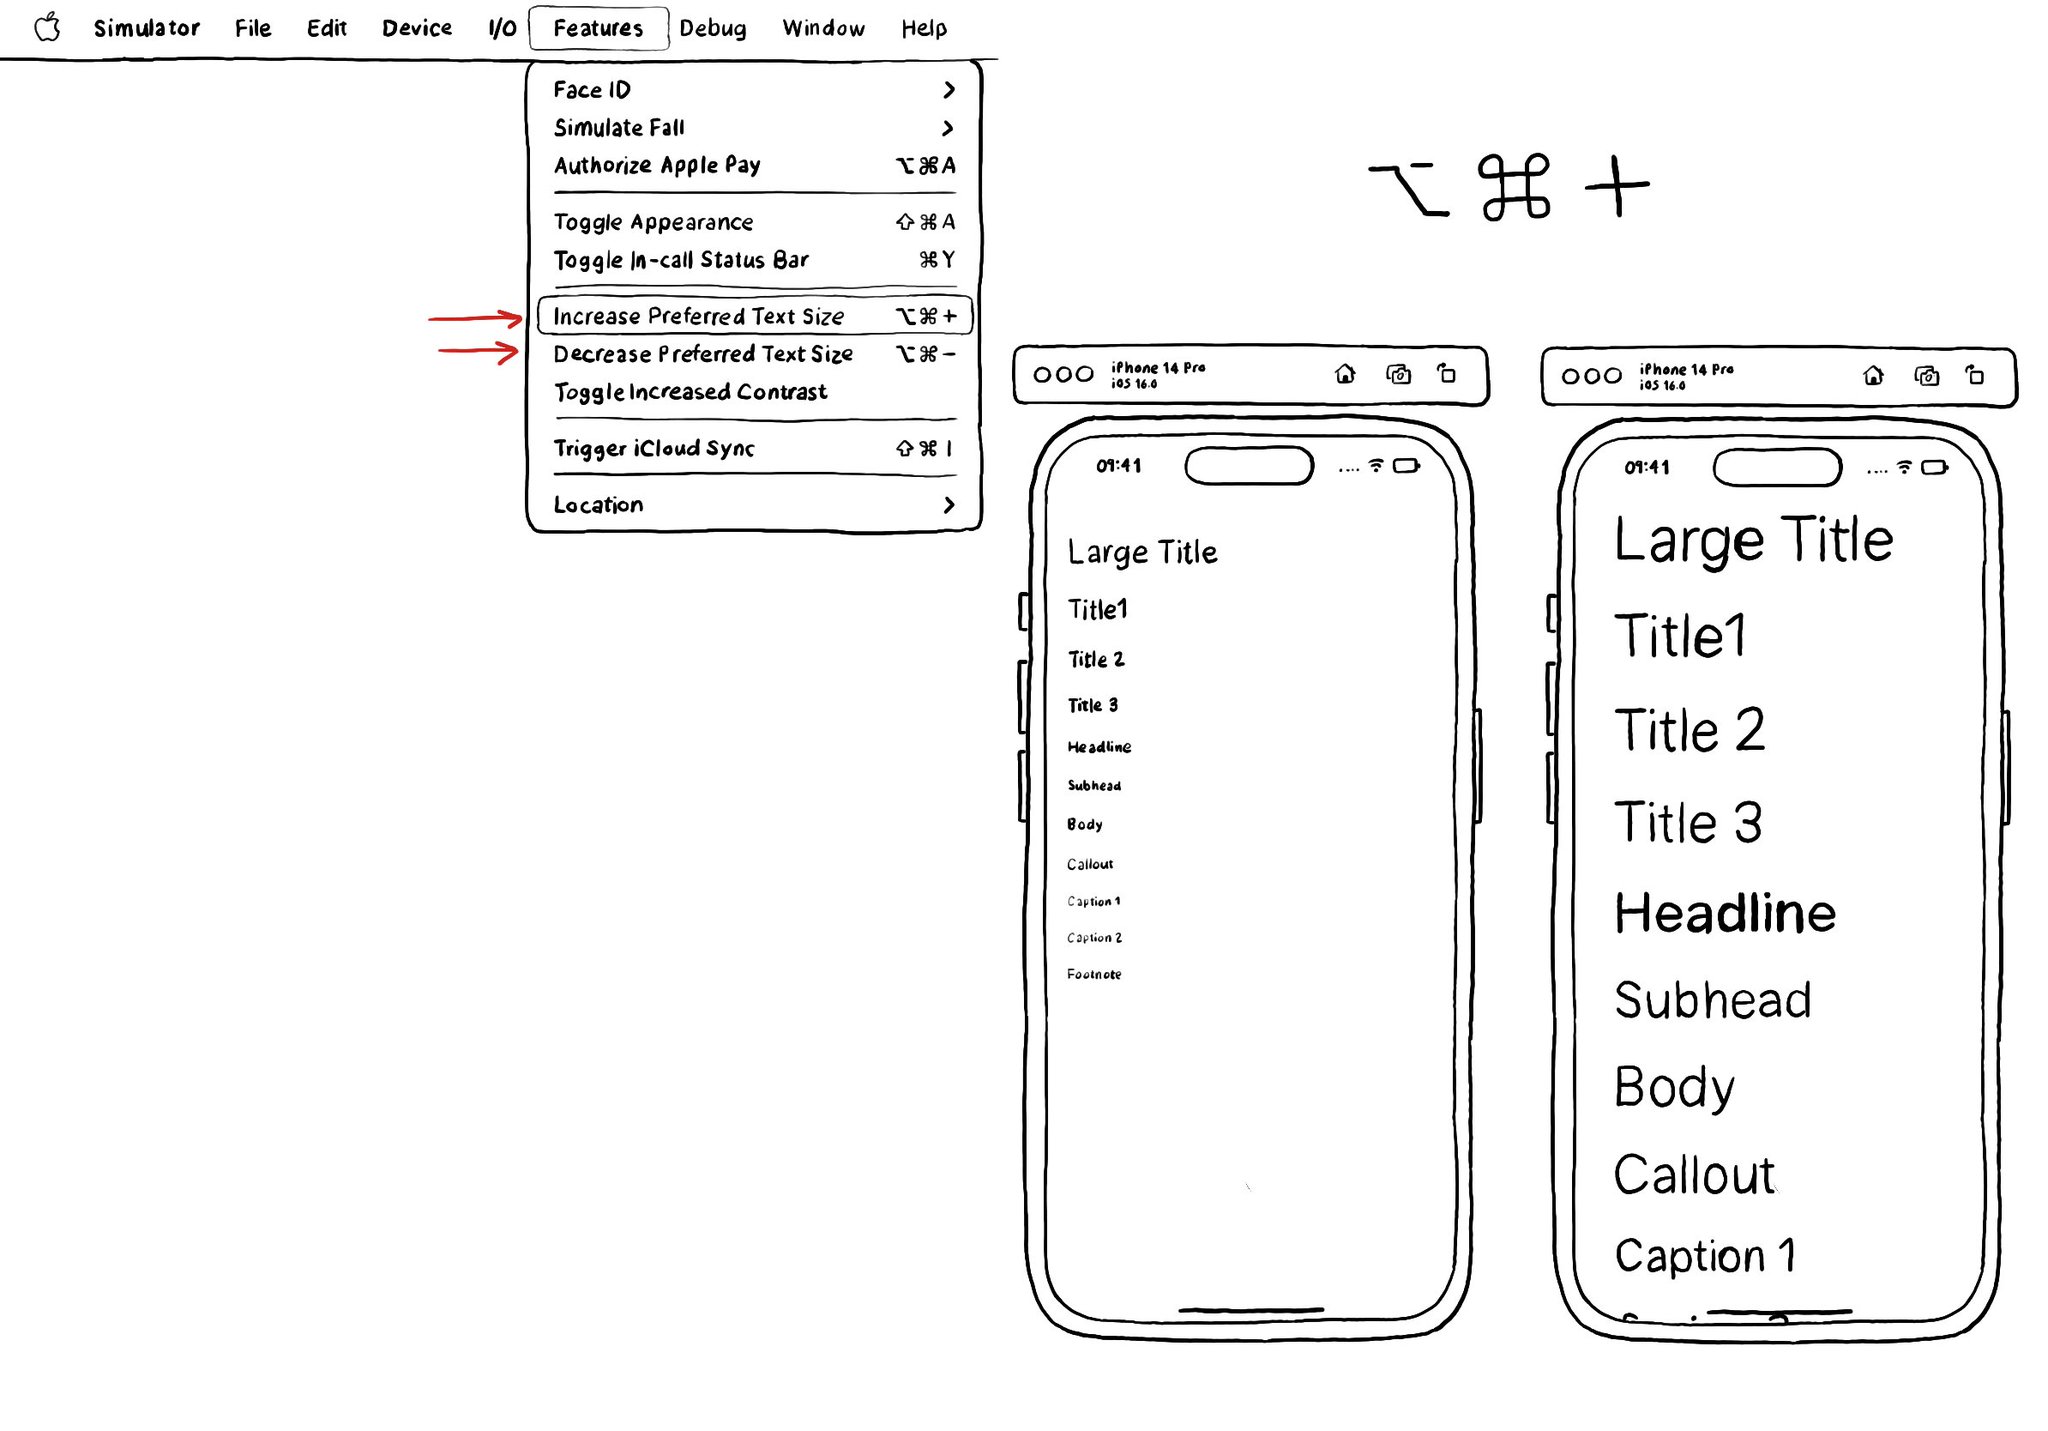
The fastest way for testing Dynamic Type while developing, and to quickly see how your app's UI flows, is by using the "option + cmd + plus/minus" to increase/decrease the text size in your simulator.
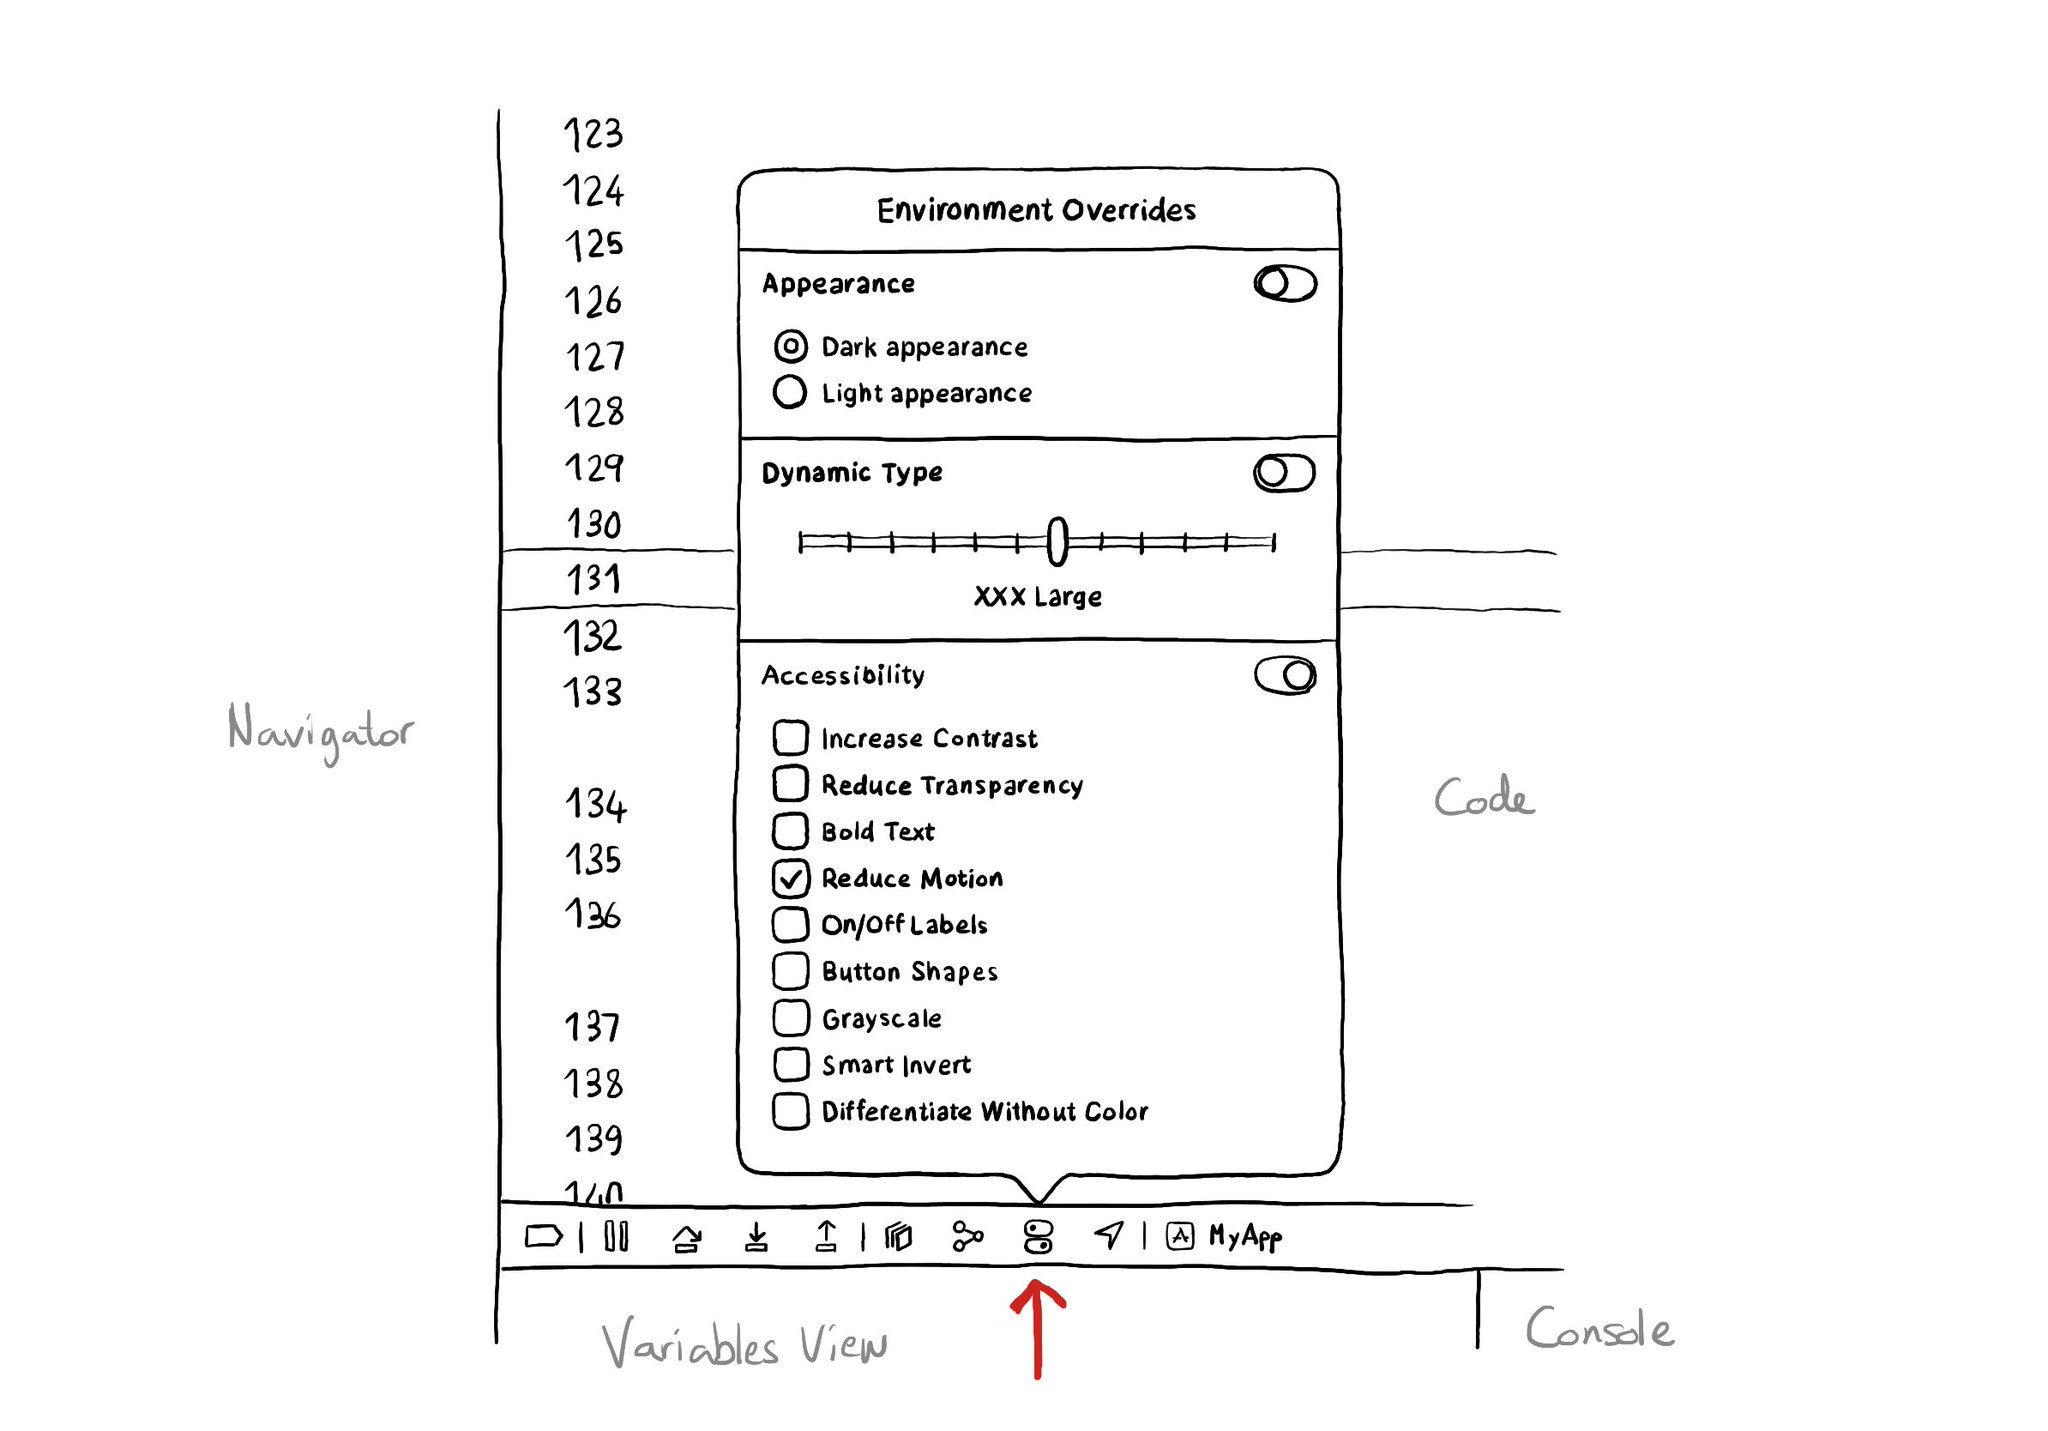
There is an Environment Overrides panel in the toolbar on top of Xcode's Debug Area. It allows you to select some of the most common accessibility options and Dynamic Type sizes, like in the Accessibility Inspector, plus select dark/light mode.
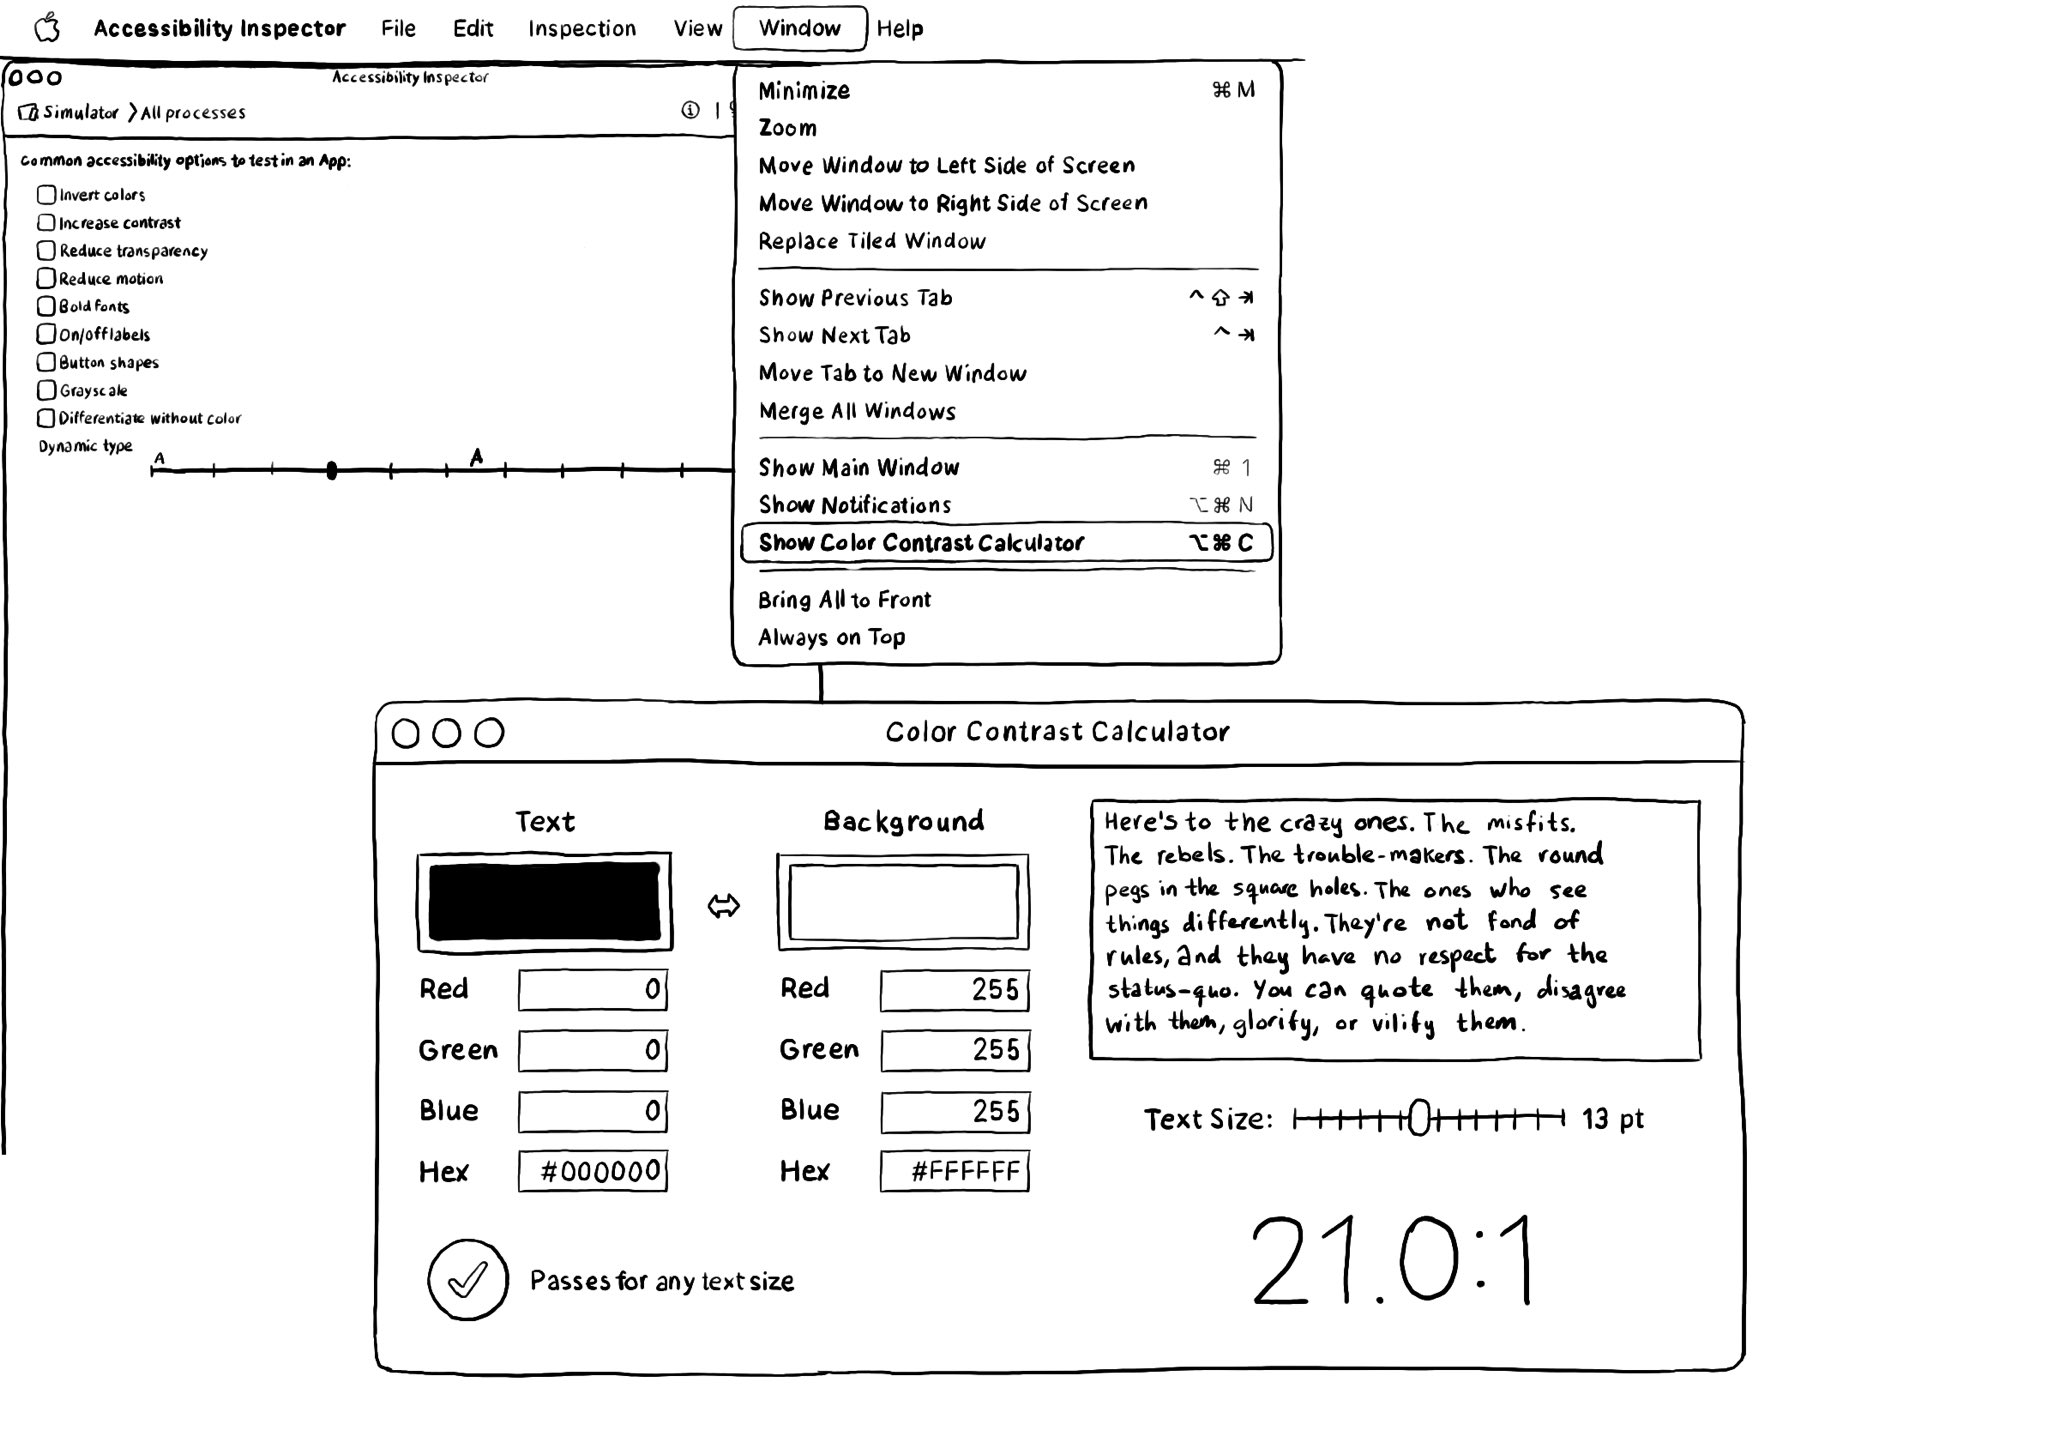
There is a Color Contrast Calculator conveniently built into the Accessibility Inspector. Find it in Window, in the top menu. Select two colors for text and background and check if it passes for all text sizes or just some of the largest ones.
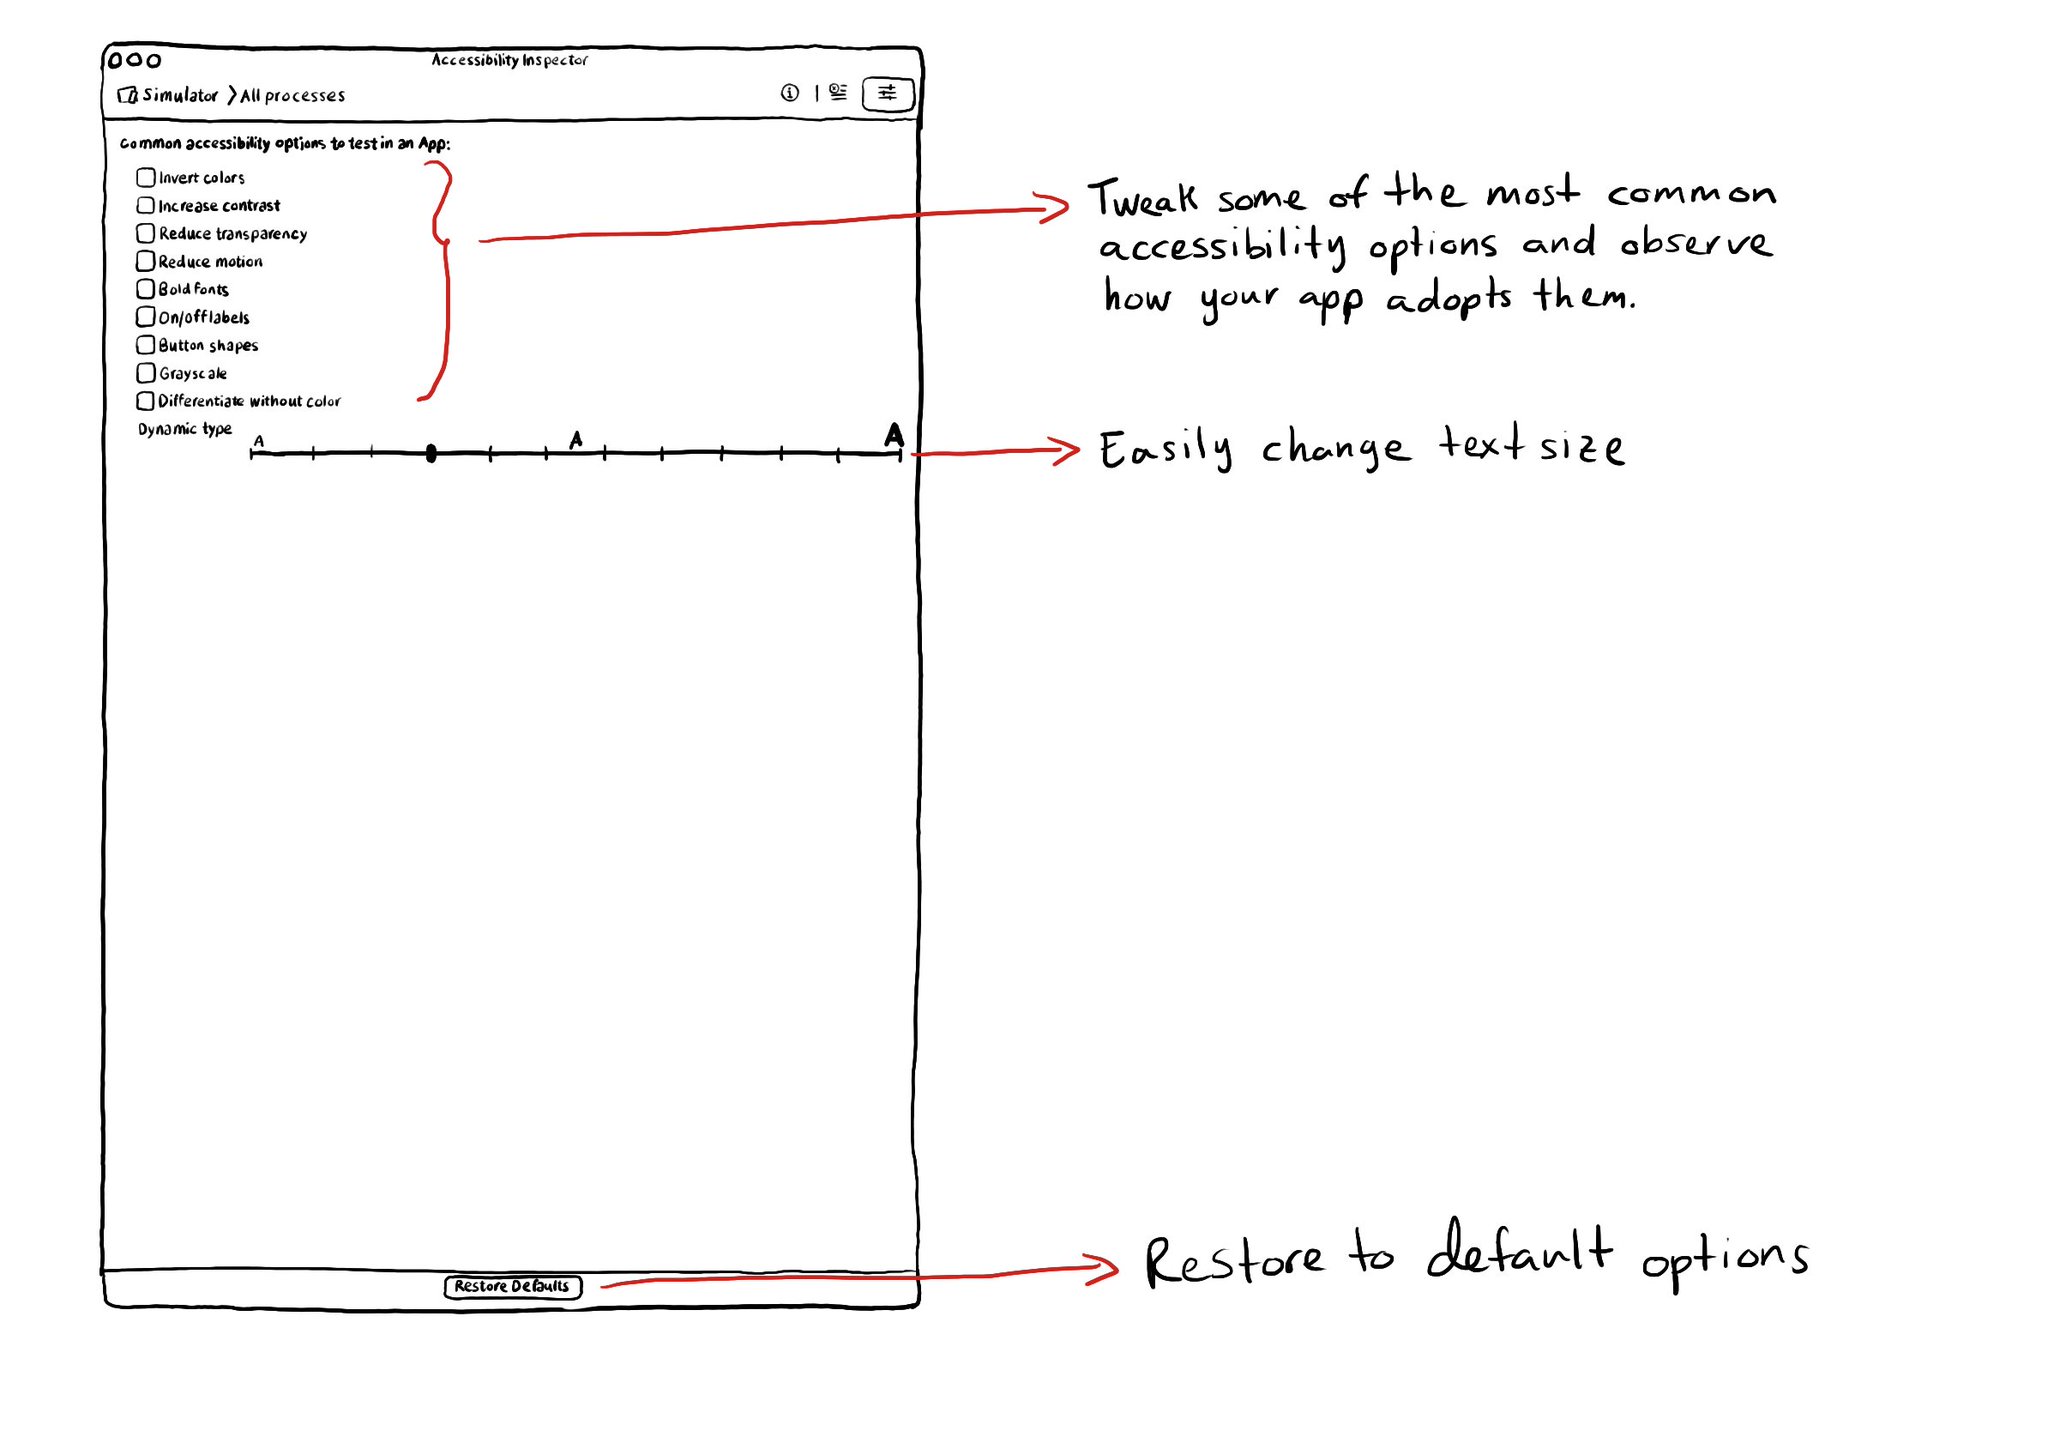
The Accessibility Inspector lets you configure on or off some of the most common accessibility options so you can conveniently observe how your app adopts these options in the simulator or device. You can also quickly select different text sizes.
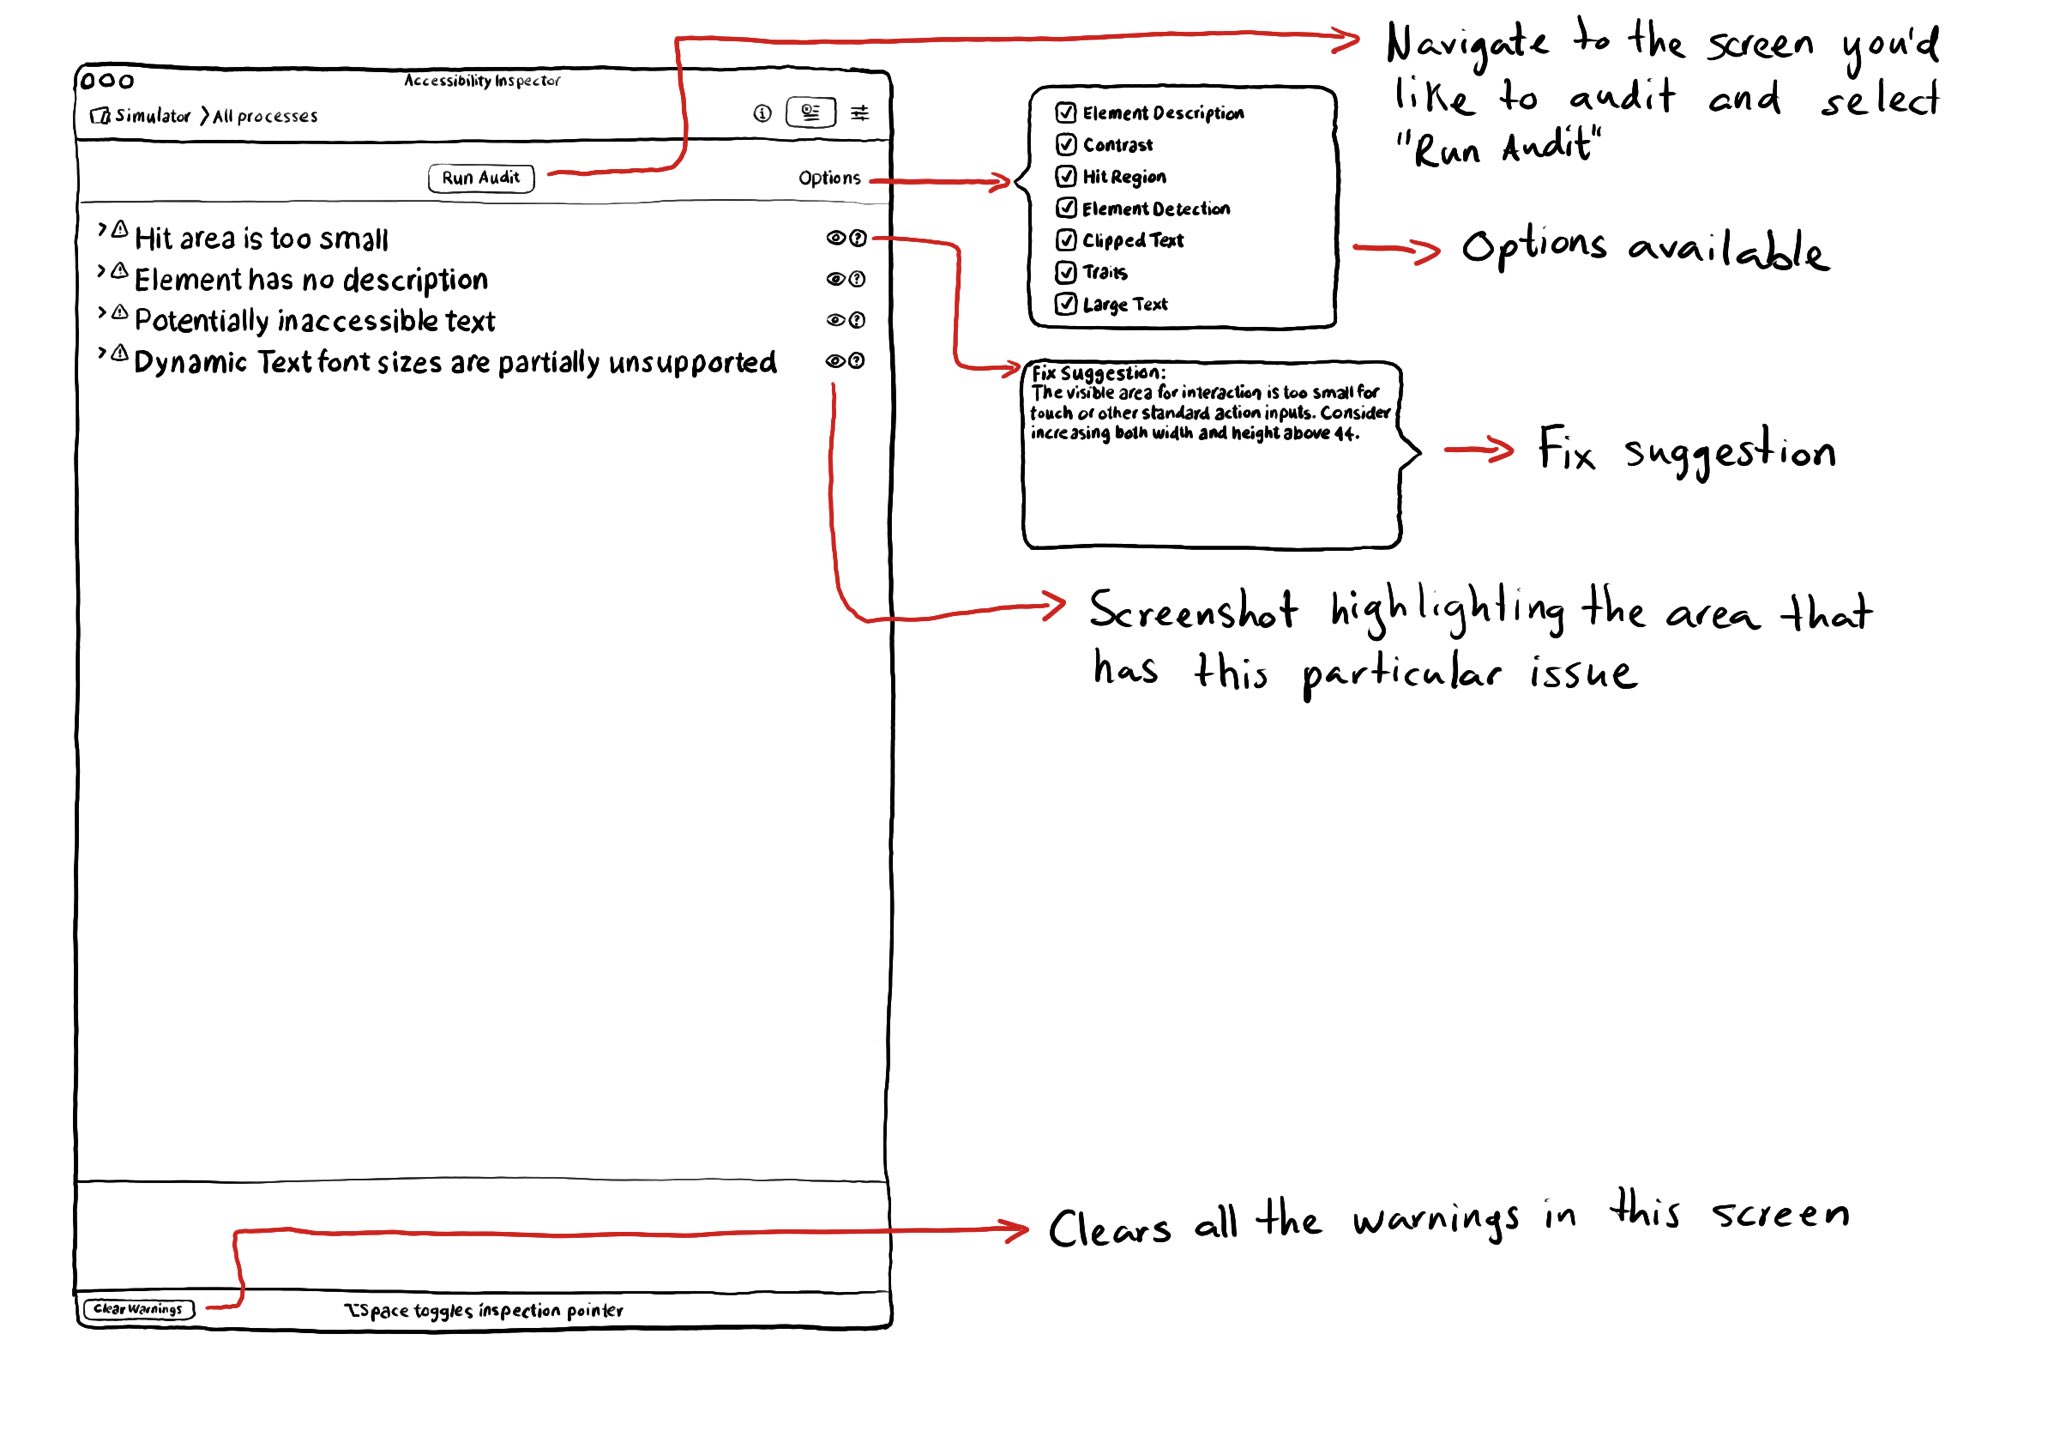
The Accessibility Inspector let’s you run an audit of the current screen in your simulator or device. It can find some basic issues like color contrast issues, touch target sizes that are too small, etc. It can also provide with fix suggestions.
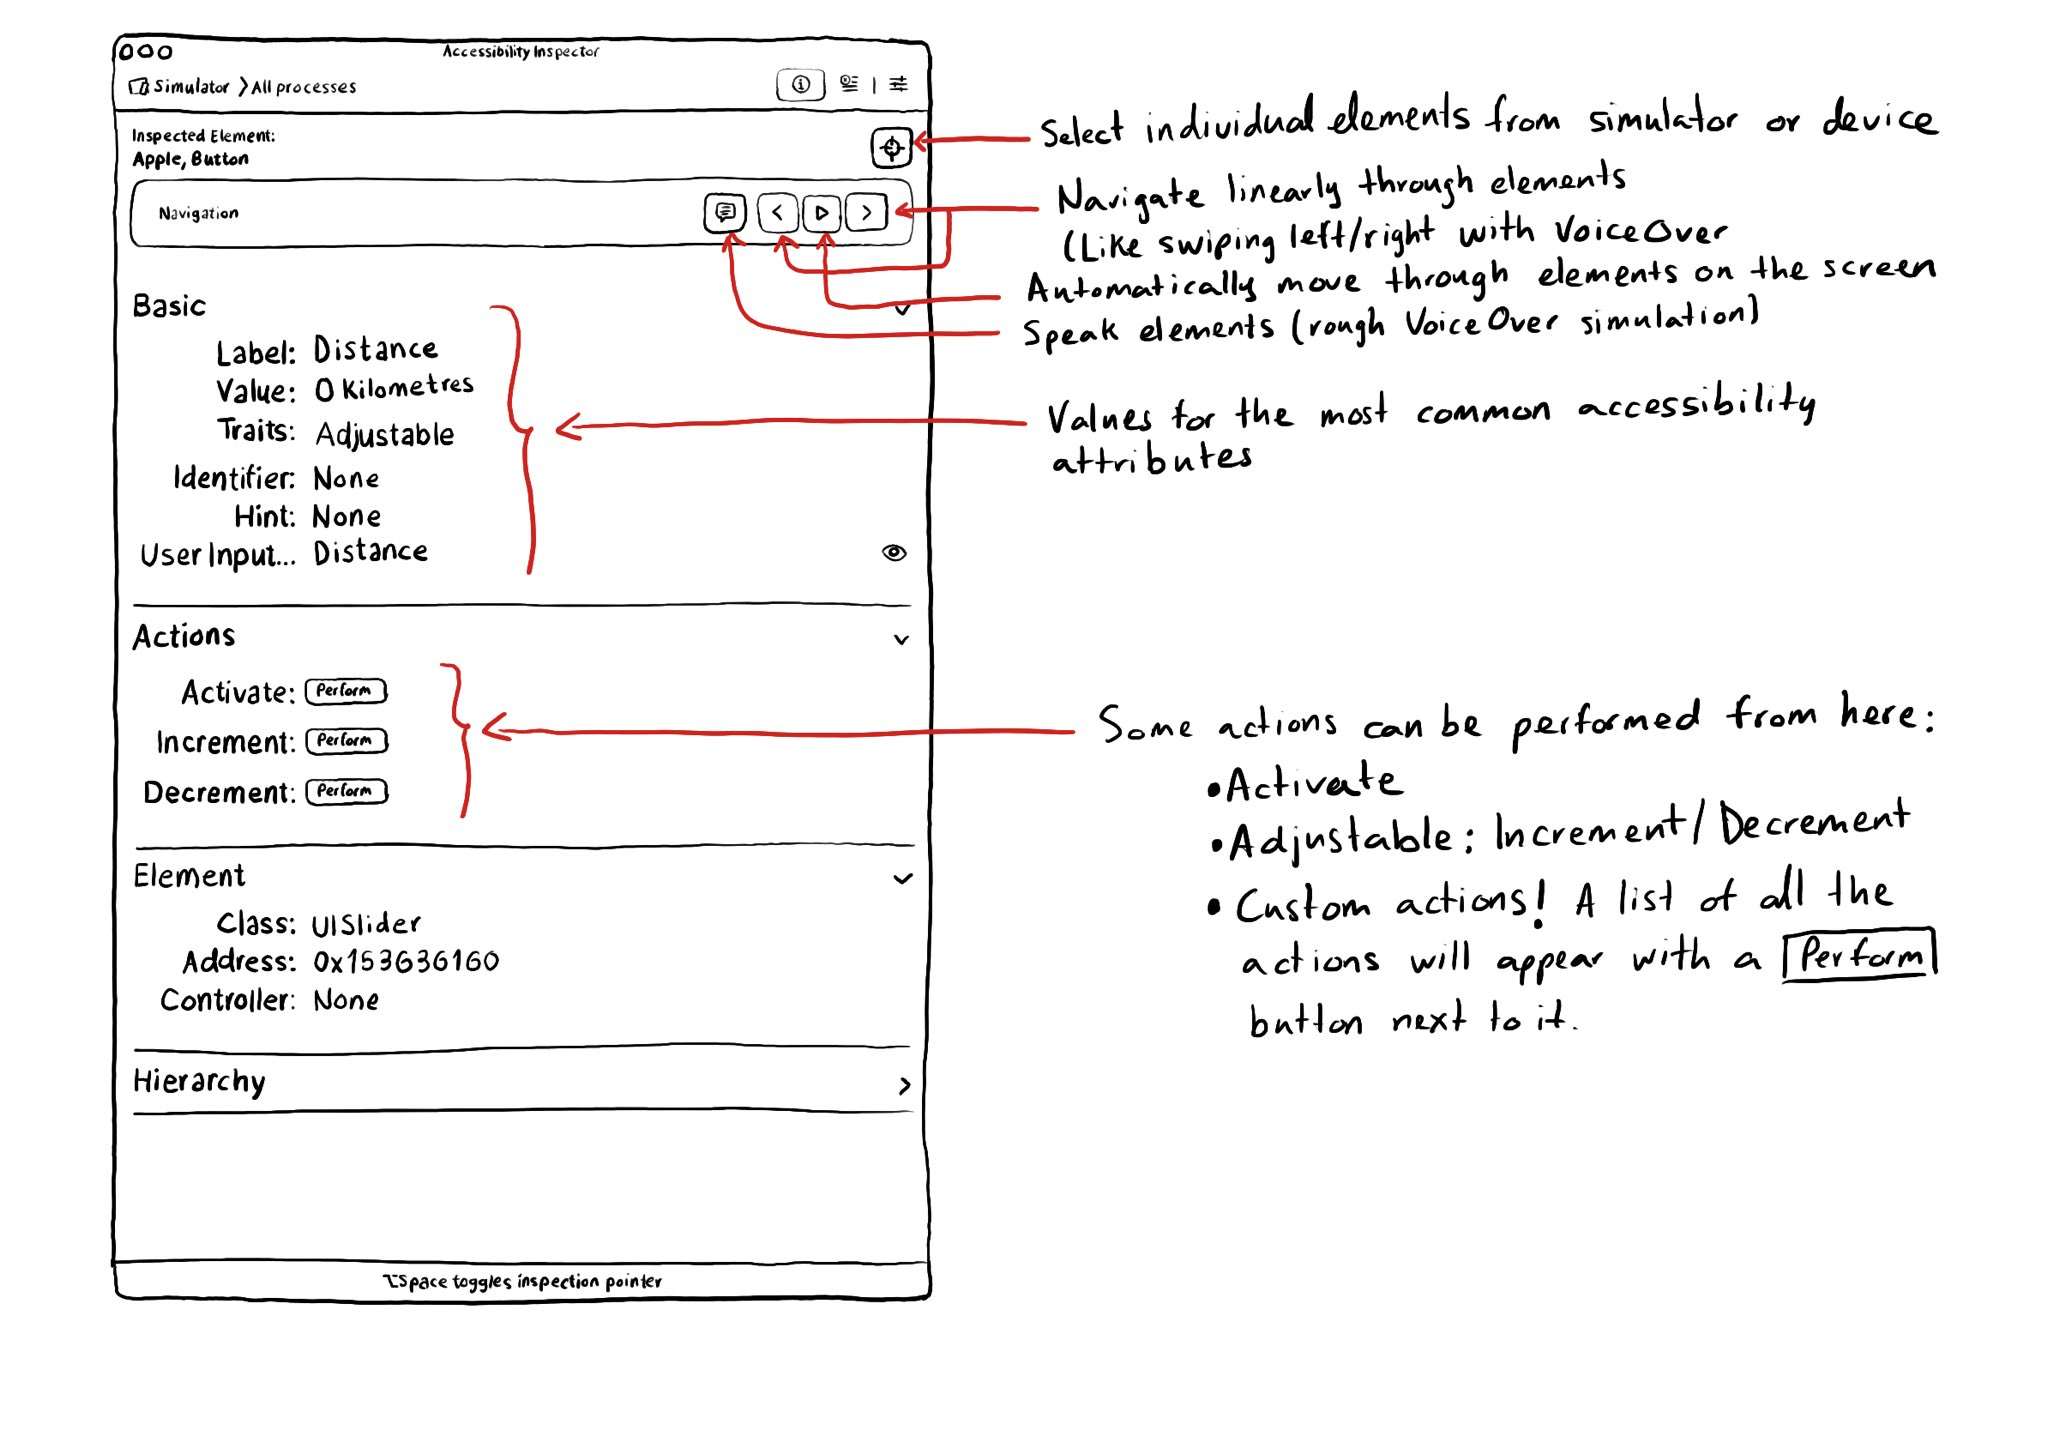
With the Accessibility Inspector you can check the value for the most common accessibility attributes for individual elements, do some basic navigation, and even perform actions if the component is adjustable or if it has custom actions.
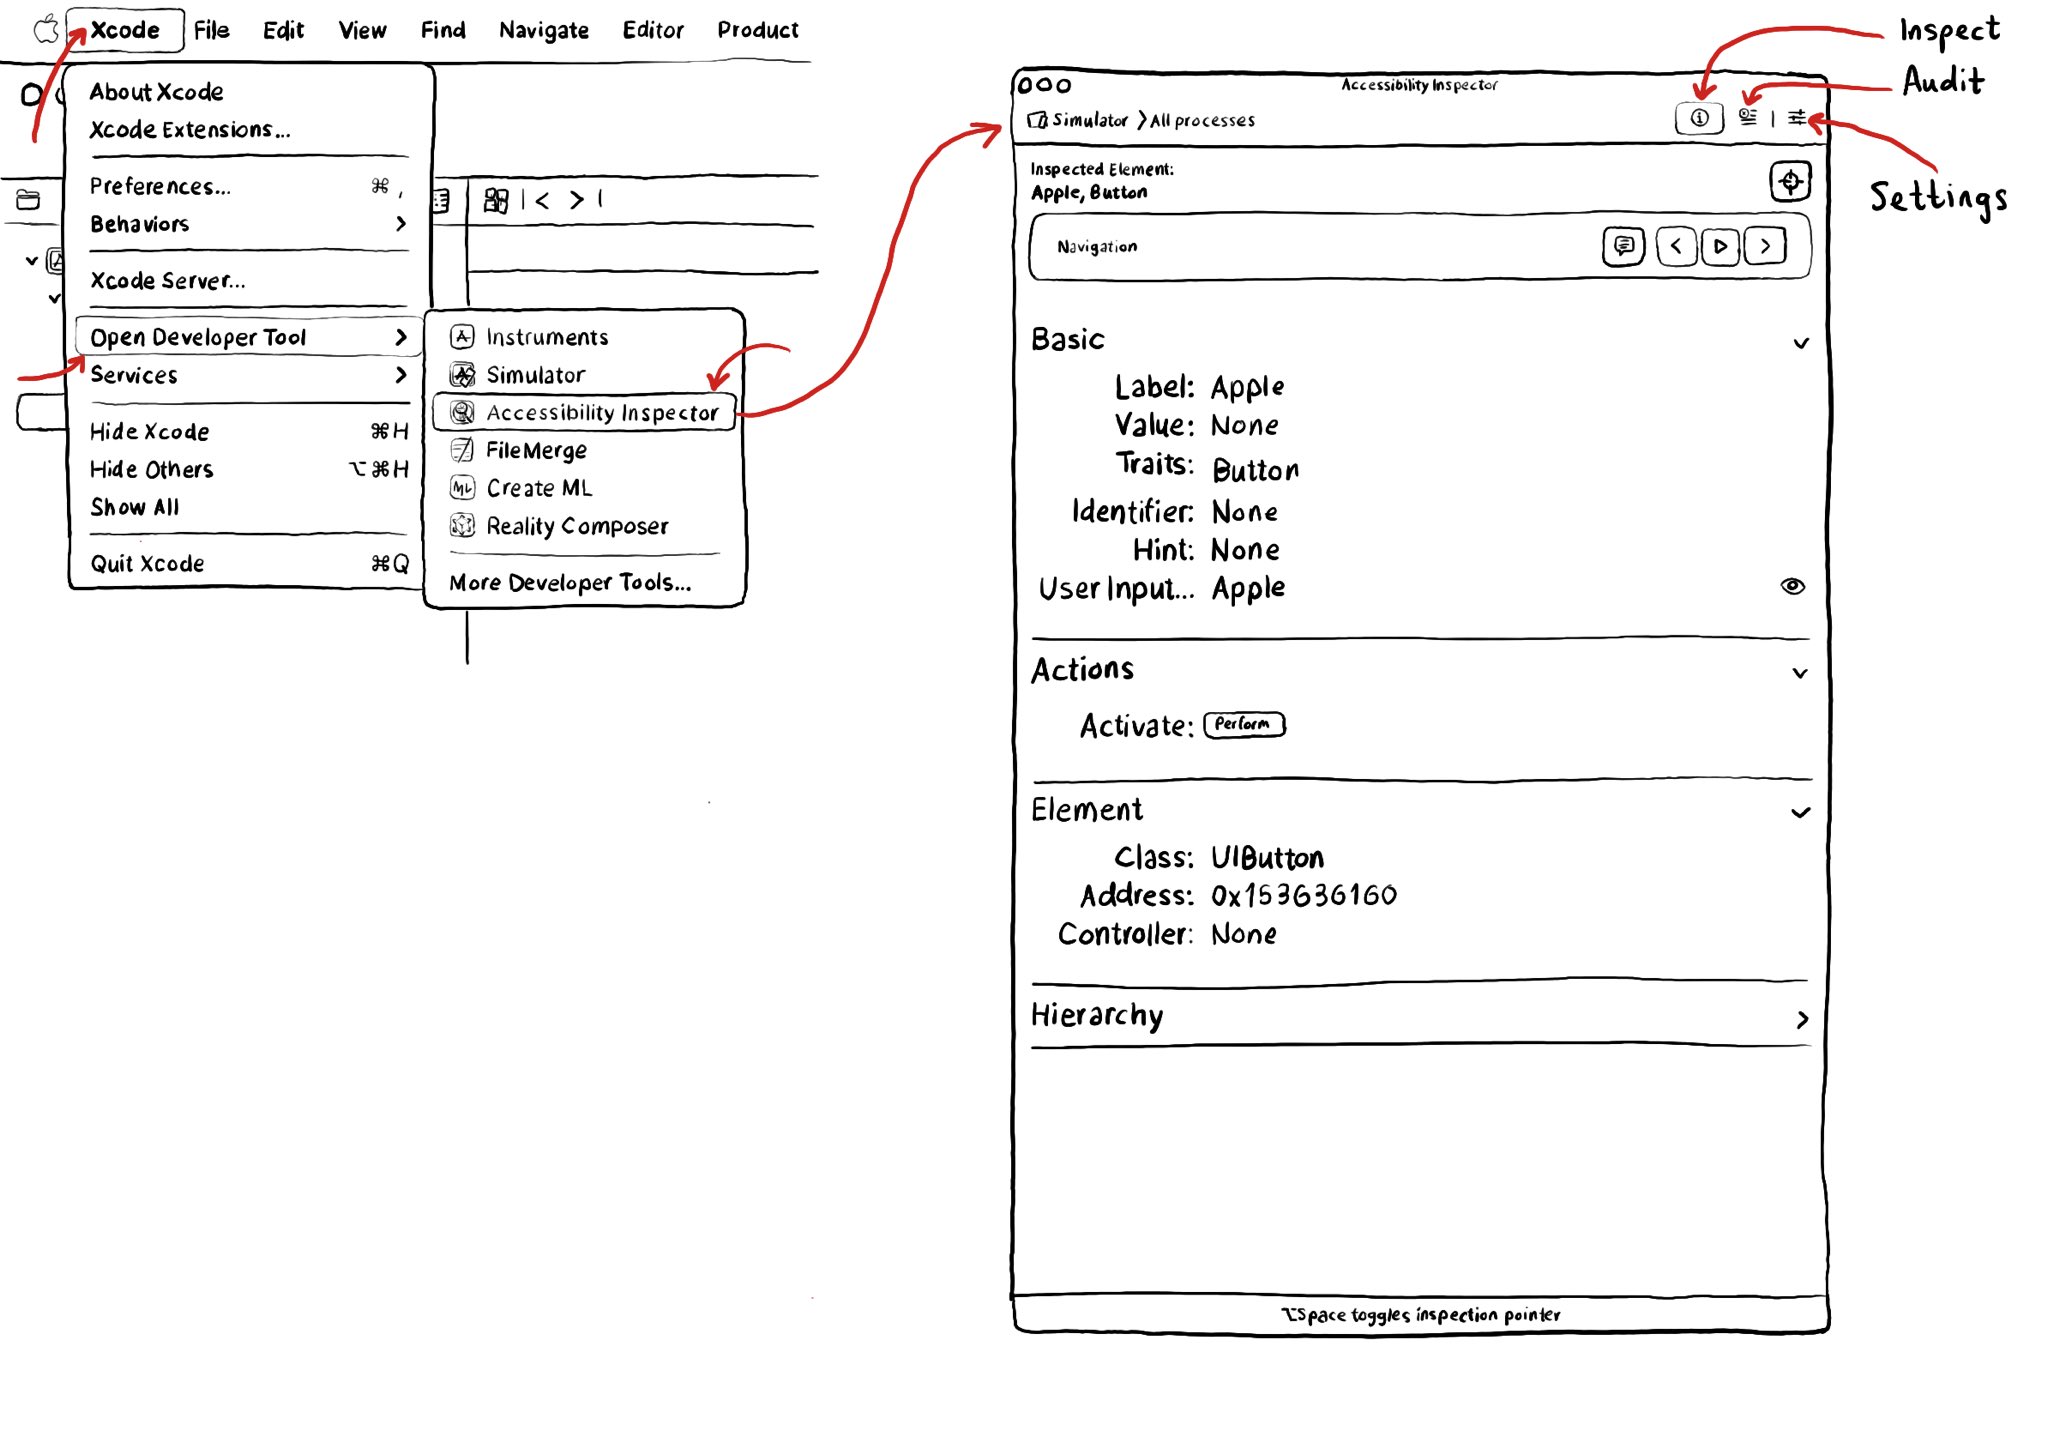
Xcode has a built-in tool to help you develop more accessible apps, the Accessibility Inspector. You can find it in the Developer Tool set in the Xcode menu. It has three main functionalities: inspect, audit and settings.
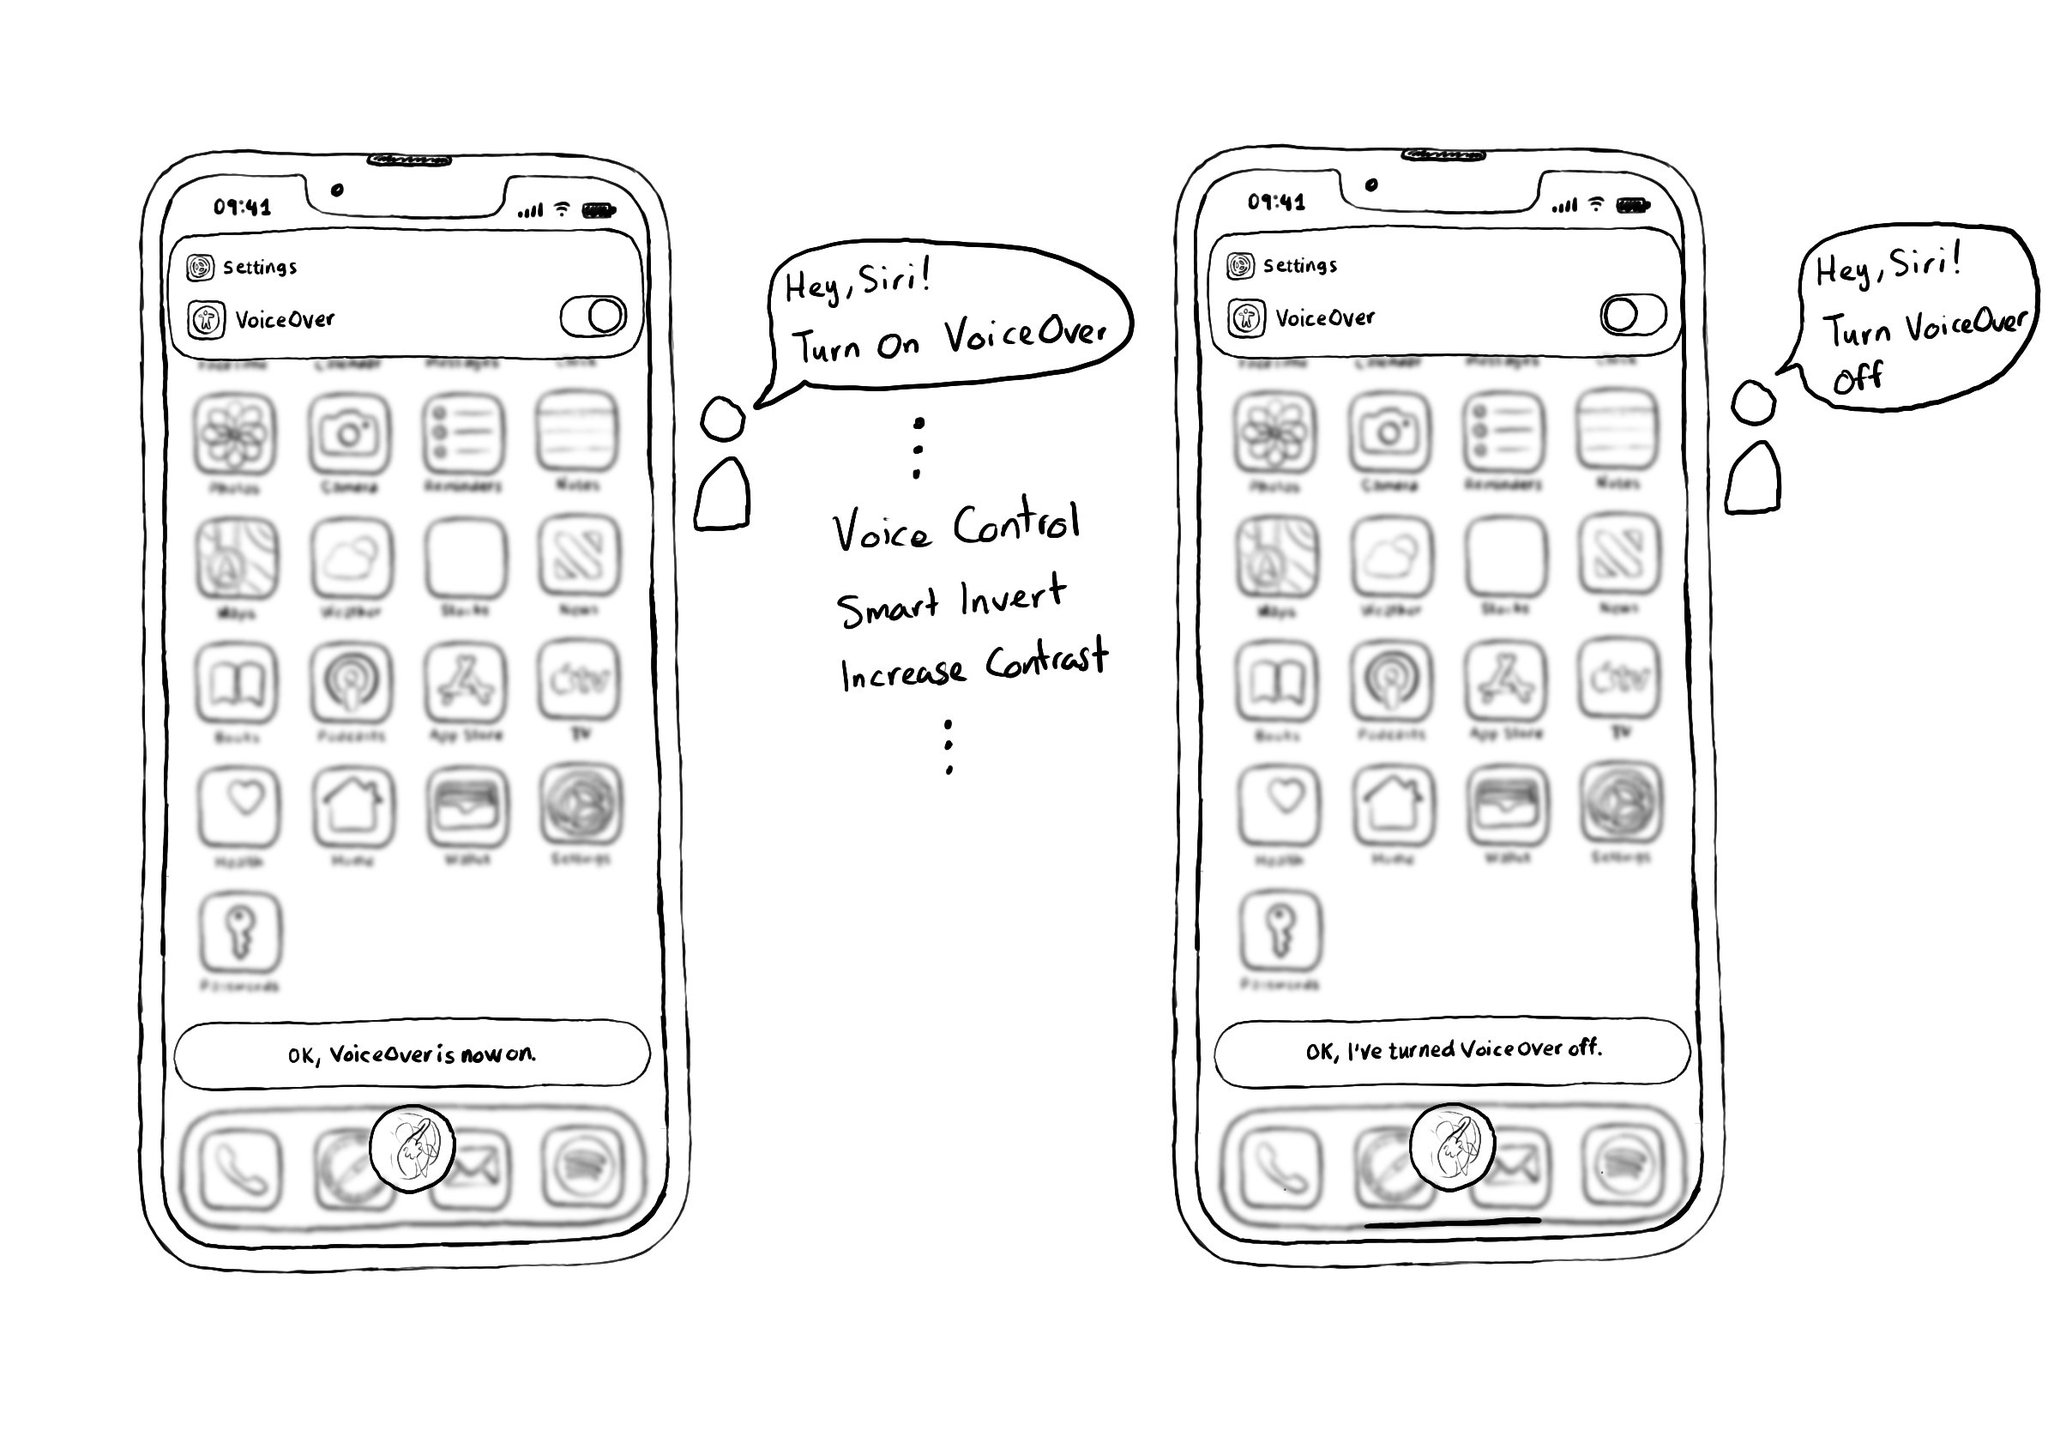
A quick way for turning on, or off, VoiceOver is by using Siri. Say something like: "Hey, Siri! Turn on VoiceOver", and you'll find yourself using VoiceOver in no time. You can also do the same with other technologies like Voice Control.
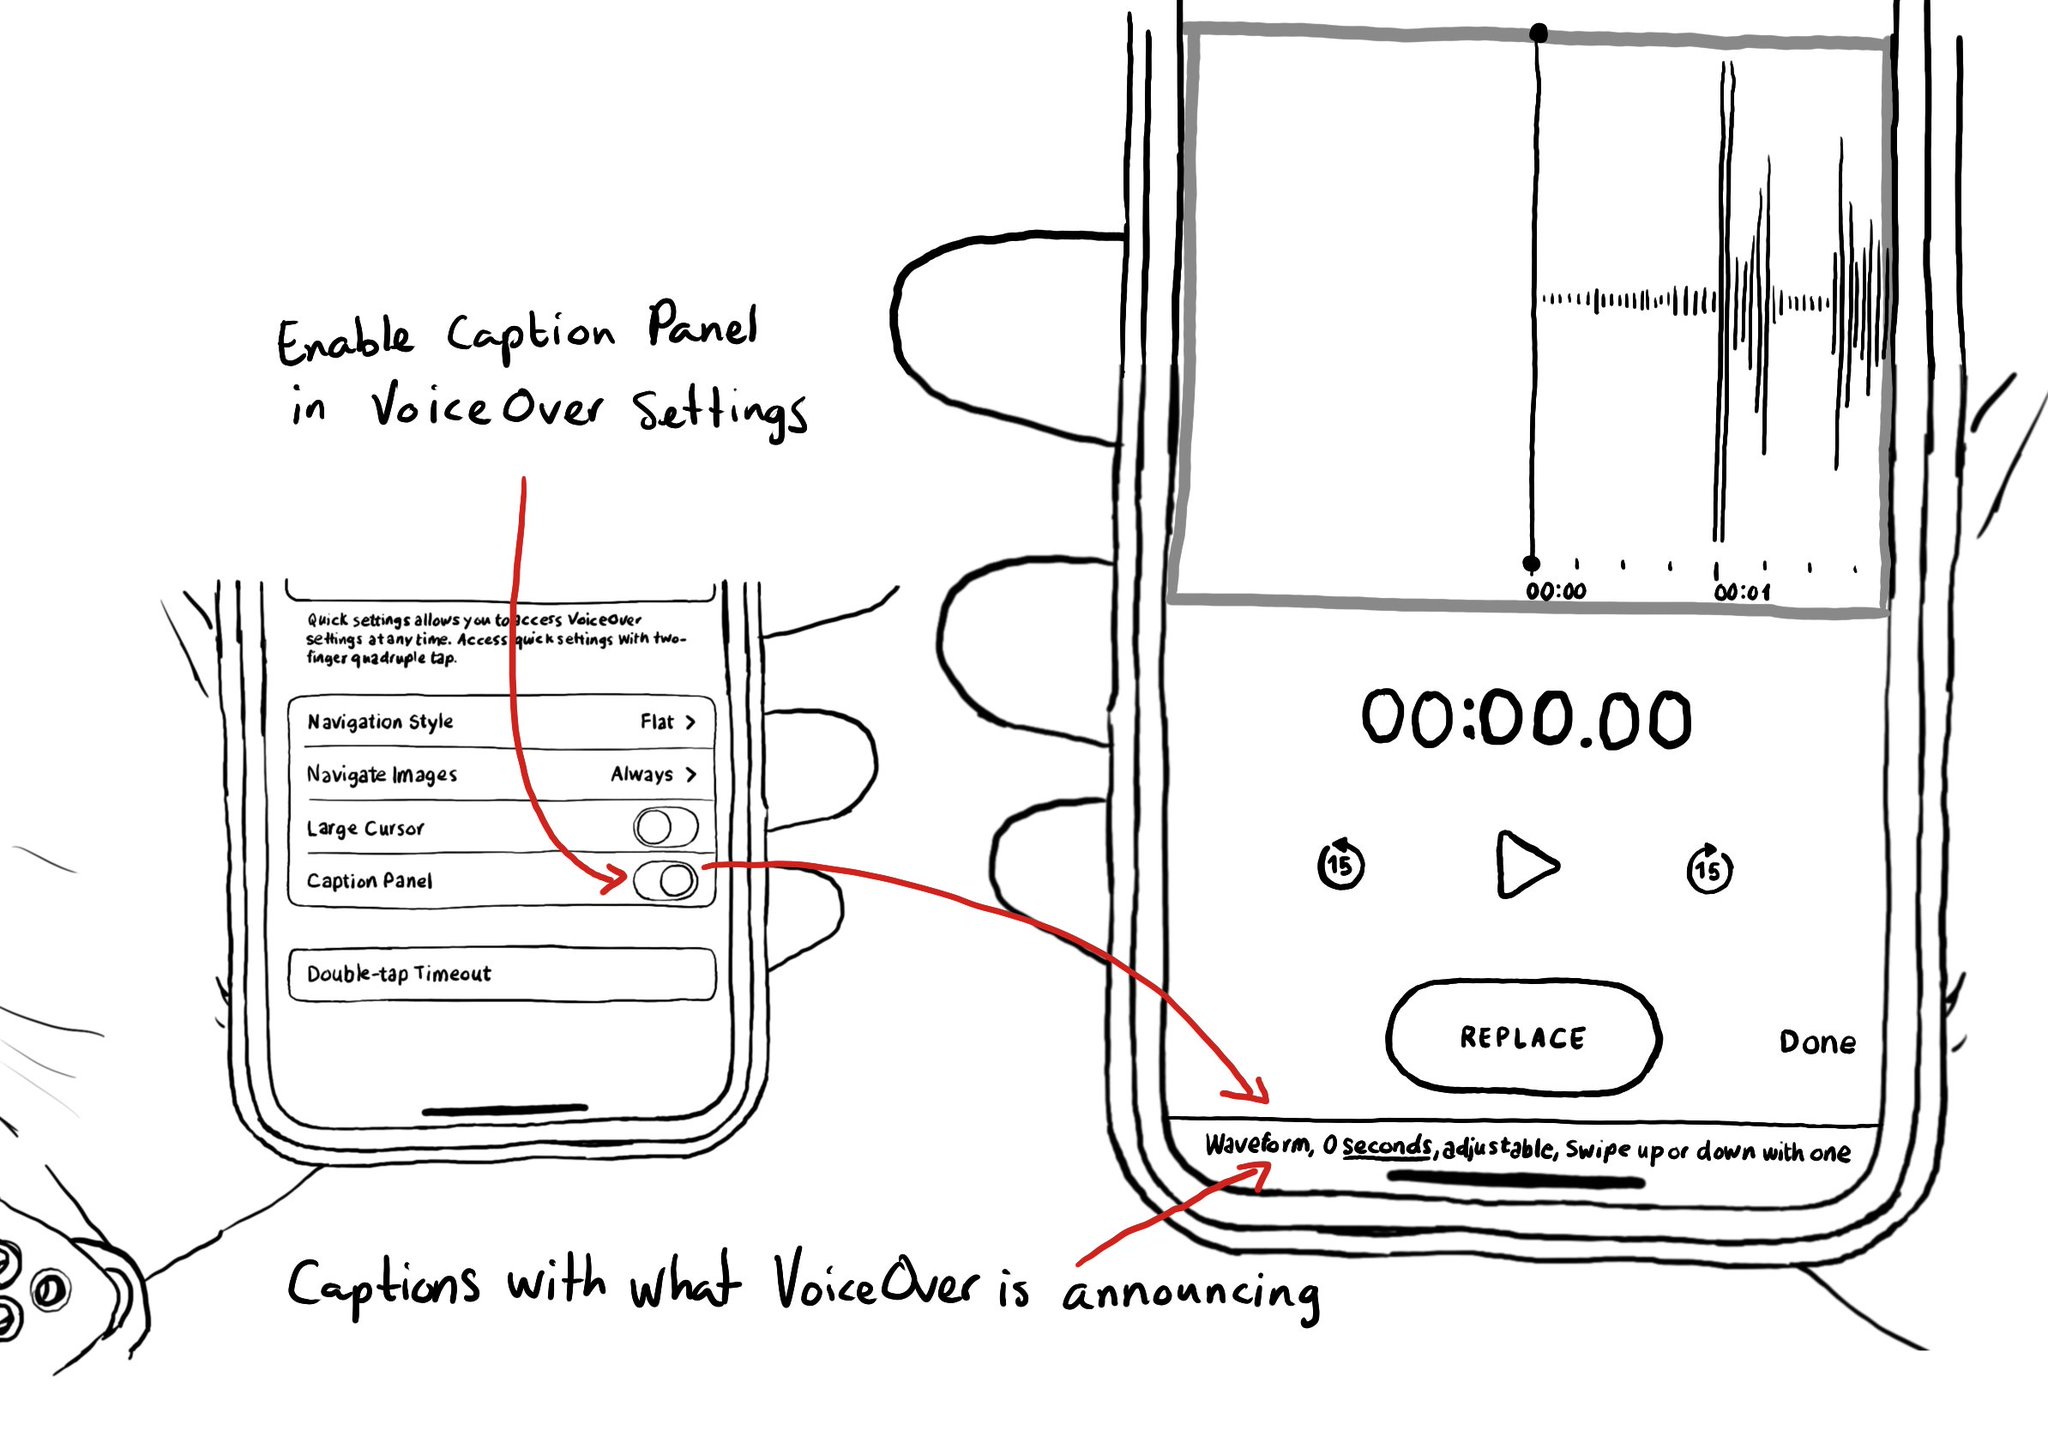
One thing I find very useful when testing (or doing demos!) is to have VoiceOver's caption panel enabled. It shows constantly at the bottom of the screen and you can see exactly what VoiceOver is saying.
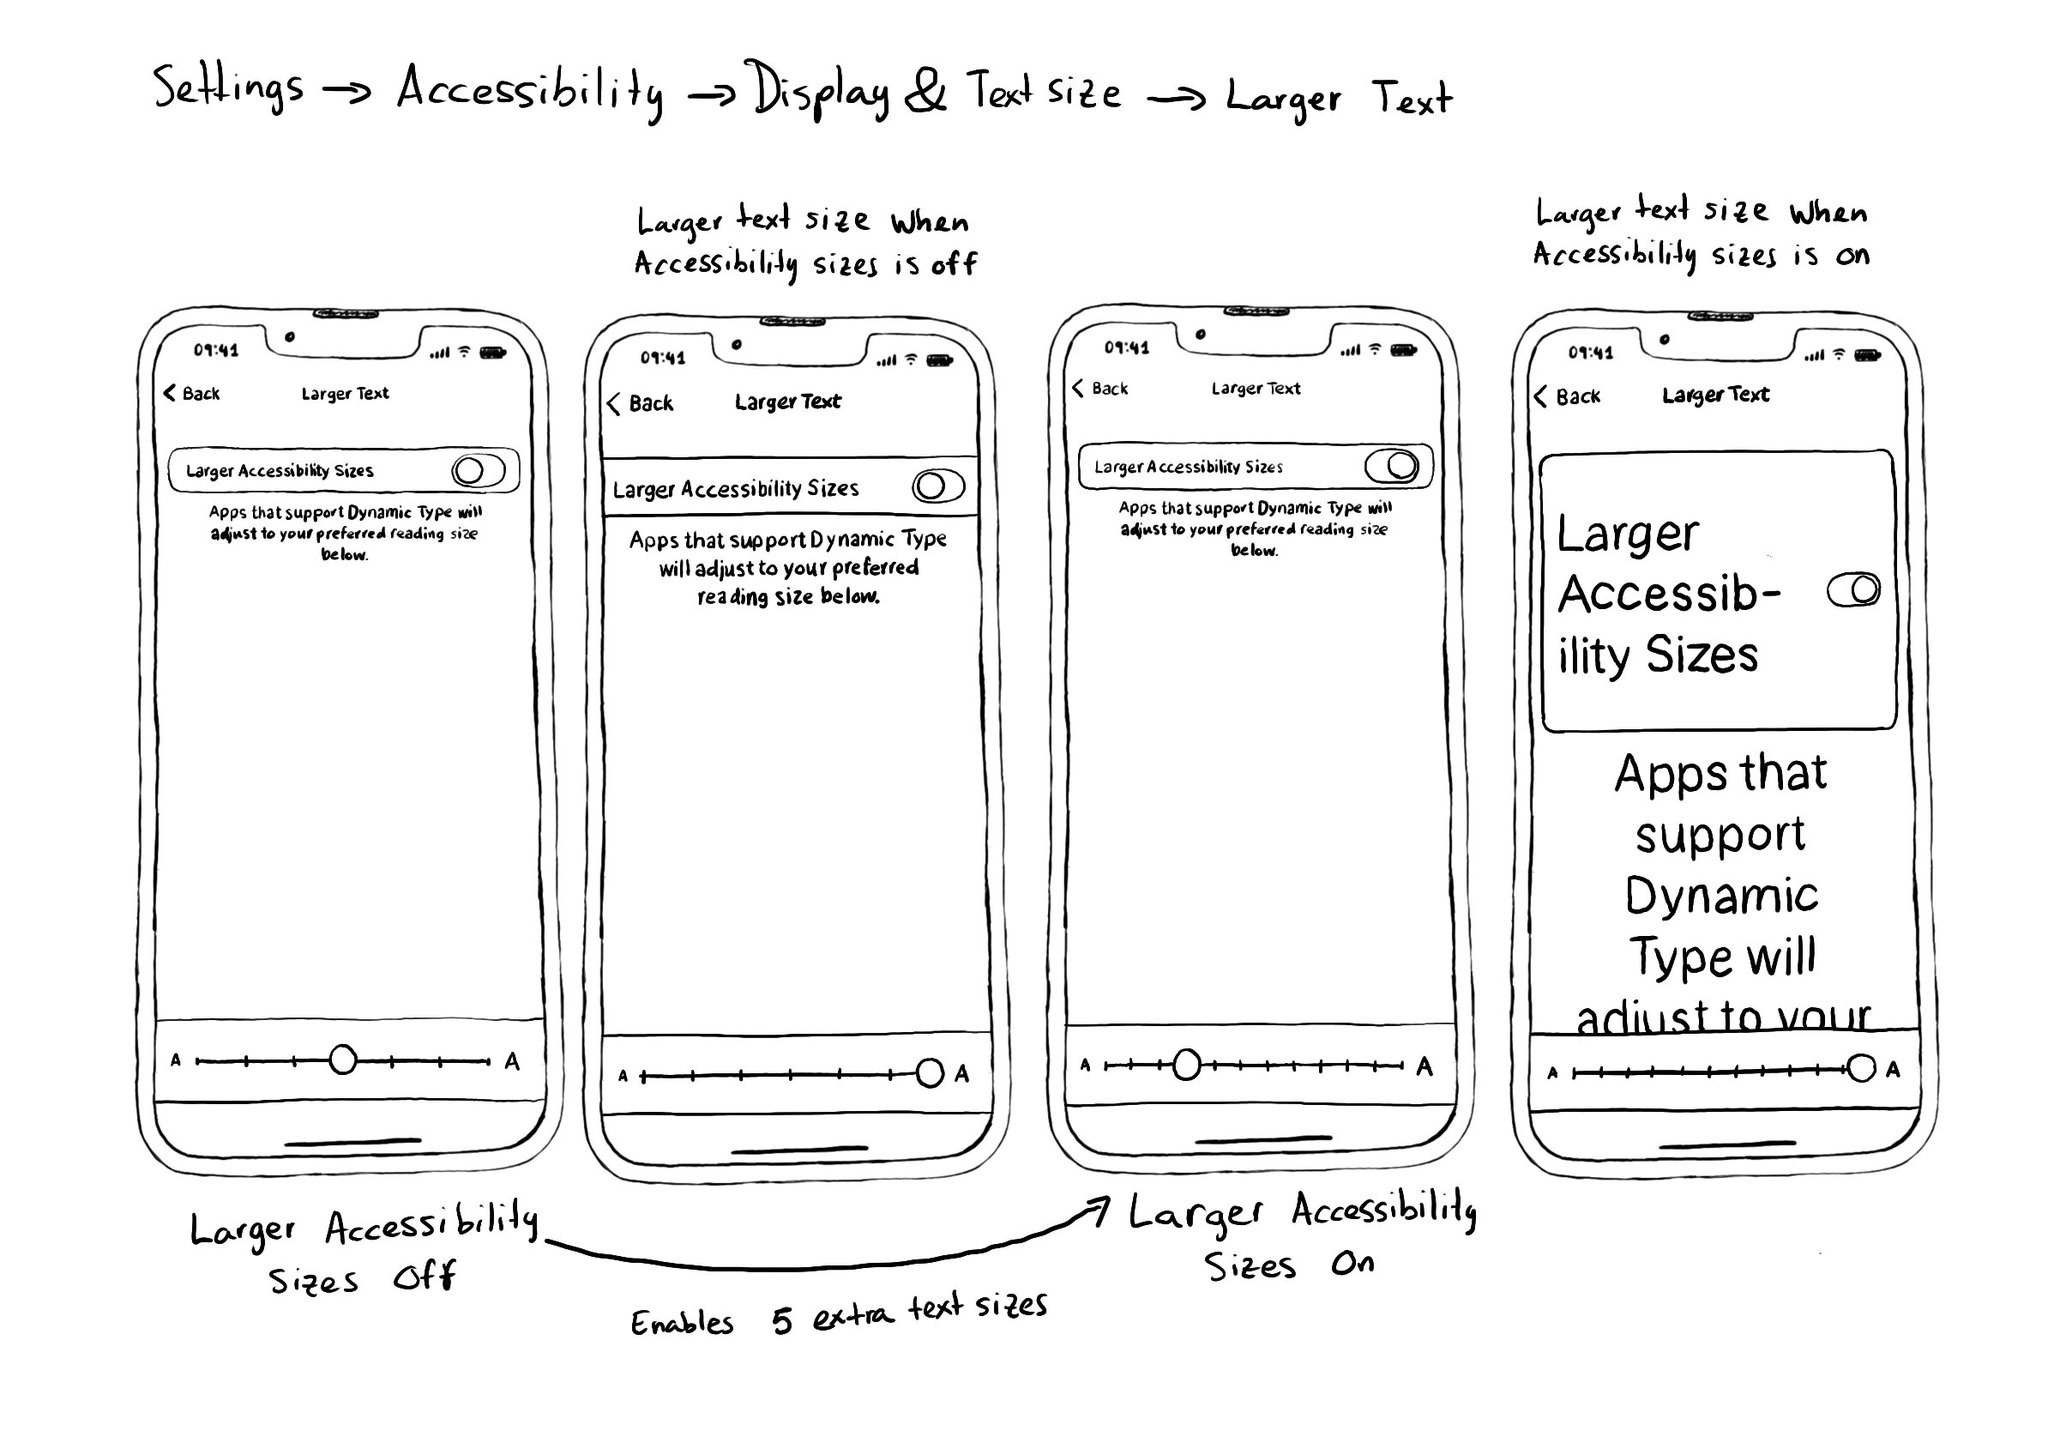
Reminder to enable Larger Accessibility Sizes, so you can pick from one of the five extra accessibility sizes when configuring text sizes. You can do it from Settings, Accessibility, Display & Text Size, and Larger Text.
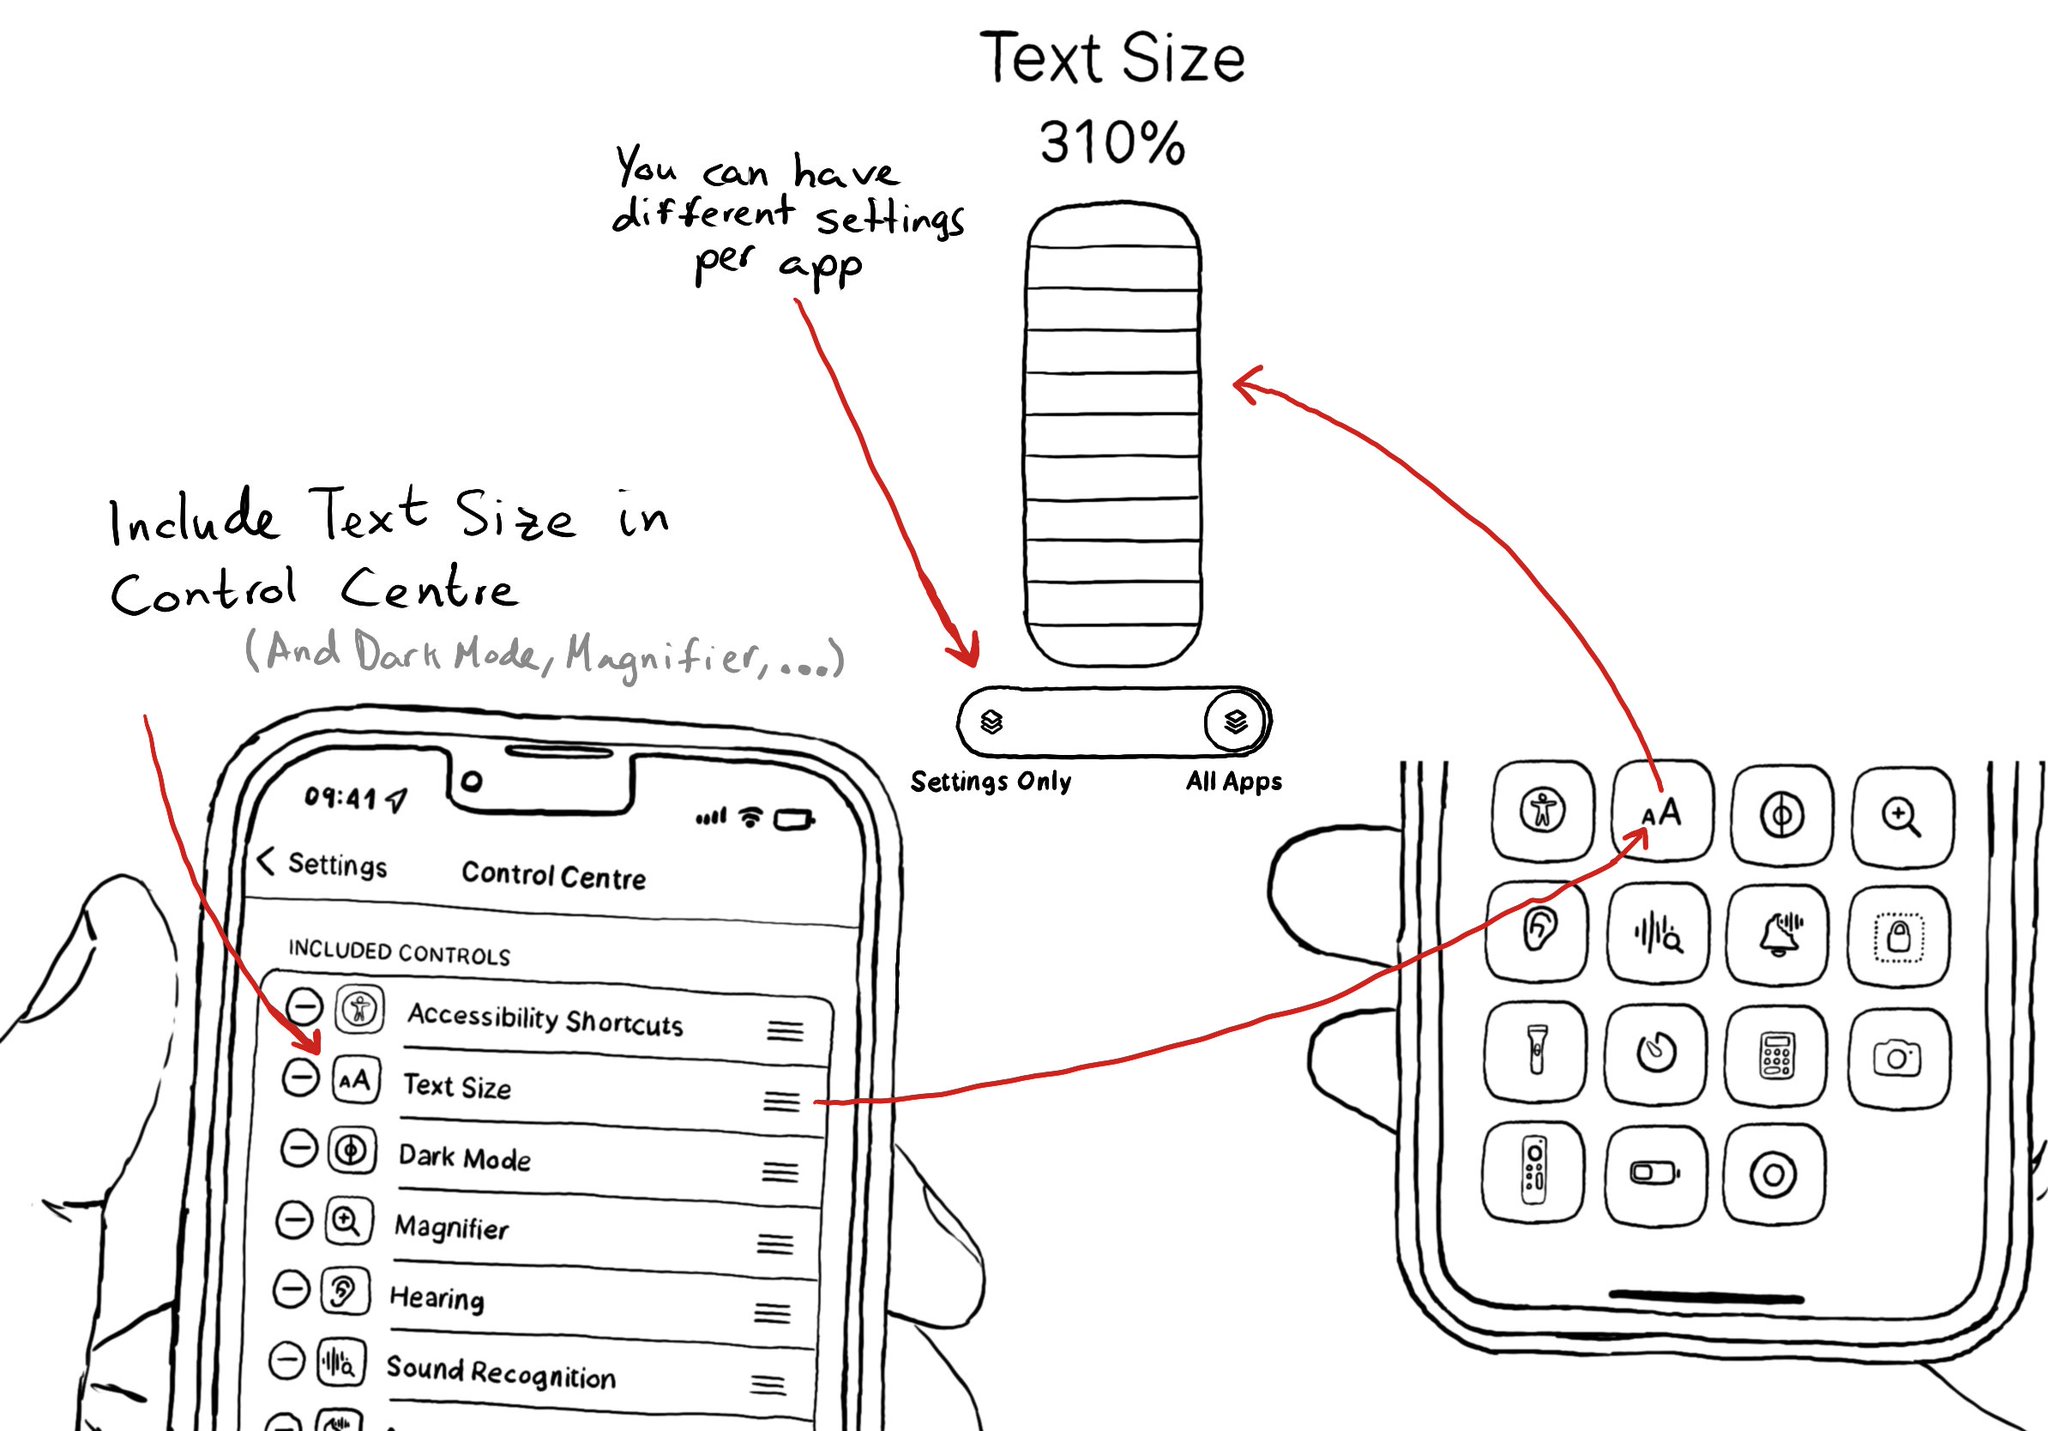
Text Size is one of my favorite Control Centre controls. It lets you quickly change the Dynamic Type size, of the whole system. But also, you can now specify a different setting per app. Also, check out Dark Mode, Magnifier, Sound Recognition...
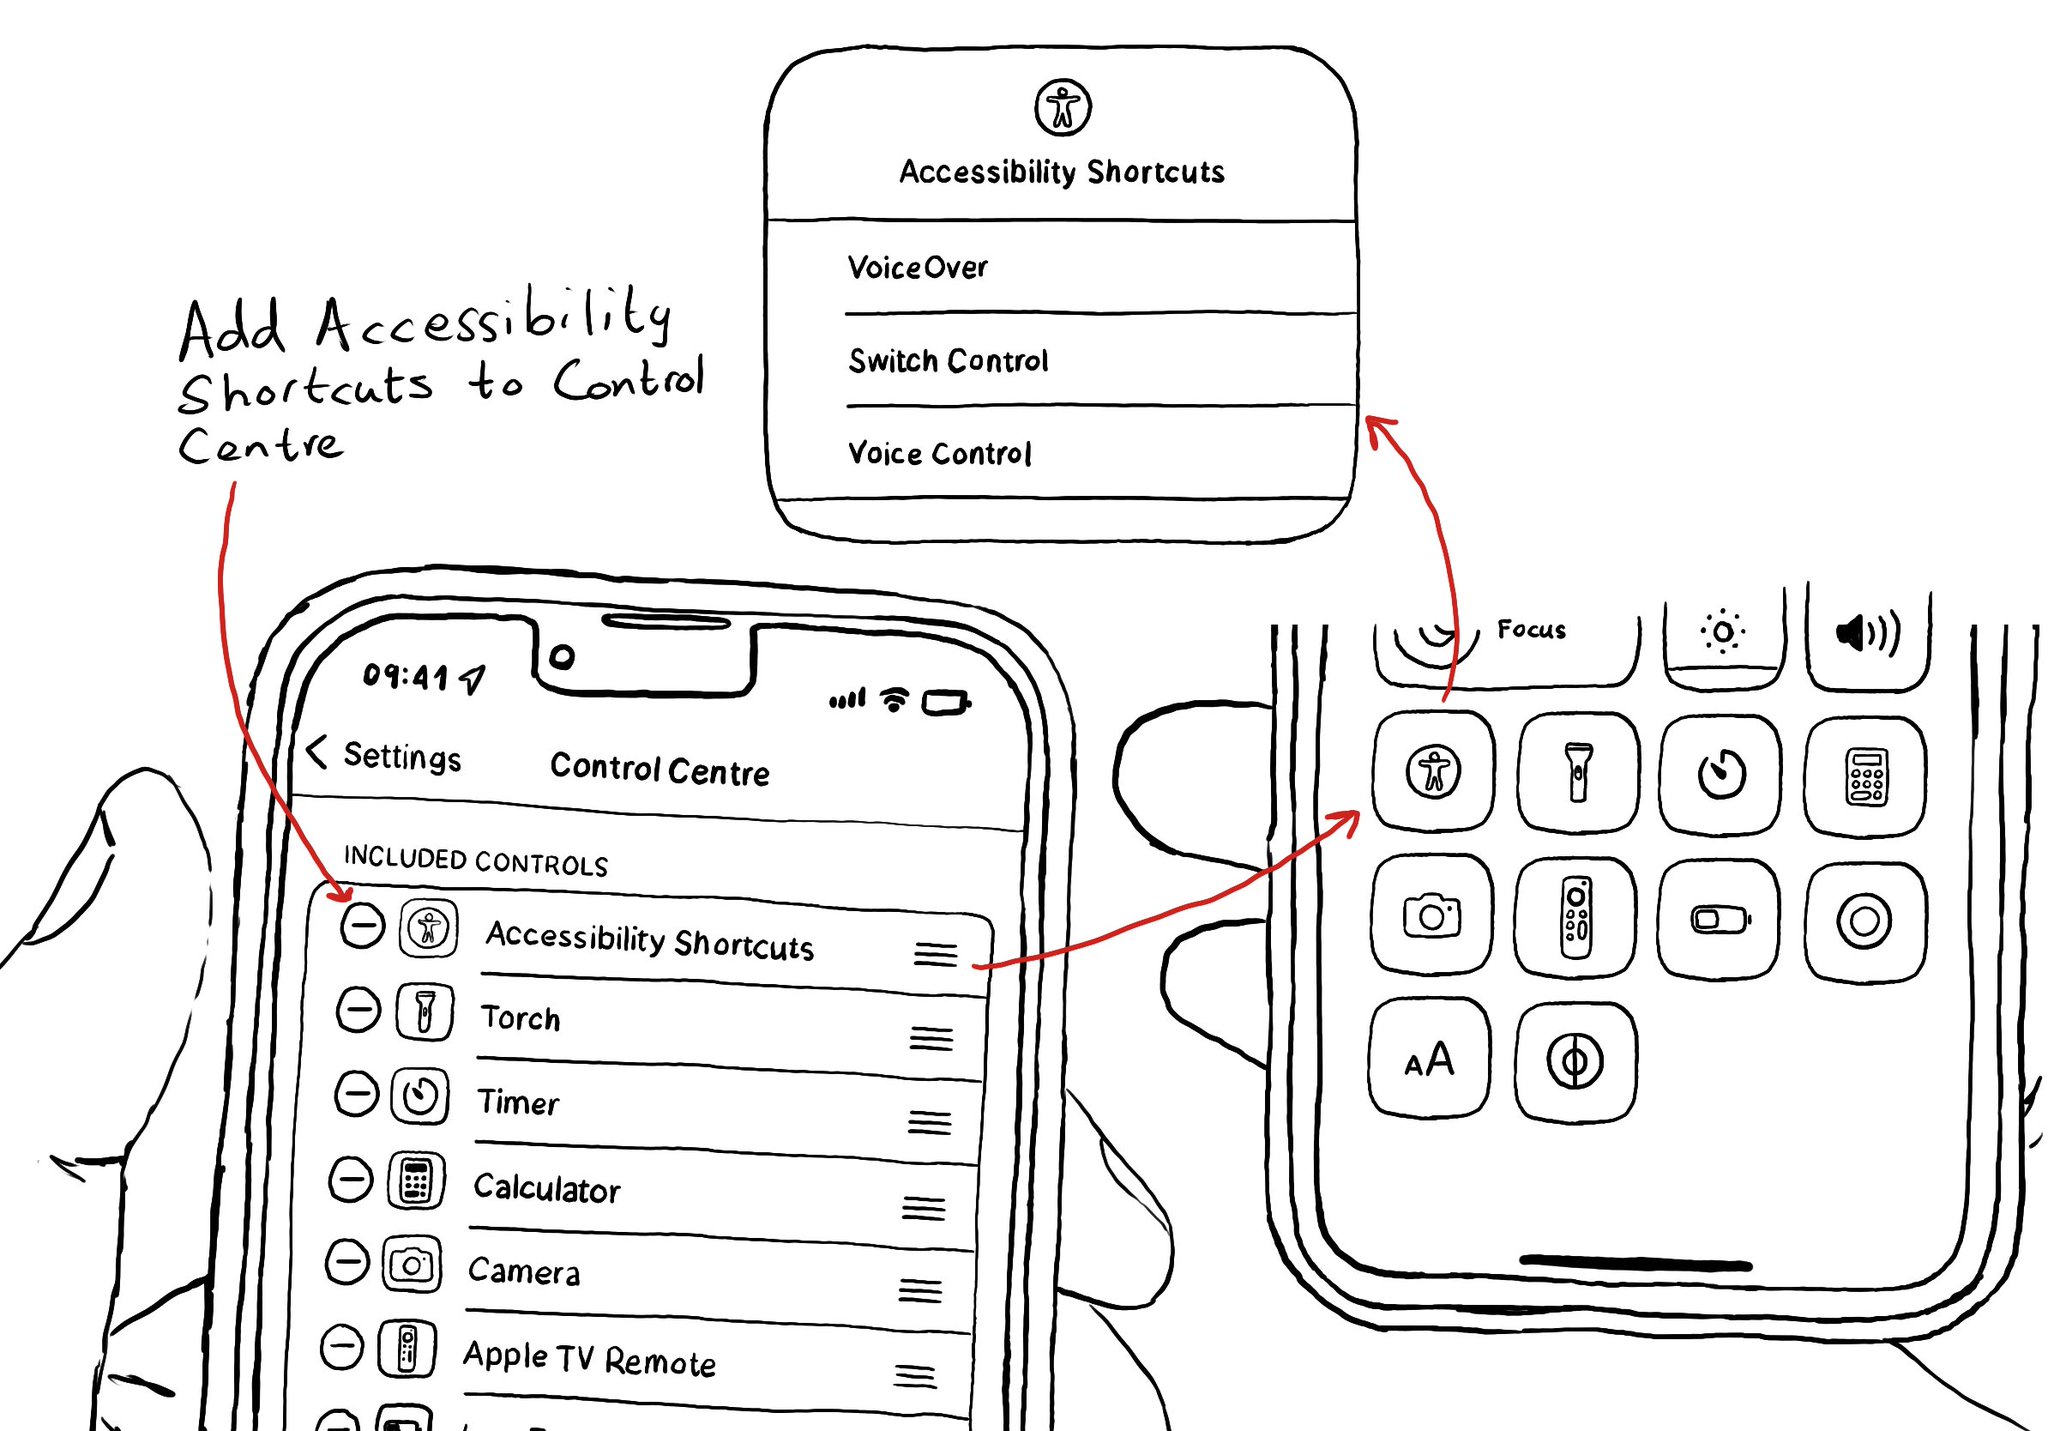
You can add your Accessibility Shortcuts to Control Centre too. One more quick access point and one more reminder to get you testing often and quickly. How to enable Accessibility shortcuts: https://x.com/dadederk/status/1583519154165800960?s=61&t=_fK9Muzu2MyFEeJLVQZcJg
Showing 61-75 of 230 posts